
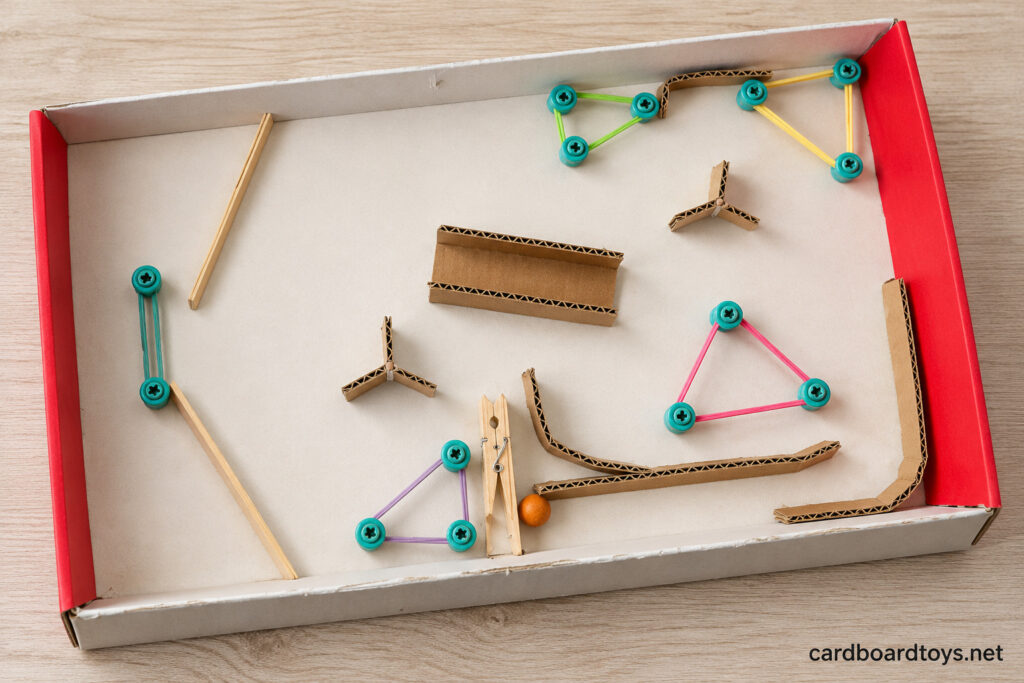
The most satisfying shot on this shoebox pinball board is the one that comes straight back. A wooden ball slips between two bright bumpers, picks up speed down the cardboard floor and meets a pair of flippers you control from outside the box. Catch it on the flat side of a flipper and you can send it back through the middle. Miss, and the low band at the player’s end catches it for the next turn.
Difficulty: Medium. The part that takes care is fitting the wooden handles so they pivot freely. Plan on 45–60 minutes. This is a good build for ages 8 and up with an adult to cut the slots.
Tools
- Pencil and ruler
- Scissors and a cutting mat
- Cardboard punch and screwdriver such as the Makedo Mini-Tool
- Craft knife for an adult to open the three narrow handle slots
2026 Prices
- 1 reused shallow shoebox or packing tray, plus cardboard scraps $0.00
- 16 Makedo Scru cardboard screws $1.60
- 7 assorted rubber bands $0.16
- 3 wooden craft sticks, about 4½ in. long $0.06
- 1 wooden spring clothespin, about 3¼ in. long $0.04
- 1 solid ⅝ in. wooden ball $0.19
- About 2 yd. of 1 in. masking tape $0.11
Total $2.16
How to build the pinball board
1. Give the box a gentle slope
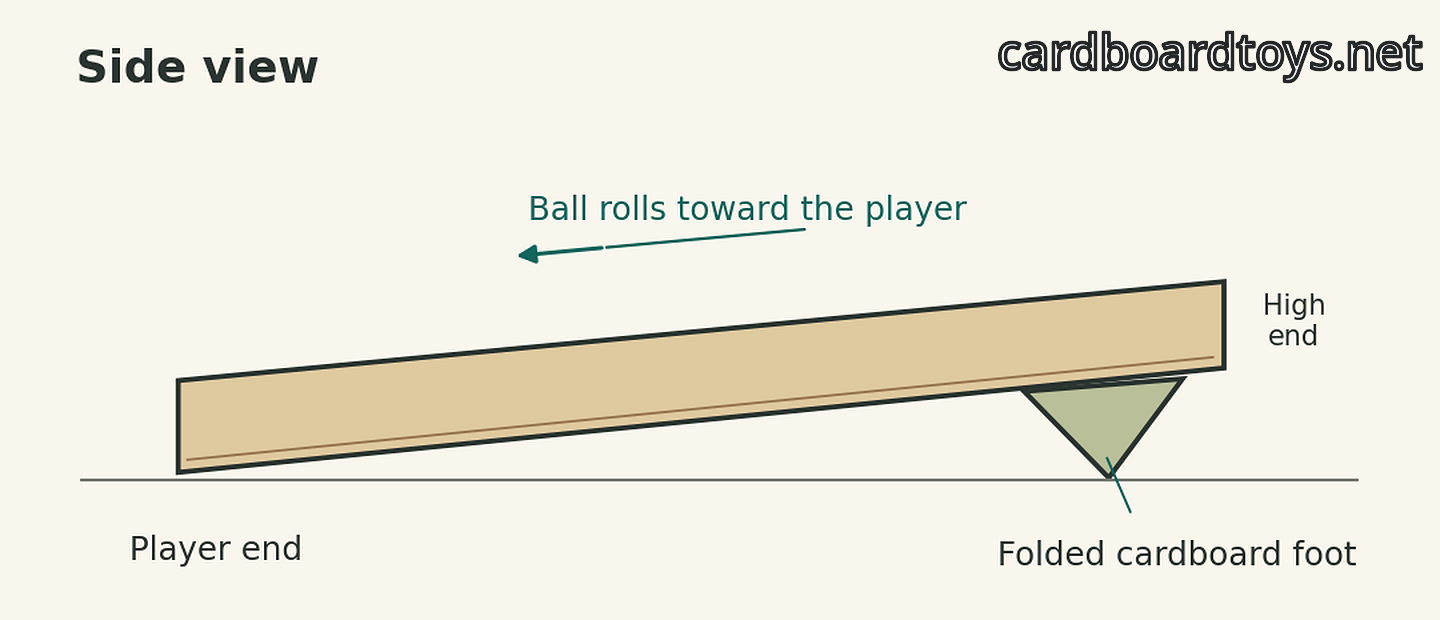
Choose a flat tray about 14–16 inches long and 8–9 inches wide inside. Keep a rim at least 1½ inches high on all four sides. Tape down any loose flaps from underneath. Face one short end toward you. Cut a strip of scrap as long as the box is wide and fold it lengthwise into a triangular tube. Tape the seam closed and fasten the tube across the underside at the far end.
Start with the far end about ½ inch higher than the player’s end. Release the ball halfway up the empty tray. It should roll toward you at a speed you can follow. If it veers to one side, straighten the foot. Add matching scrap pads under the two near corners if the underside needs clearance for the screws.
2. Mark the four triangles and set the posts
Reserve a strip along the right wall, about 1 inch wide, for the starting lane. Leave the bottom quarter clear for the flippers. Lay out four small triangles above that space, two on the left and two on the right of center. Vary the angle of their faces and roll the ball through the gaps before marking the corners. Each passage needs a little more room than the ball itself.
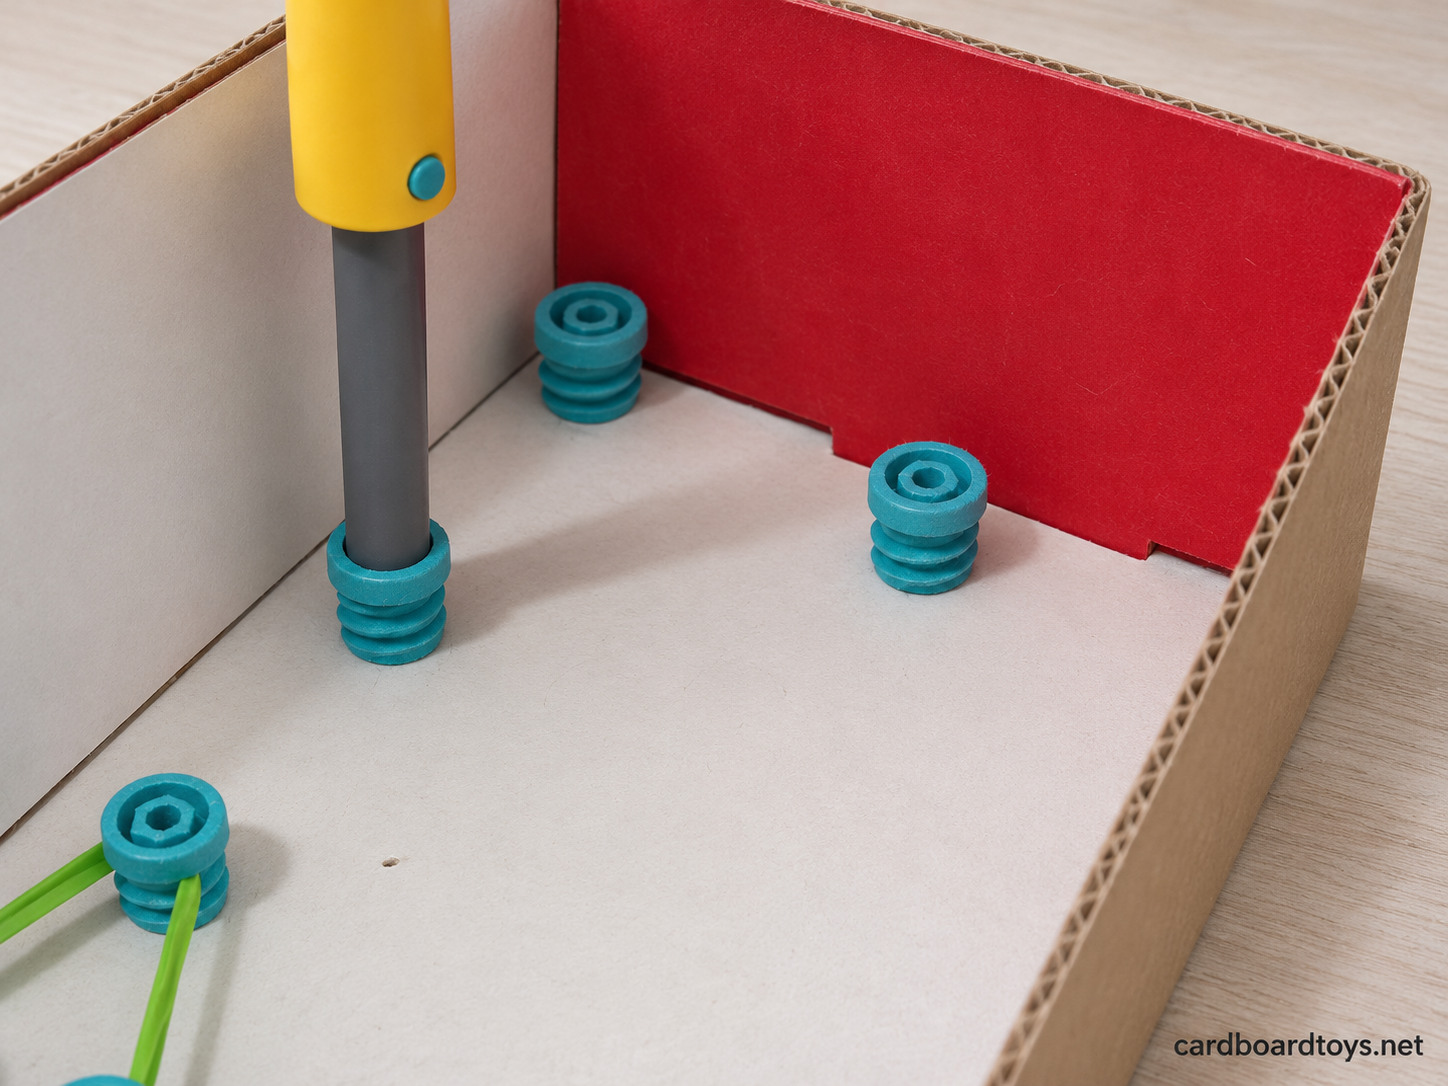
Tape a small reinforcing patch under each group of marks. Set the tray on scrap cardboard, punch a starter hole at each of the 12 corners, then turn a screw into each hole from above. Put two more posts across the lower center, about 2 inches apart and 1 inch from the near wall. Keep the two remaining screws for the side handles.
3. Turn the posts into bumpers
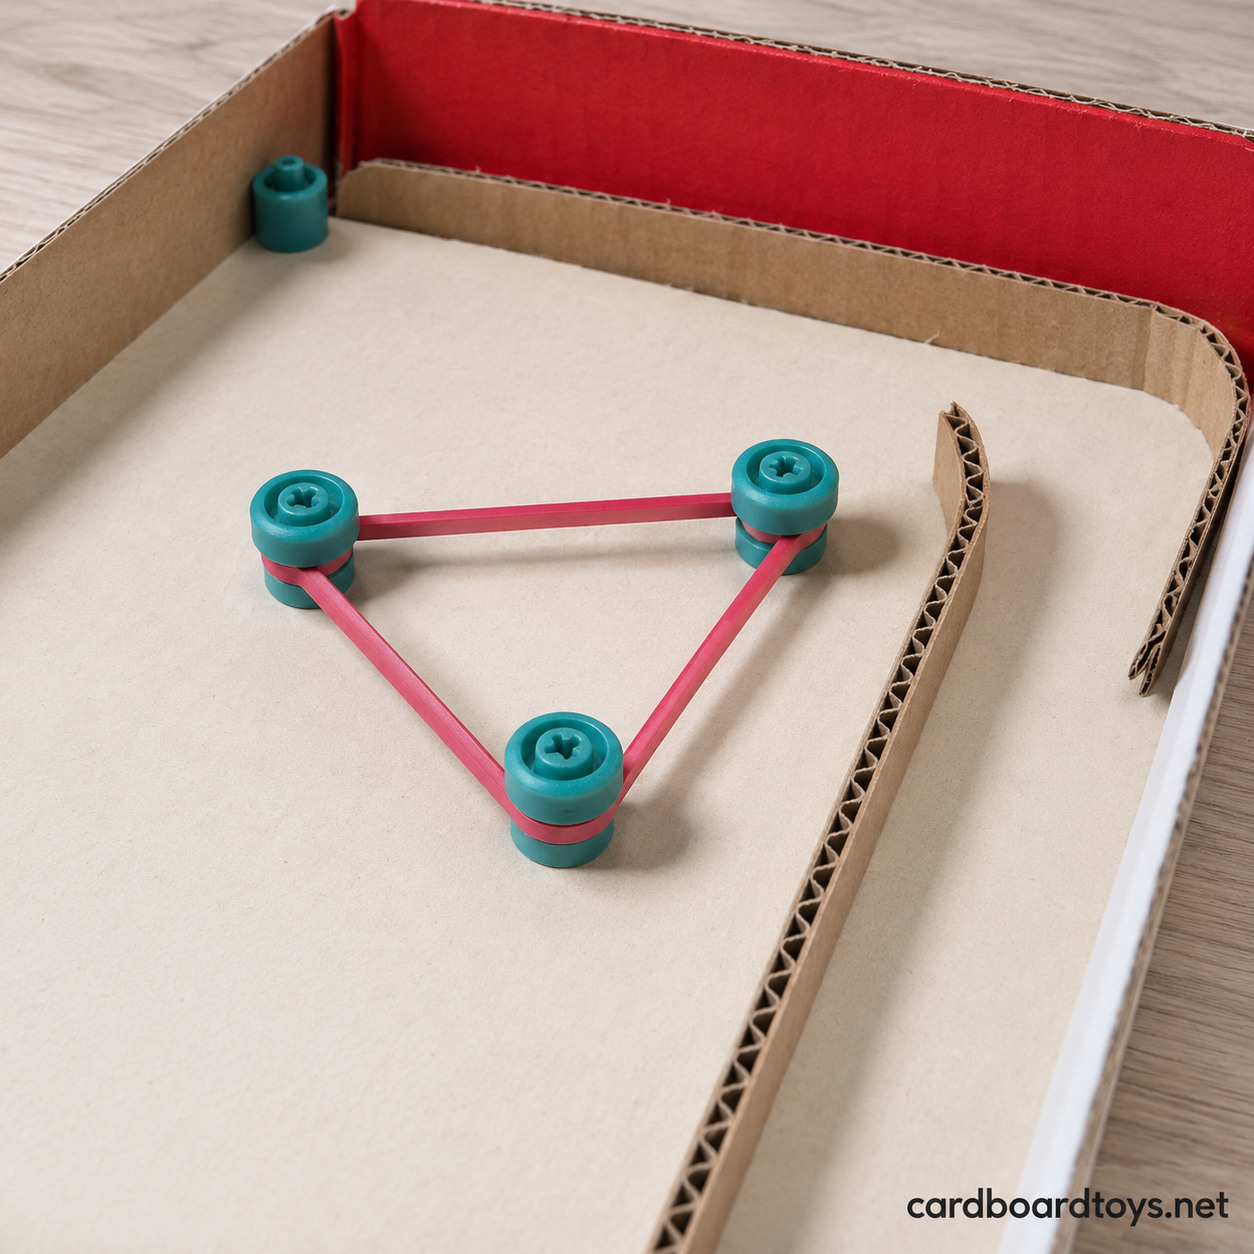
Slip one band around the three posts of each triangle. Smooth out any twists and settle the band just under the heads. Hold the wooden ball against a straight stretch. The band should meet it near its middle. If the ball rides over the band, raise it on small scrap-card spacers beneath the heads. If the posts lean inward, choose a longer band.
Fit a fifth band around the pair of posts at the player’s end. Both strands run across the board here. This low bumper marks the end of a turn when the ball slips past the flippers.
4. Shape the side lane and center channel
Cut corrugated strips about ¾ inch high. Stand one on edge along the upper half of the right wall. Use the ball to set the lane width, leaving about ¼ inch of extra space. At the far end, bend a second strip into a gentle curve from the right wall toward the center. Leave a clear opening between the tip of the lane divider and that curve so the ball can turn onto the board.
For the center channel, cut a rectangle about 3 inches long. Fold up its two long edges so the ball fits between them, then tape the underside to the floor. Leave both ends open. For each of the two small Y-shaped deflectors, fold one short card strip into a V, tape the end of a third arm to the point, and fix the three feet with small tape tabs. Put one above the channel and one off to its lower right. Run the ball past every join before pressing the tabs down.
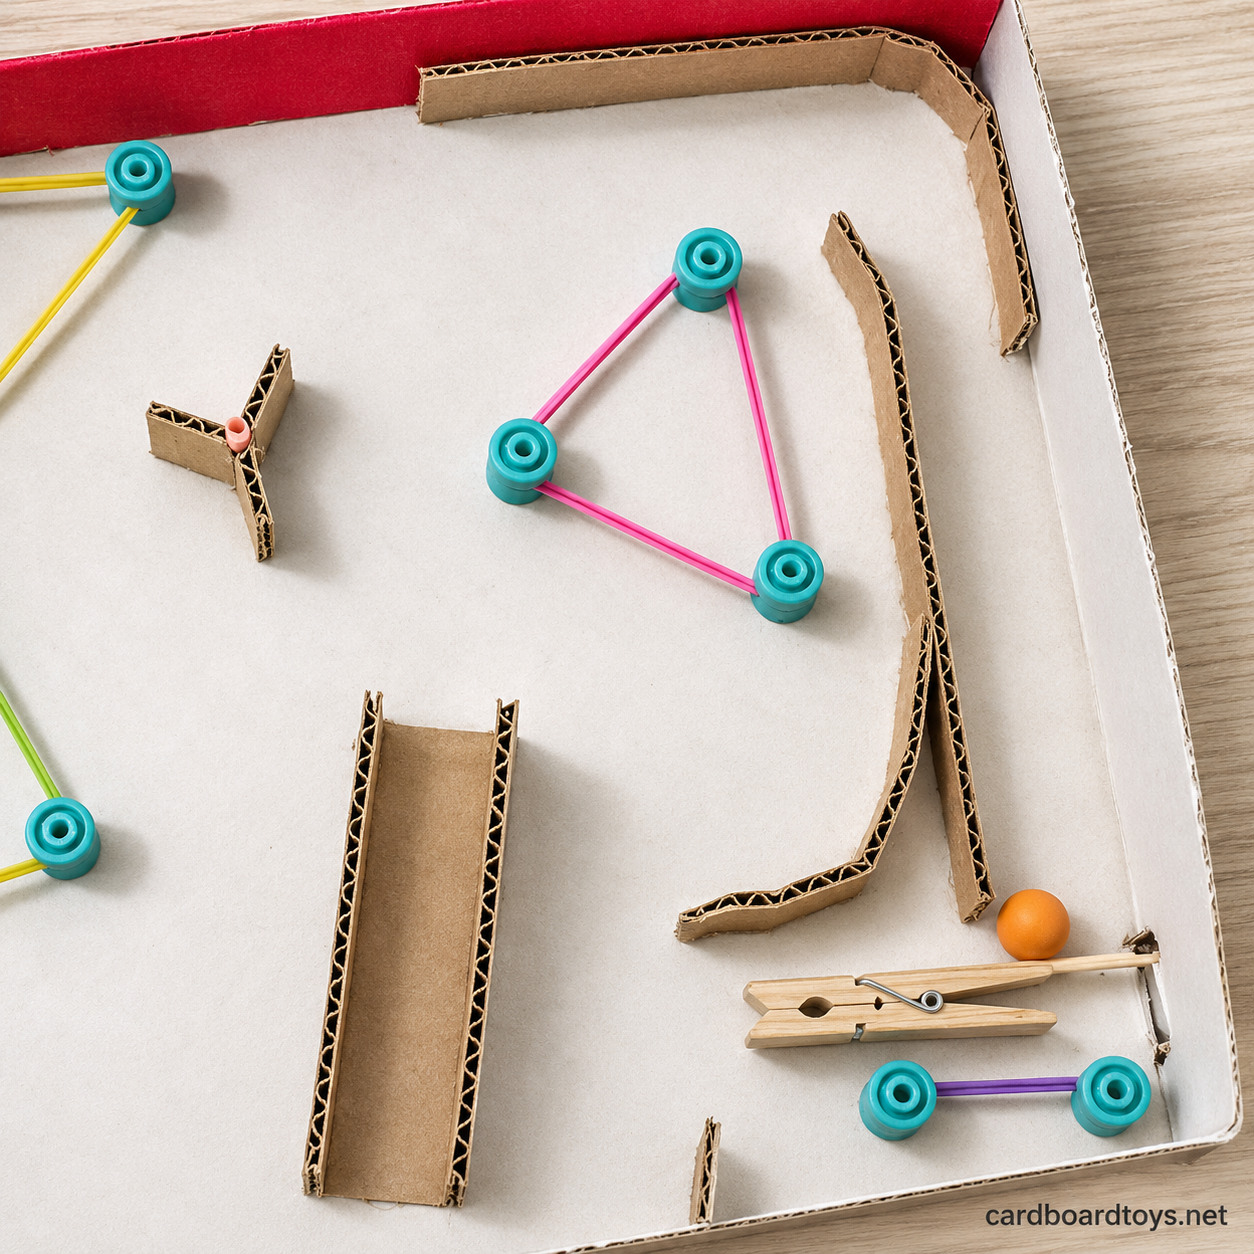
5. Fit the flippers and the side-lane paddle
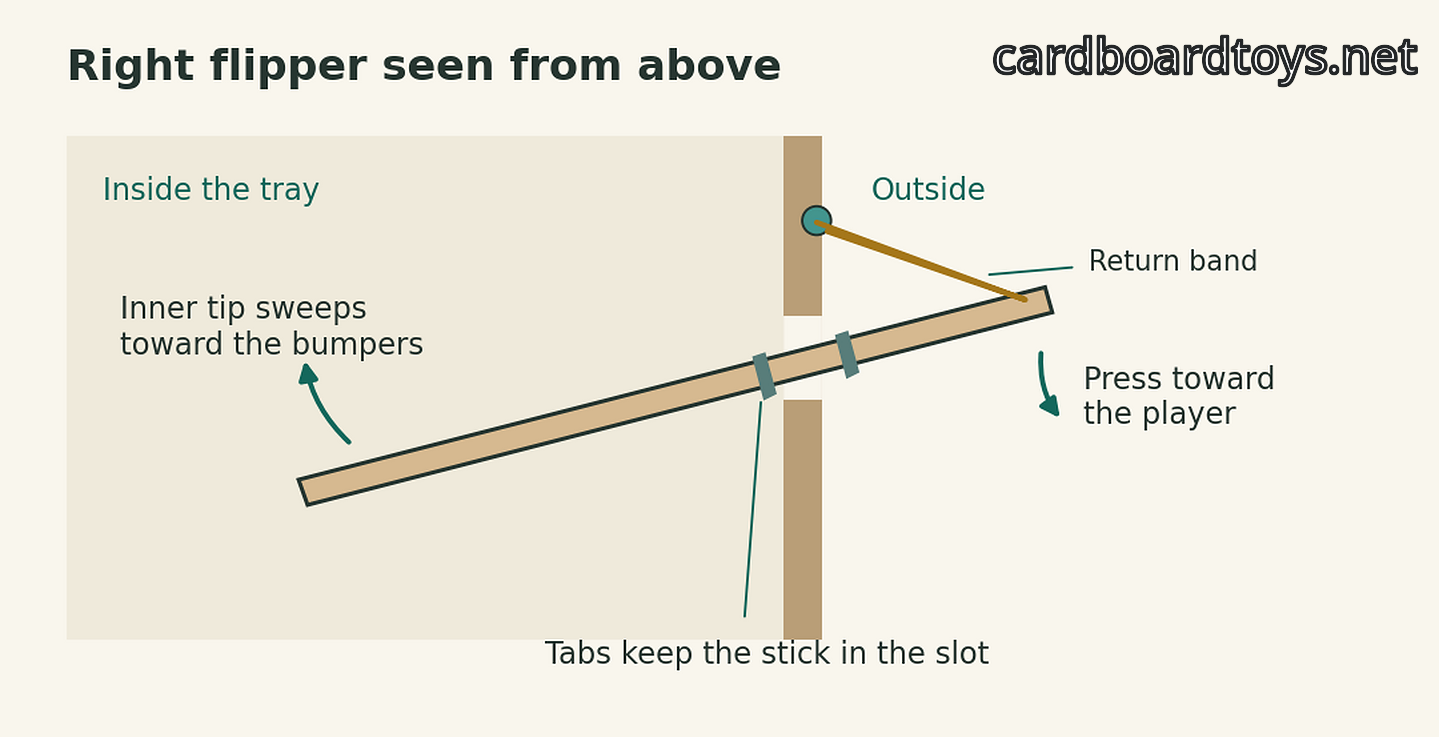
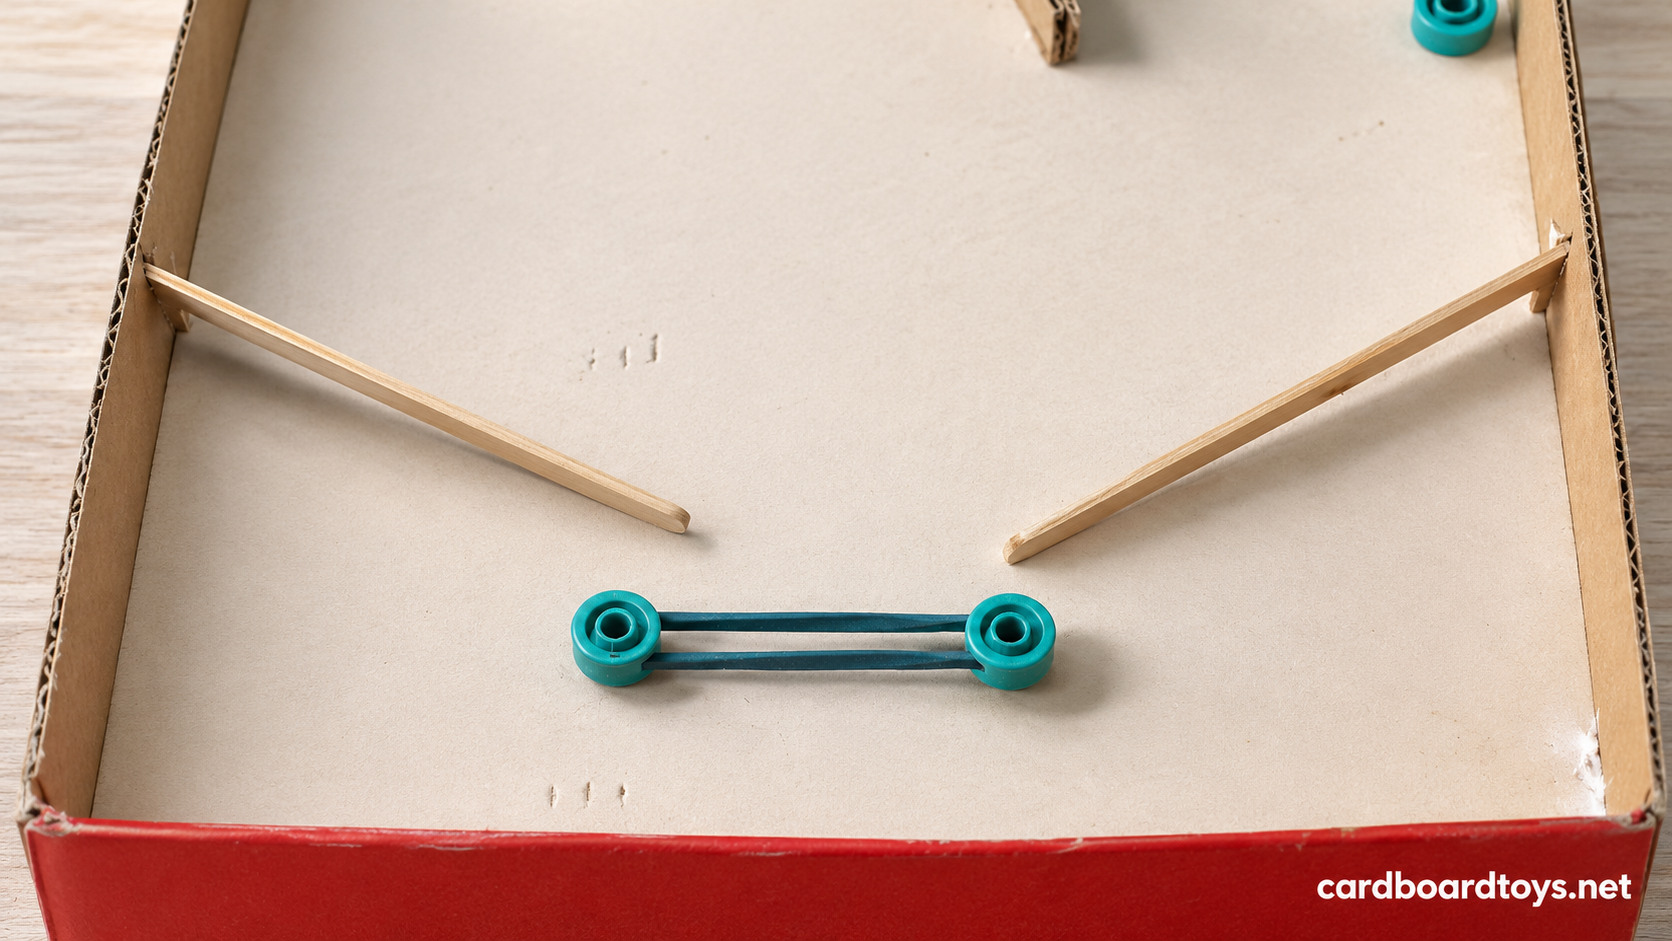
Reinforce both long side walls with scrap where the lower flippers will sit, roughly 2½ inches from the near end. An adult can cut a short slot in each wall just above floor level. Stand a craft stick on its narrow edge and thread it through. Leave roughly 1¼ inches outside as a handle. The inside tip should clear the floor and point slightly toward the near end. Widen the slot along the wall just enough for the stick to swing in a short arc.
Tape a small folded card tab onto the top edge of each stick on either side of the wall. Make each tab taller than the slot and leave a narrow gap to the wall. The tabs keep the stick captive while the wall acts as its pivot. Put one of the spare screws through each side wall a little farther up the board, with its head outside. Loop a band from that head around the outside handle. Use only enough tension to return the flipper to rest. Press the outer end toward you and the inner tip should sweep uphill.
At the lower mouth of the right lane, fit the third stick through a slot in the right wall in the same way. Clip the closed clothespin along its inner end and wrap it with tape so it stays put. Line up its flat side behind the starting ball and check that it clears the divider. Move this small paddle by hand in both directions. One short forward stroke rolls the ball up the lane.
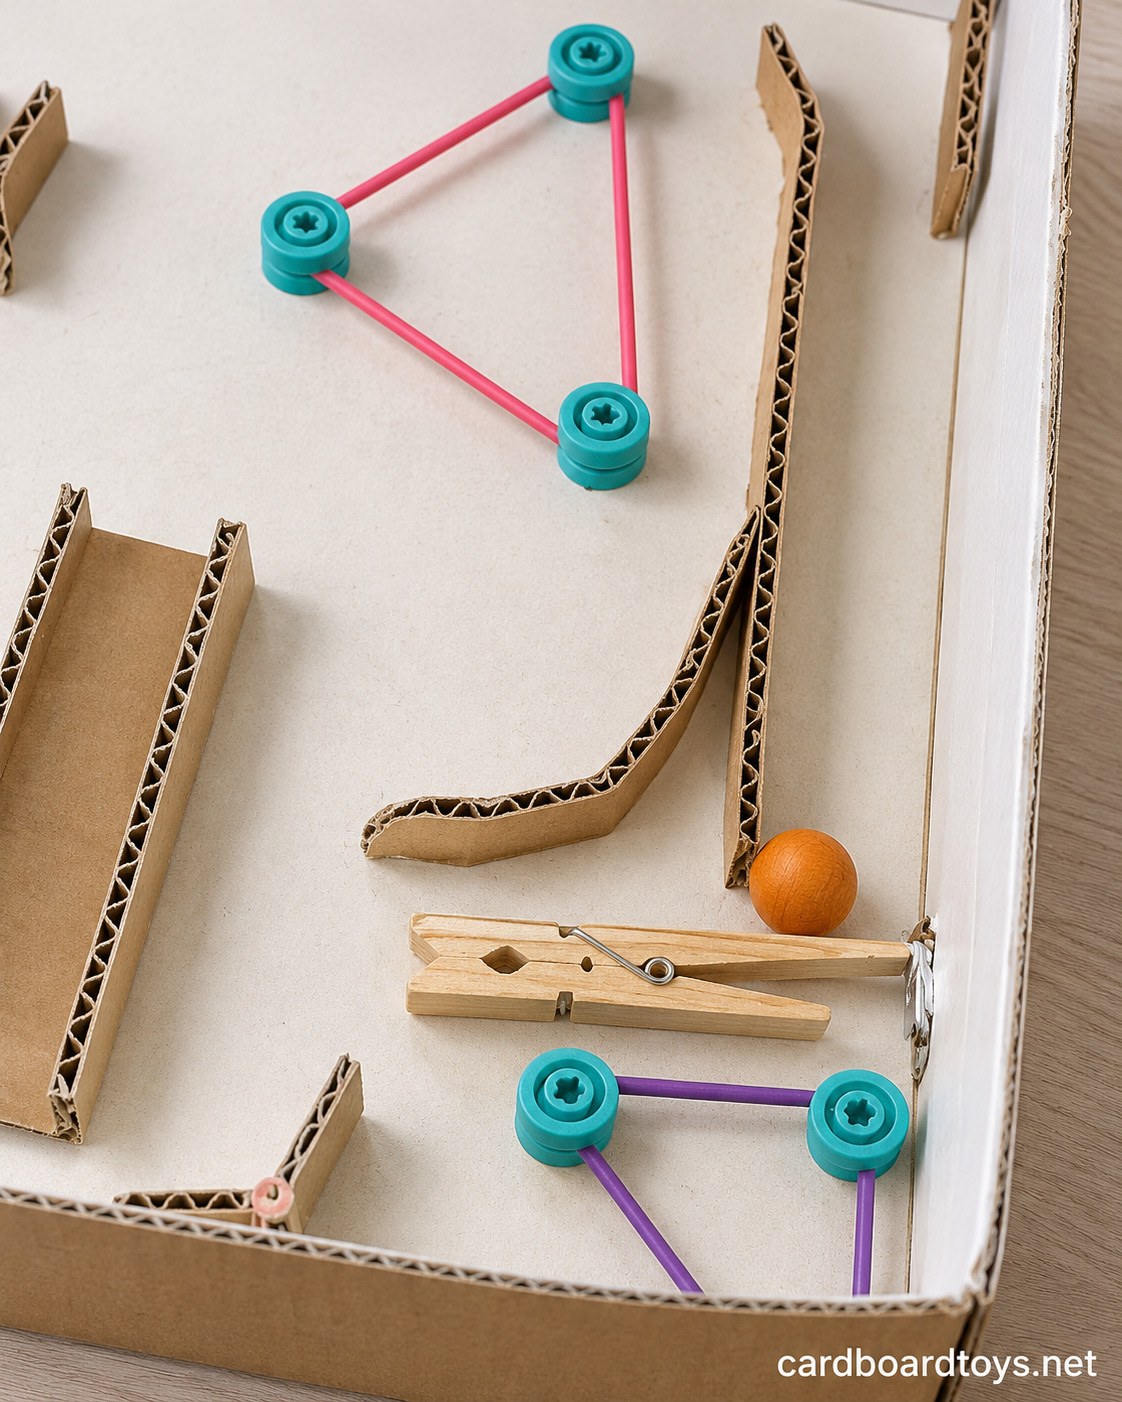
6. Try a three-ball round
Put the ball above the clothespin and move the side handle gently. At the top of the lane the ball should turn into the bumpers, then roll back toward you. Work the lower handles one at a time. For a simple score, count one point for each triangular bumper the ball touches. When it reaches the low band behind the flippers, pick it up and start the next ball. Add the points from three turns.
A ball that always stalls at one spot usually points to a raised tape edge or a tight gap. Flatten the tape or move that guide a little. If every return slips past both flippers, narrow the gap between the tips by sliding the sticks a little farther into the tray and repositioning their tabs. If the game runs too fast to react, lower the far end.
The finished game in motion
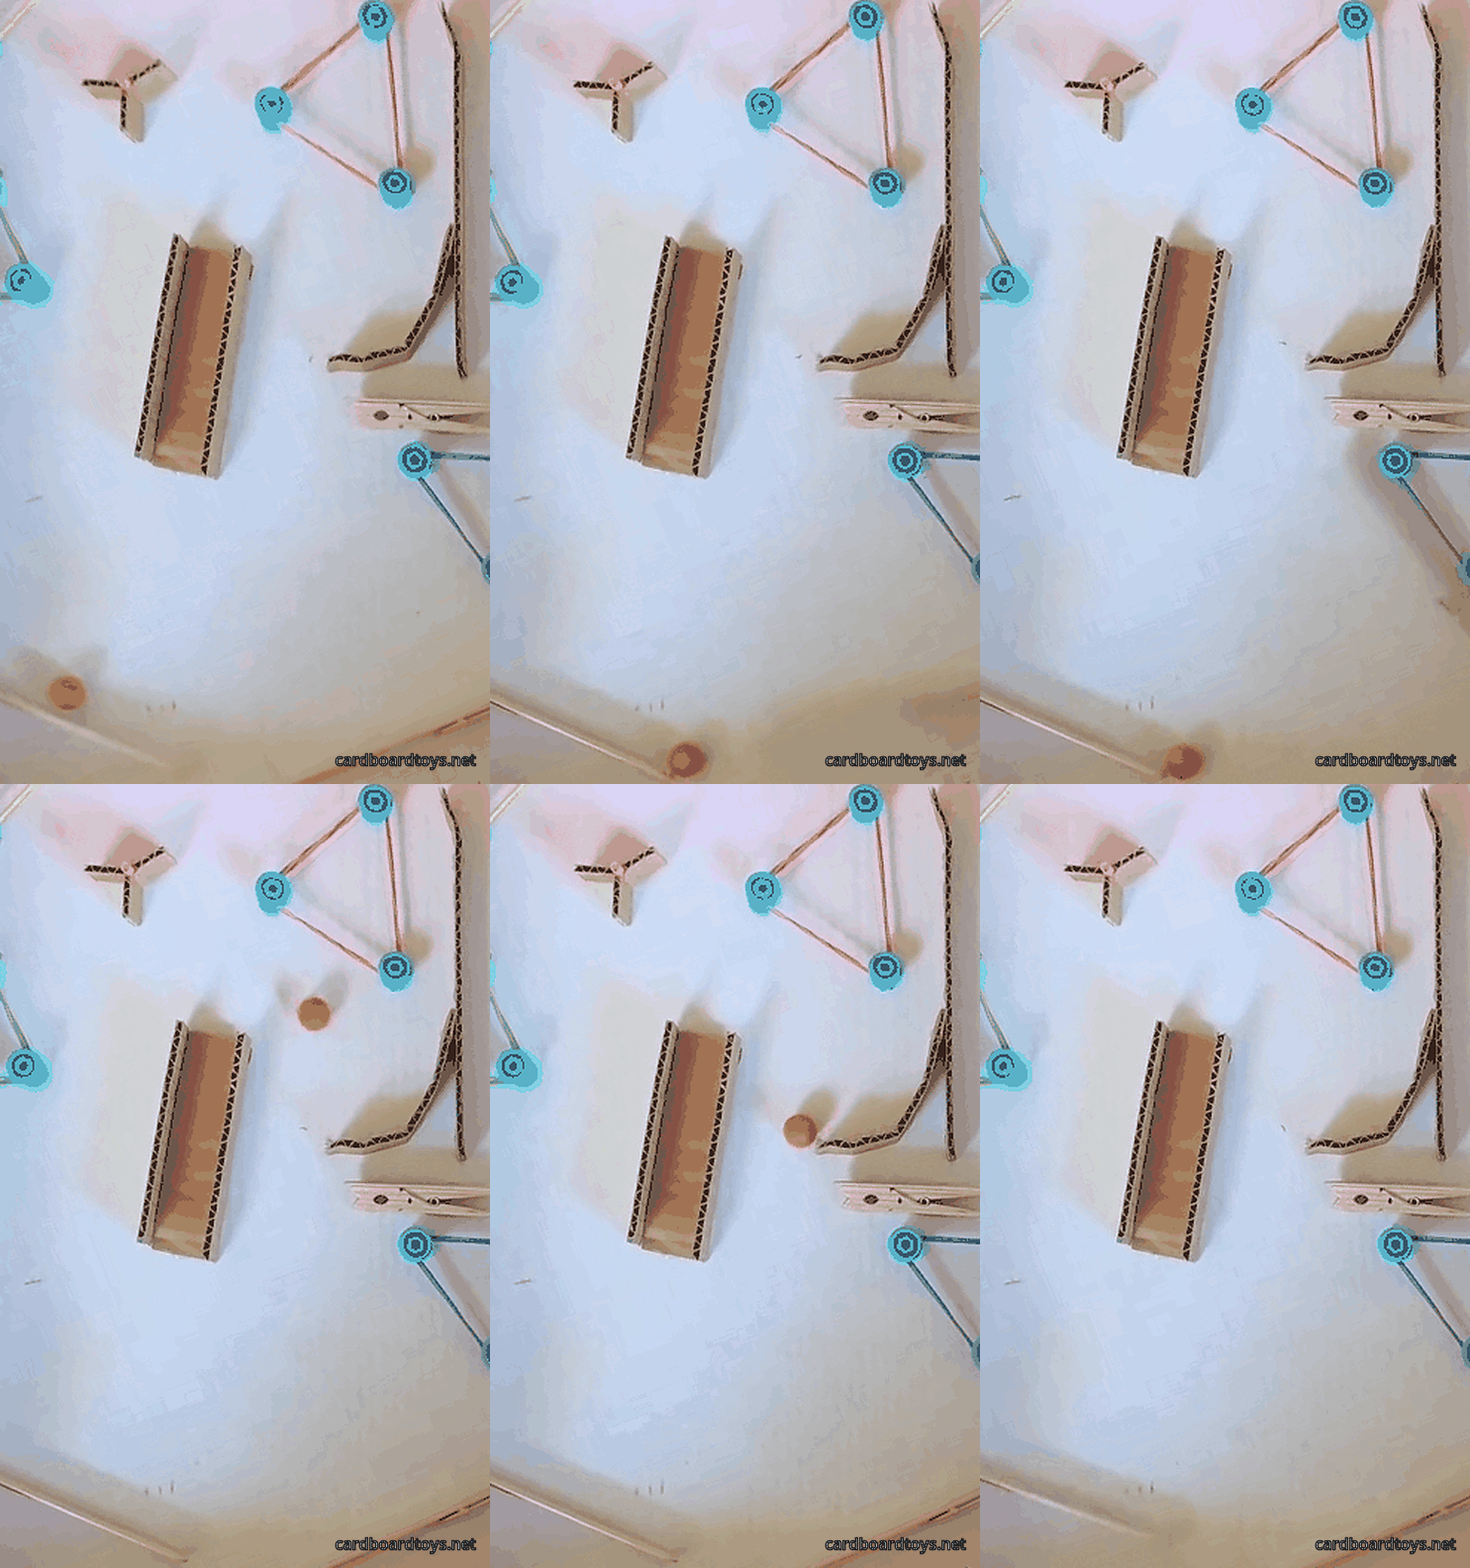
Safety
An adult should cut the handle slots on a cutting mat and trim any splintered wood. Put scrap behind each punch point and keep fingers out of its path. Before play, make sure the clothespin is taped closed, the flippers stay in their slots and the screws sit firmly. Replace stretched or cracked bands. Keep the game flat on a stable table and move the handles gently so the ball stays inside the rim. Store the ball and loose screws away from children under three because they are choking hazards.