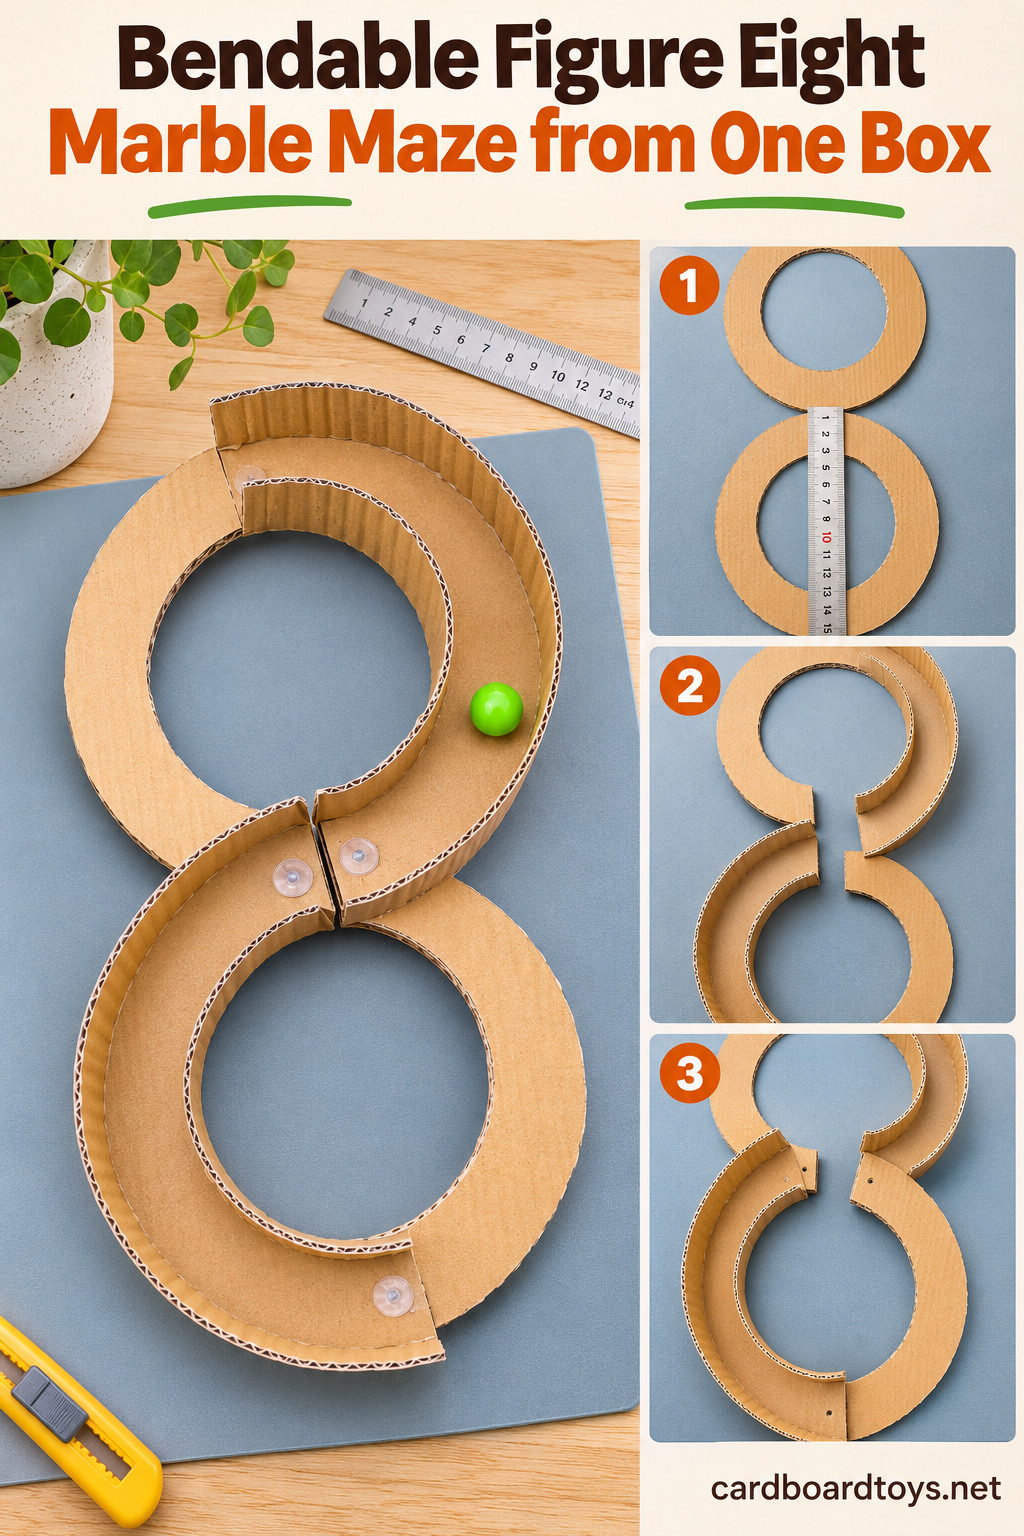

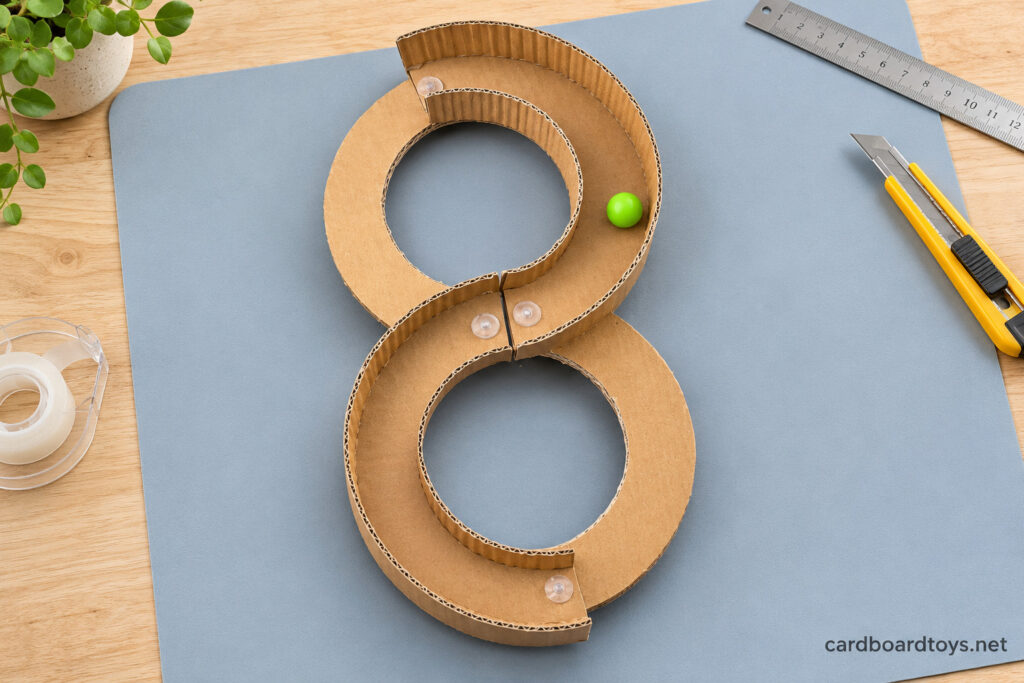
Cut a number eight out of a delivery box, split it into four curved pieces and pin those pieces back together with toothpicks. That is the whole idea behind this maze. Because the joints can turn, the frame bends in your hands, and a marble rolls along two short walled tracks. You keep it moving by flexing the eight at the right moment so the marble crosses from one track to the other.
You need one box, four toothpicks and roughly an hour. There is nothing to print, paint or leave drying overnight.
Why Kids Keep Picking It Up
Most children see it as a challenge right away: how many laps before the marble escapes? Getting a long run means both hands have to work together, so the toy builds coordination without ever feeling like practice.
Curious kids will also ask why a stiff piece of cardboard can bend like this. The answer is the four pins. Each one is a pivot, and together they turn the frame into a simple linkage, the same trick that lets a folding chair fold. Grown ups tend to keep it on the desk as a quiet fidget once the kids are done.
How Hard Is It?
- Skill level: easy to moderate. Drawing and cutting circles is simple. Lining up the pin holes needs a little patience.
- Time: 45 to 60 minutes, glue cooling included.
- Age: from about 6, kids can draw the rings, help bend the wall strips and play. Cutting, poking holes and hot glue are jobs for an adult.
Safety first: a marble can choke a small child, so this is not a toy for anyone under 3. Clipped toothpick ends are pointy. Keep them very short and cover every one with a glue cap, which happens in Step 9.
Tools
- Drawing compass that opens to 3 in.
- Metal ruler
- Pencil or pen
- Sturdy scissors
- Bamboo skewer for making holes
- Mini hot glue gun
- Old scissors or small snips for clipping toothpicks
2026 Prices
- Reused corrugated cardboard, about 12 × 6 in., plus scraps $0.00
- 4 round toothpicks for the pins $0.02
- About 2 mini hot glue sticks $0.24
- 1 small marble, about ⅝ in. across $0.48
Total $0.74
Building the Maze
Step 1: Draw Two Rings
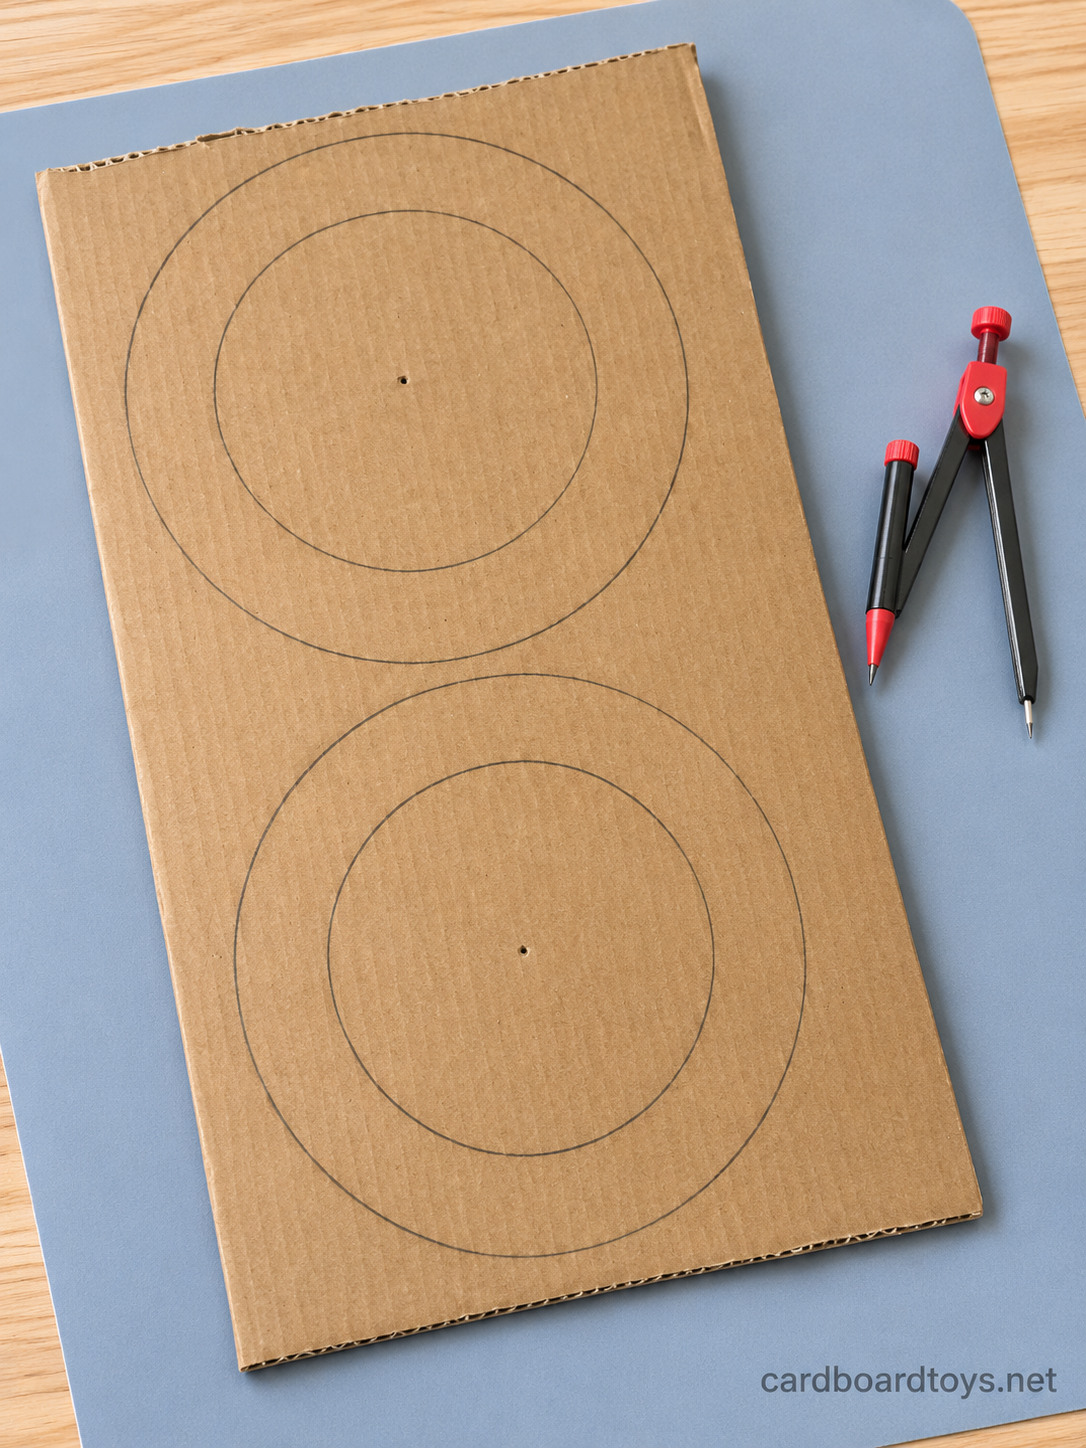
Lay the cardboard flat. You need two rings, one above the other, with a small gap between them. Mark a center dot for each. Open the compass to 2 3/4 inches (7 cm) and draw the outer circle. Close it to 1 3/4 inches (4.5 cm) and draw a smaller circle around the same dot. Do the same for the second ring.
Each ring is now about 1 inch (2.5 cm) wide. That band becomes the floor the marble rolls on, so keep the compass point pressed down and both circles centered.
Step 2: Cut Out the Rings
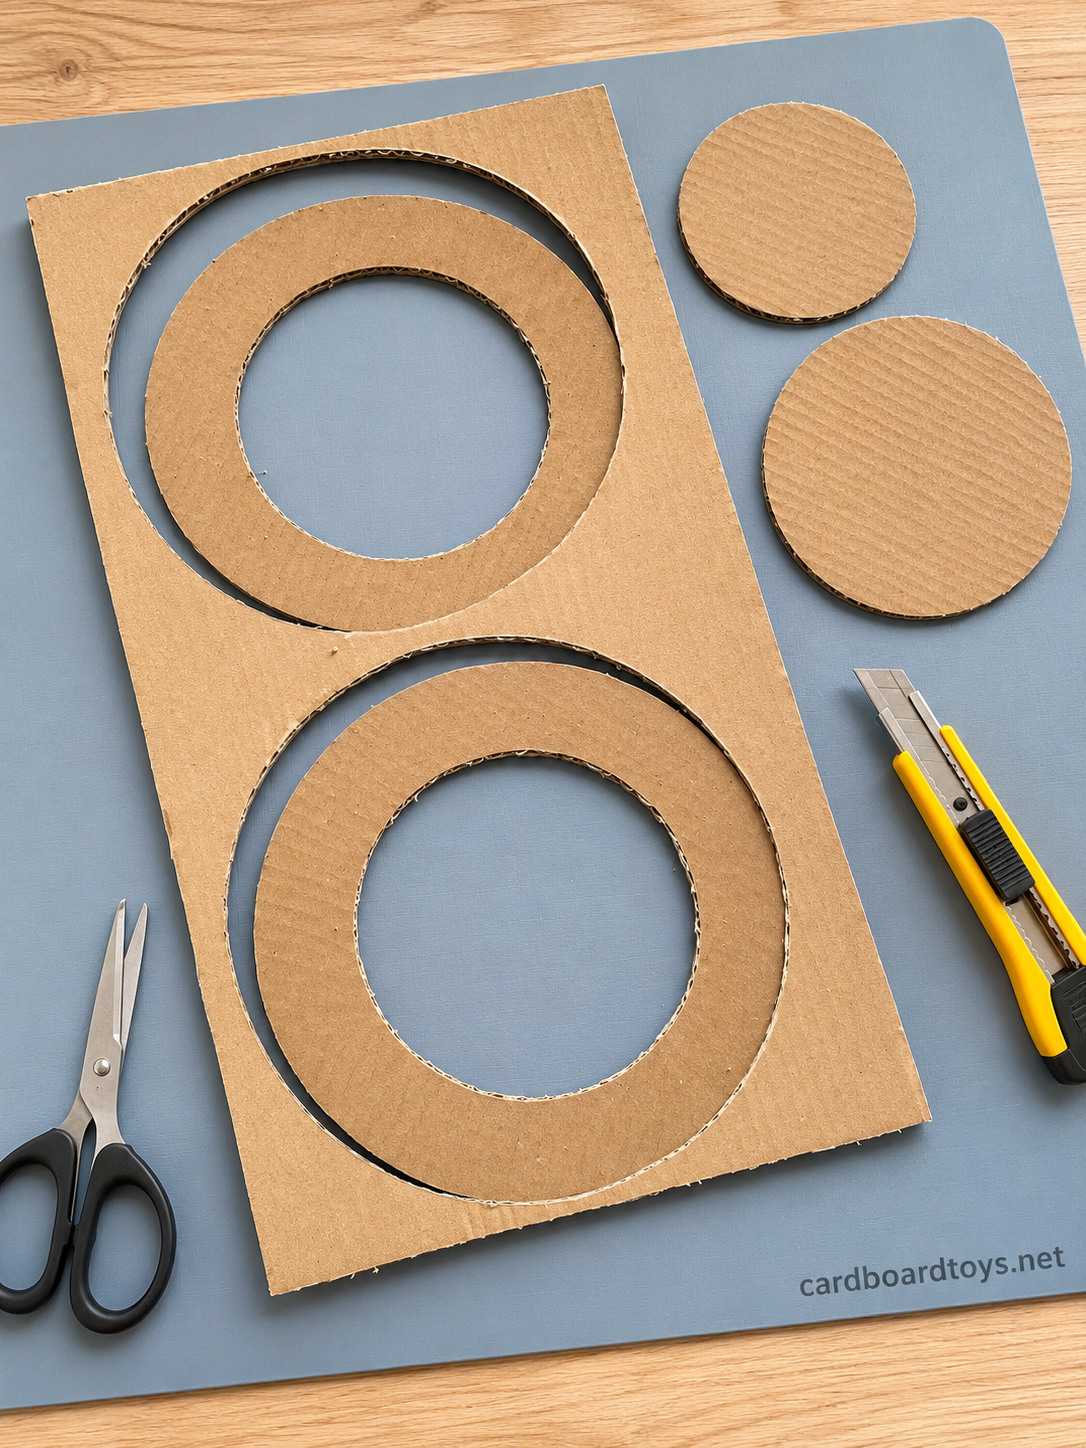
Cut both circles of each ring while the sheet is still in one piece, because a big sheet is easier to hold steady. To get into the middle, pinch the card, snip a small slit and cut out to the line. Turn the cardboard, not your hand, and the curve will stay smooth. Pop out the center discs.
Small bumps on the edge do not matter. Trim any deep notches on the inner edge, though, since the wall strip will be glued there later.
Step 3: Mark Where to Split Them
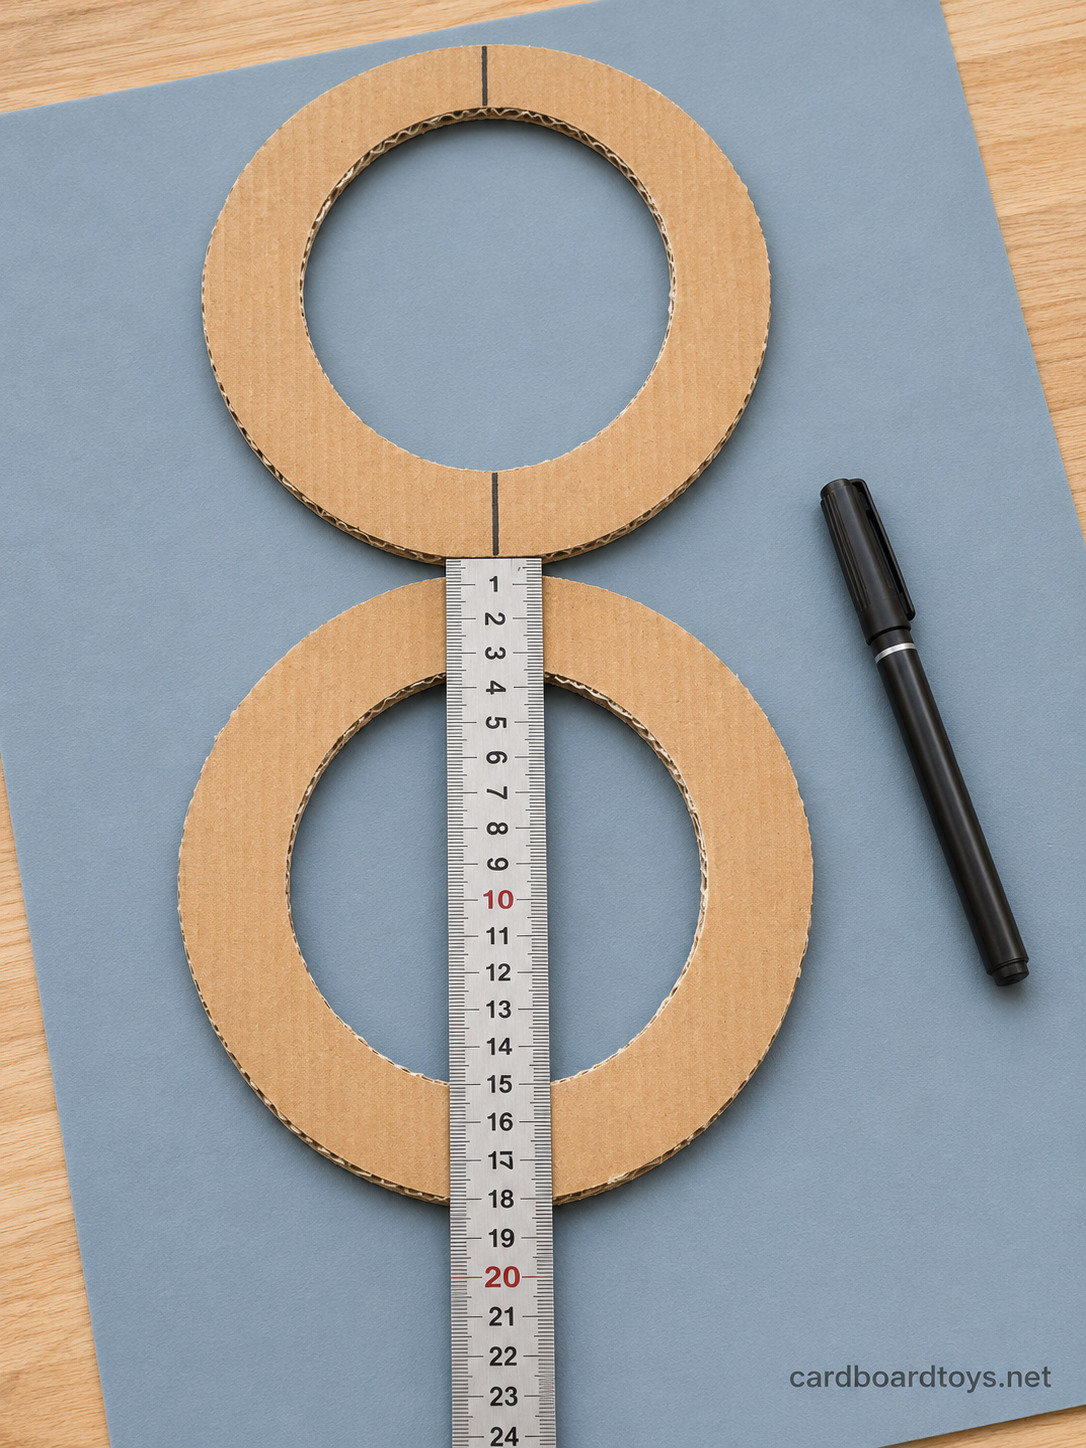
Lay the ruler across a ring so it passes right over the little hole the compass point left. Draw a short line across the band at the top and another at the bottom. Those lines cut the ring into two equal halves. Repeat on the second ring.
The compass hole is your best guide here. Uneven halves will not meet properly when the frame bends.
Step 4: Cut Four Half Rings
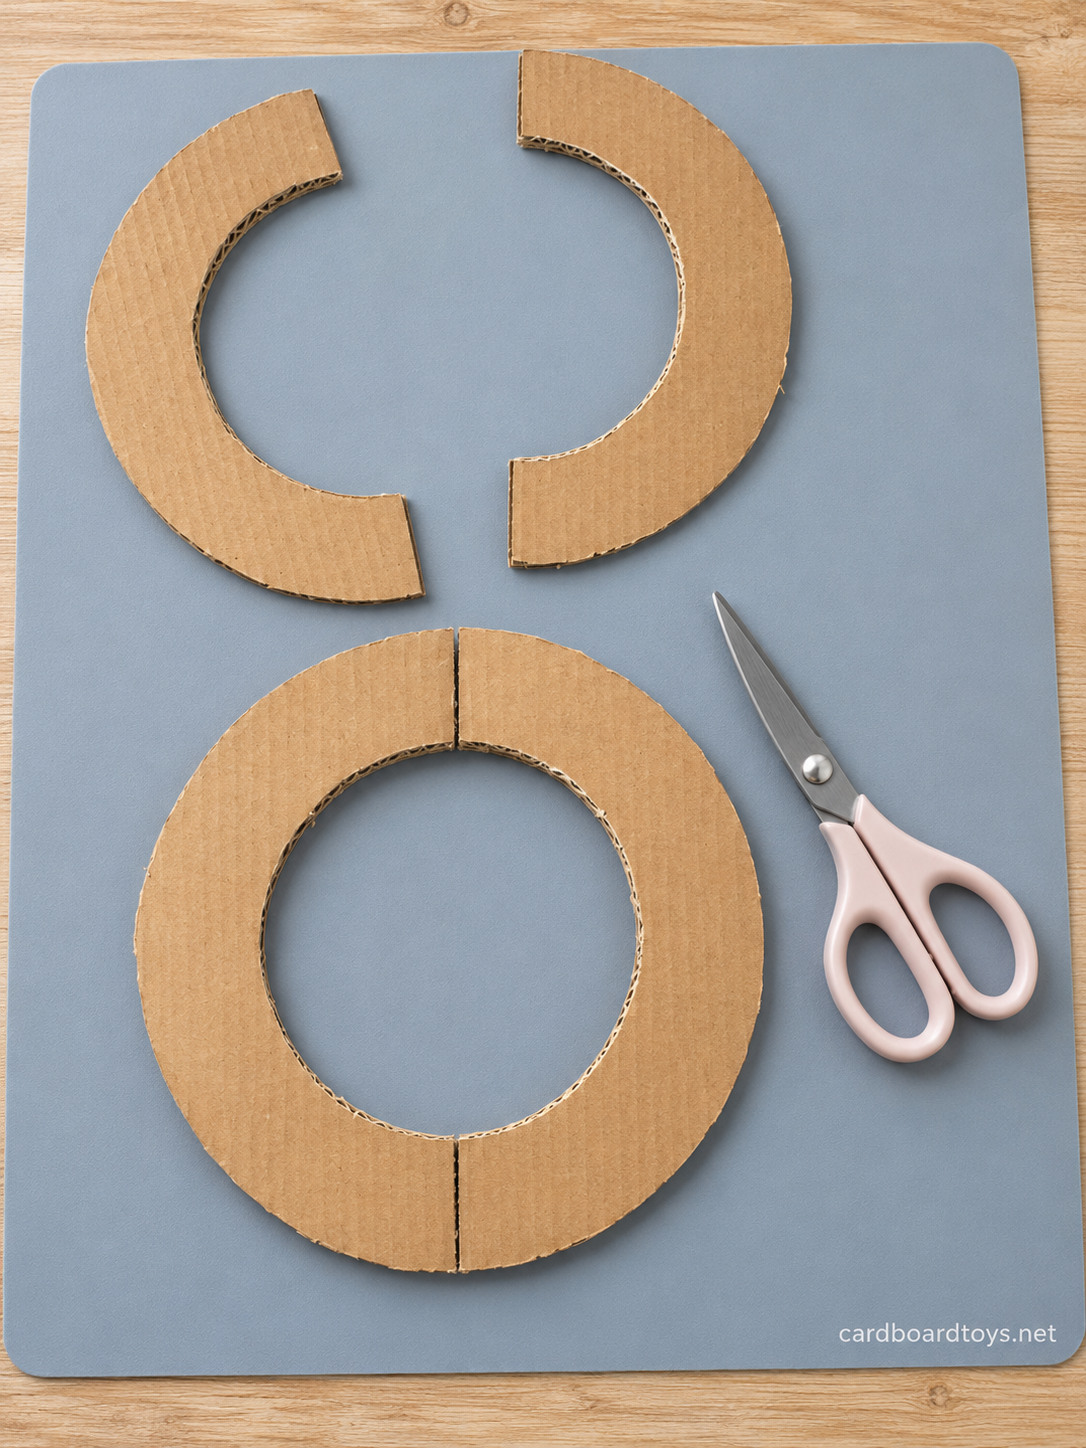
Cut along all four lines. You now have four C shaped pieces. Put them back on the table in a figure eight, two on top and two below, so you can see how they fit.
Give each piece a job. The top right and bottom left pieces will become the marble tracks. The top left and bottom right pieces stay flat and link everything together.
Step 5: Cut the Wall Strips
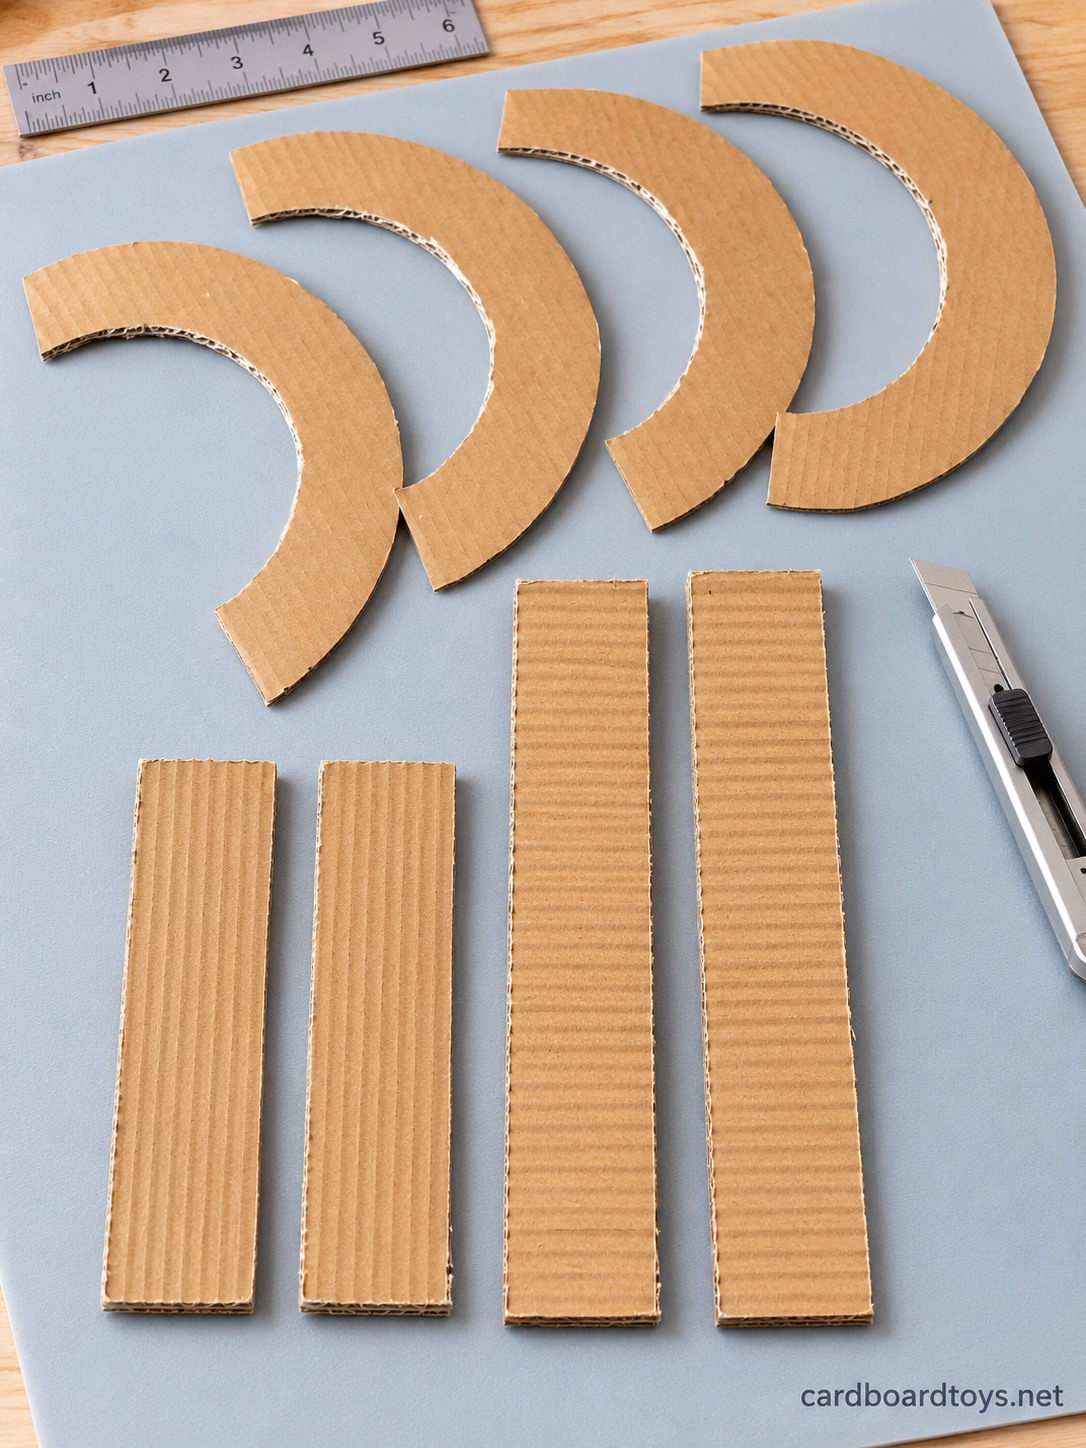
From scrap card, cut four strips 1 1/4 inches (3 cm) tall. Two should be about 9 inches (23 cm) long for the outer edges and two about 6 inches (15 cm) long for the inner edges. They are a bit too long on purpose. You will trim them after gluing.
Cut them so the ribs inside the cardboard run from the top edge to the bottom edge. That way the strip curls smoothly instead of cracking. If one still resists, roll it around a can first.
Step 6: Give Two Pieces Walls
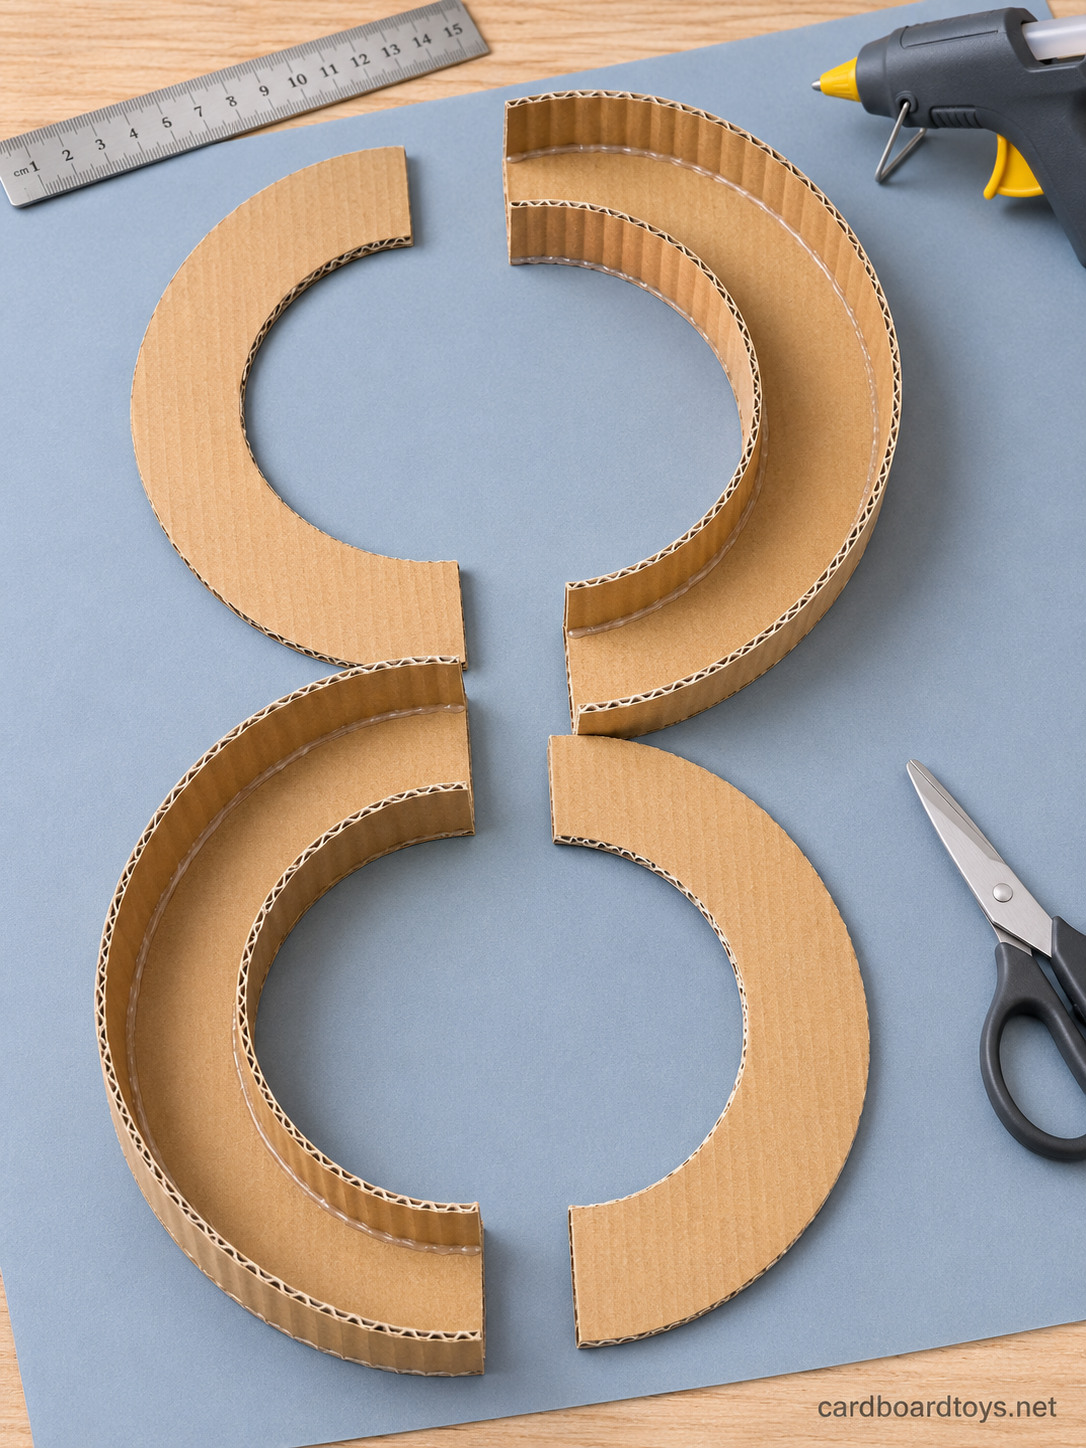
Pick up the top right half ring. Put a thin line of hot glue along its outer edge and stand a long strip against it, pressing a few inches at a time so it follows the curve. Glue a short strip along the inner edge in the same way. You have made a curved channel. Do the same to the bottom left half ring.
Snip off any wall that sticks out past the ends so the ends stay flat. The other two pieces get no walls.
Wait for the glue to cool, then look inside each channel. A dried drip on the floor is enough to stop a marble, so peel it off now.
Step 7: Poke the Pin Holes
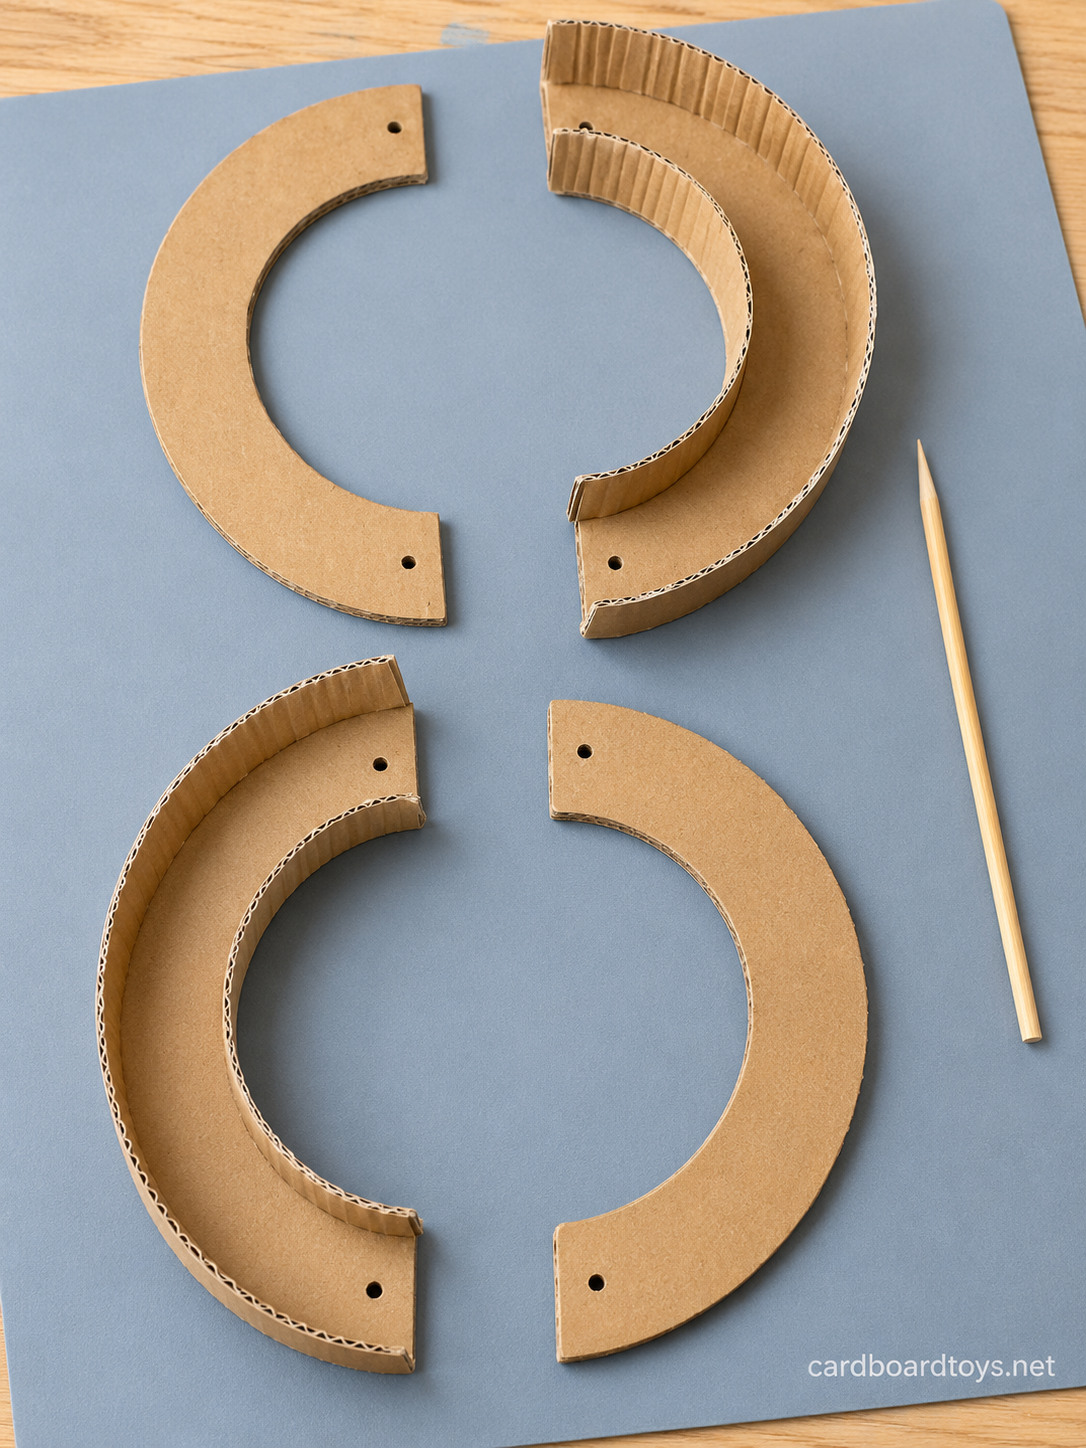
Each piece needs one hole near each end, so eight holes in all. Measure about 1/2 inch (1.2 cm) in from the end and mark the middle of the band. On the two channels, the hole goes through the floor between the walls.
Push the skewer tip through each mark and twist it a little. A toothpick should be able to spin in the hole without wobbling. Work over a scrap of cardboard so the skewer does not hit the table.
Step 8: Pin the Top and Bottom Loops
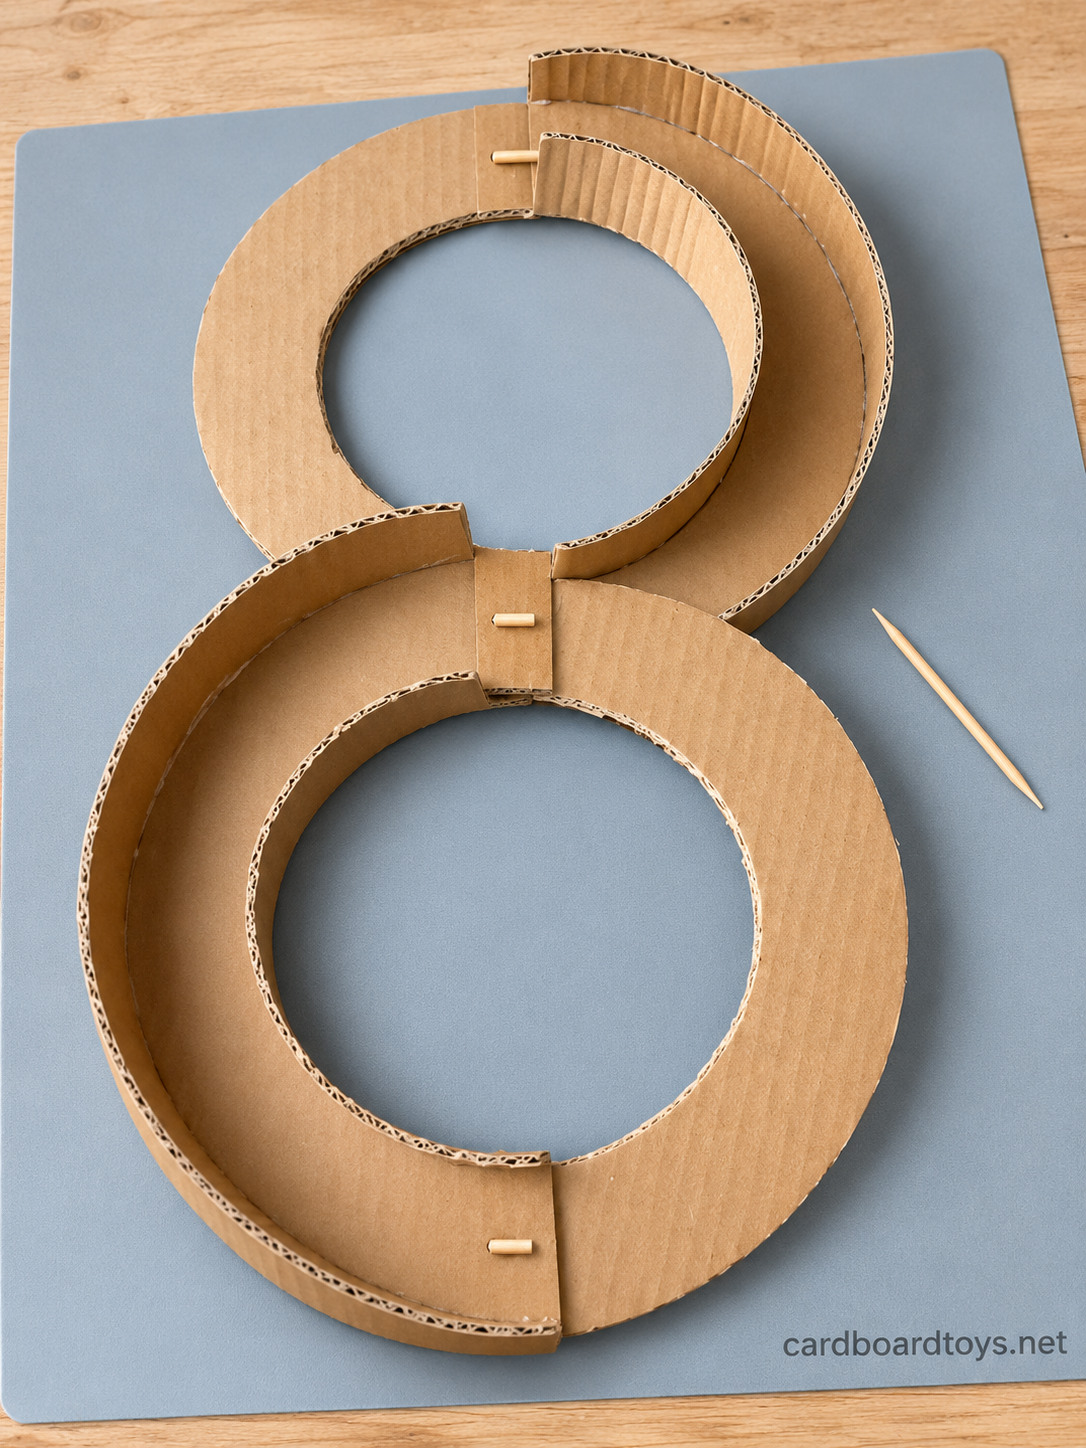
Start at the bottom. Slide the lower end of the bottom right flat piece under the lower end of the bottom left channel until the holes line up, about an inch of overlap. Push a toothpick through both. Now do the top: tuck the top end of the top left flat piece under the top end of the top right channel and pin it.
Remember the rule, because you will use it again: channels sit on top, flat pieces go underneath. Wiggle each joint to check that it turns freely.
Step 9: Join the Middle and Cap the Pins
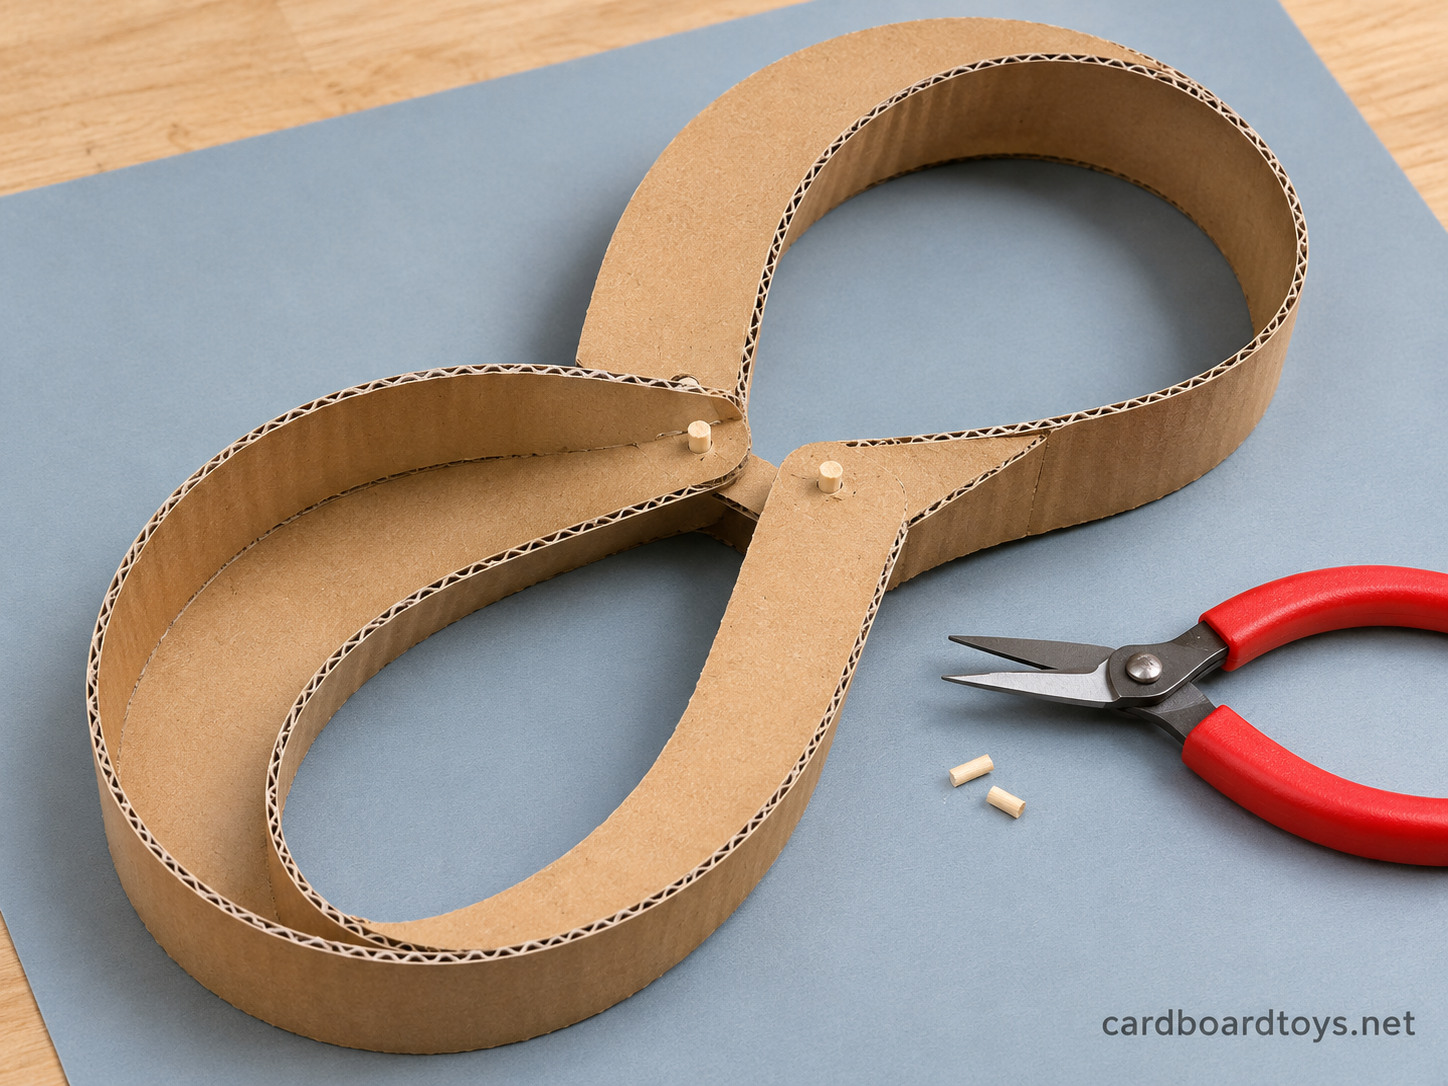
Now connect the two loops where they meet in the center. On the left, slide the lower end of the top left flat piece under the upper end of the bottom left channel and pin it. On the right, slide the upper end of the bottom right flat piece under the lower end of the top right channel and pin that too. The four pieces now form one closed chain, and the frame flexes when you squeeze it.
Clip each toothpick so about 1/8 inch (3 mm) shows on each side. Add a small blob of hot glue to every cut end, front and back, so it looks like a rivet head. Keep the glue on the toothpick. If it runs between the two layers, the joint will lock. Bend the frame gently a few times while the glue is still soft.
Step 10: Play
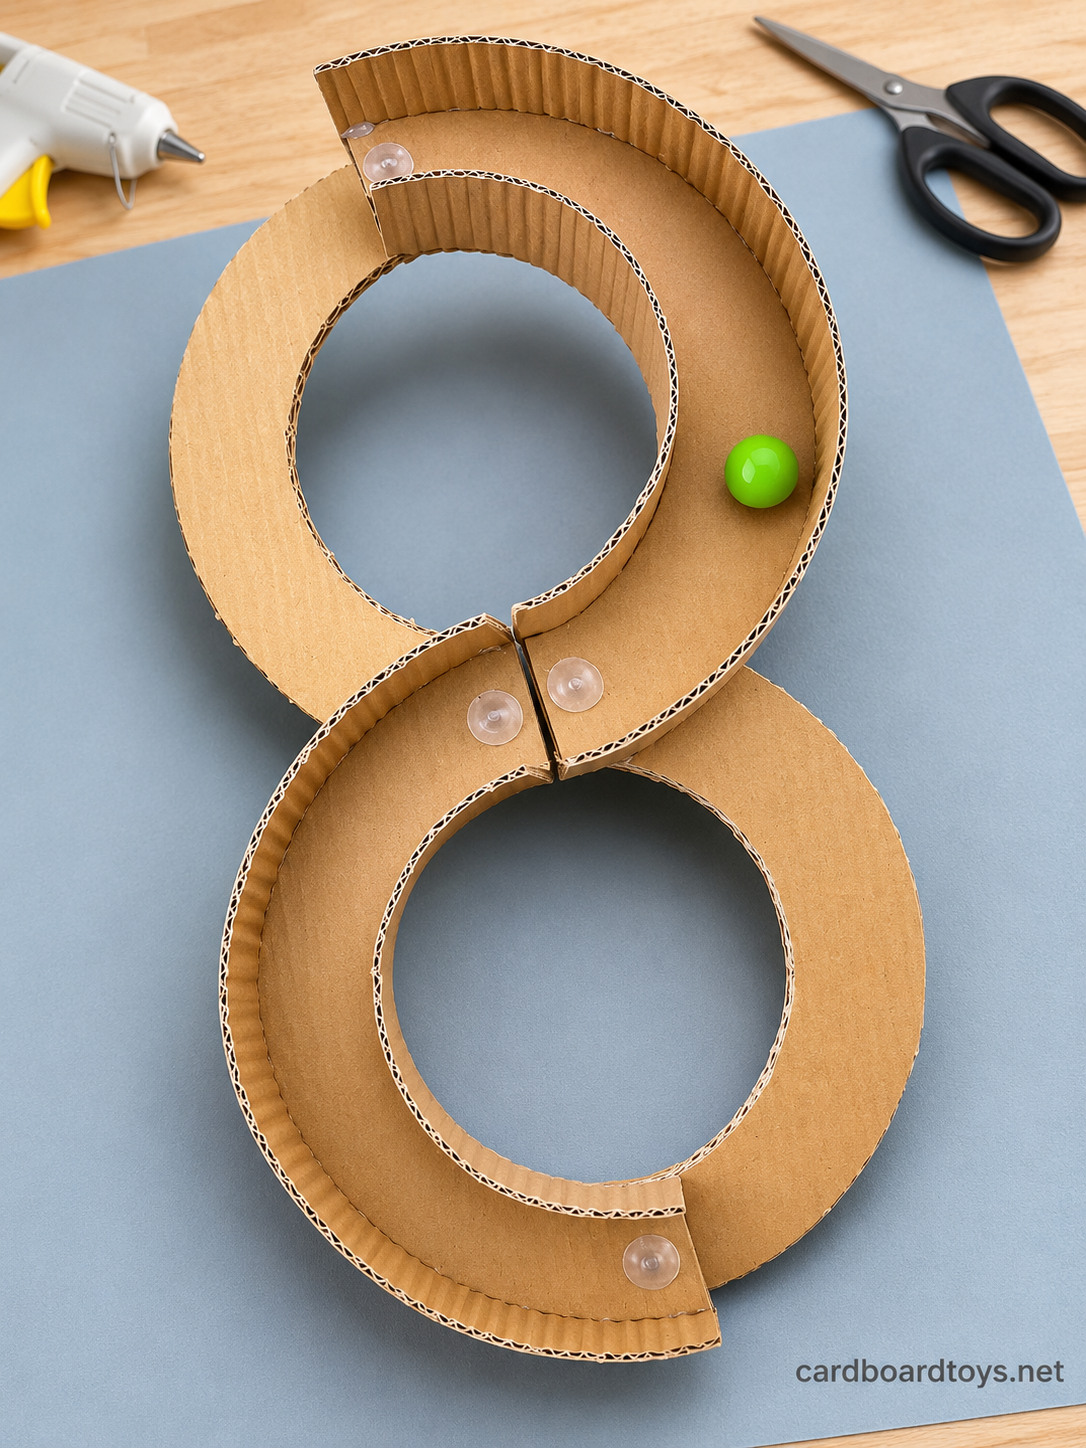
When the caps are cool, the maze is ready. Hold the frame with both hands, set the marble in a channel and tilt so it starts to roll. Where the two channels meet in the middle, bend the frame until their open ends line up, and the marble will cross over. Let it run down the second track, then change your grip and send it back.
Timing is everything. Bend too soon and the marble falls off a flat piece. Bend too late and it hits a wall and stops. Once you find the rhythm, try for long runs or race someone.
A stiff joint loosens after a dozen back and forth bends. A joint that gets too floppy just needs another dab of glue on its caps.
Keep It Handy
The project card below has the ring sizes and the main steps on one image, so it is easy to pin and come back to when the next box shows up.