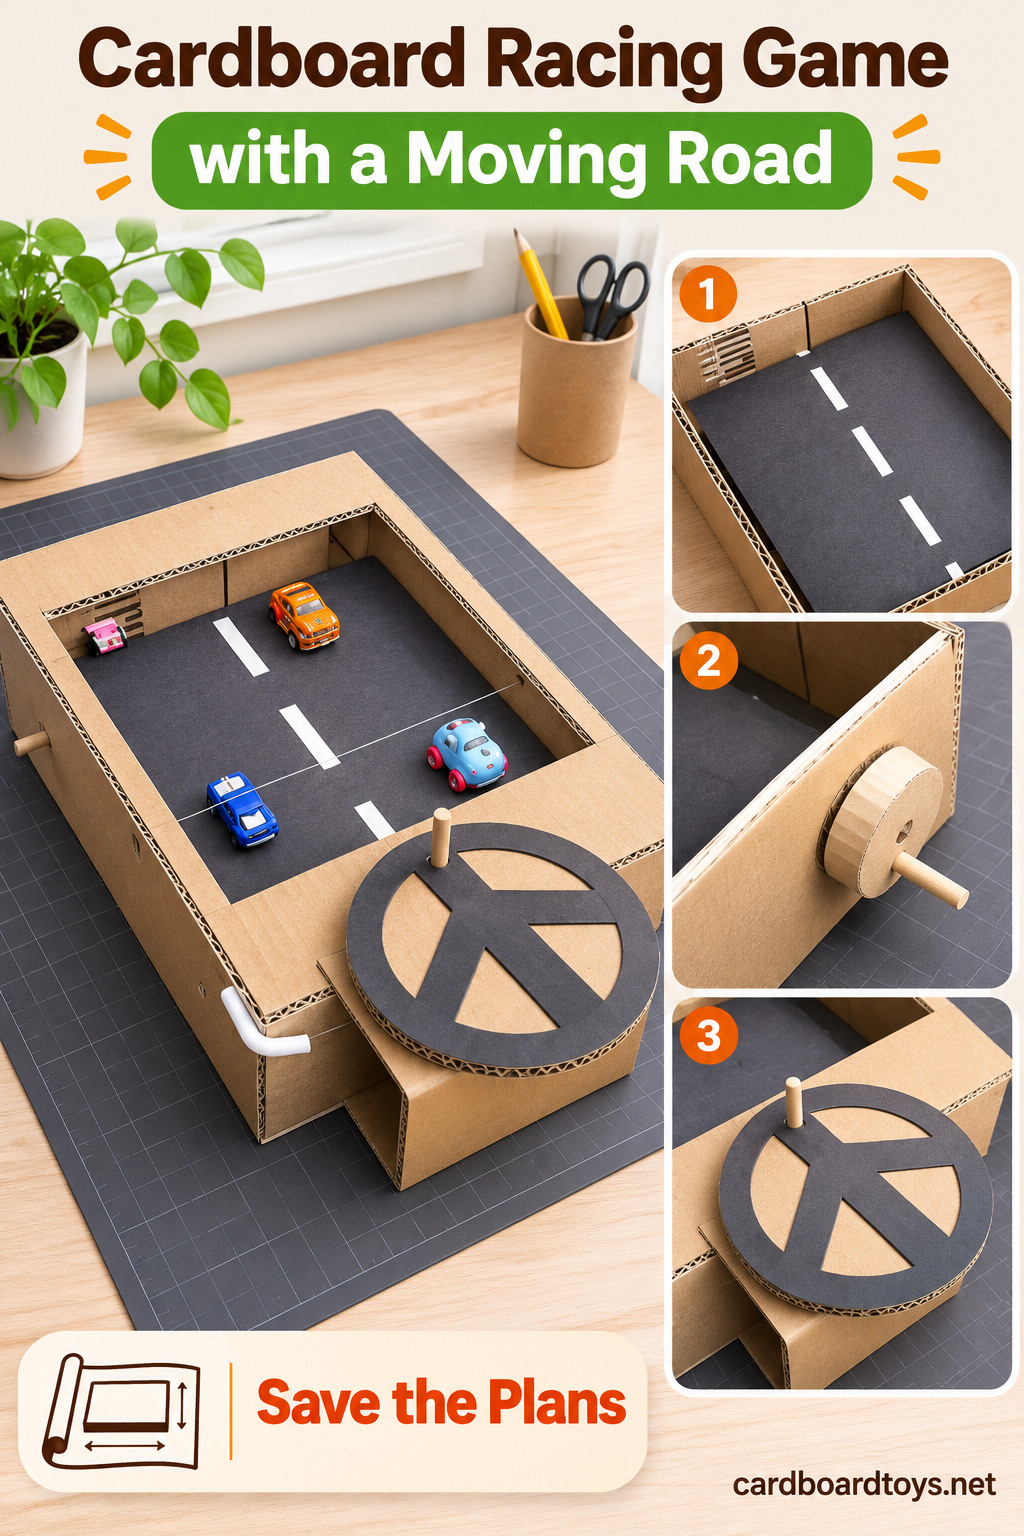

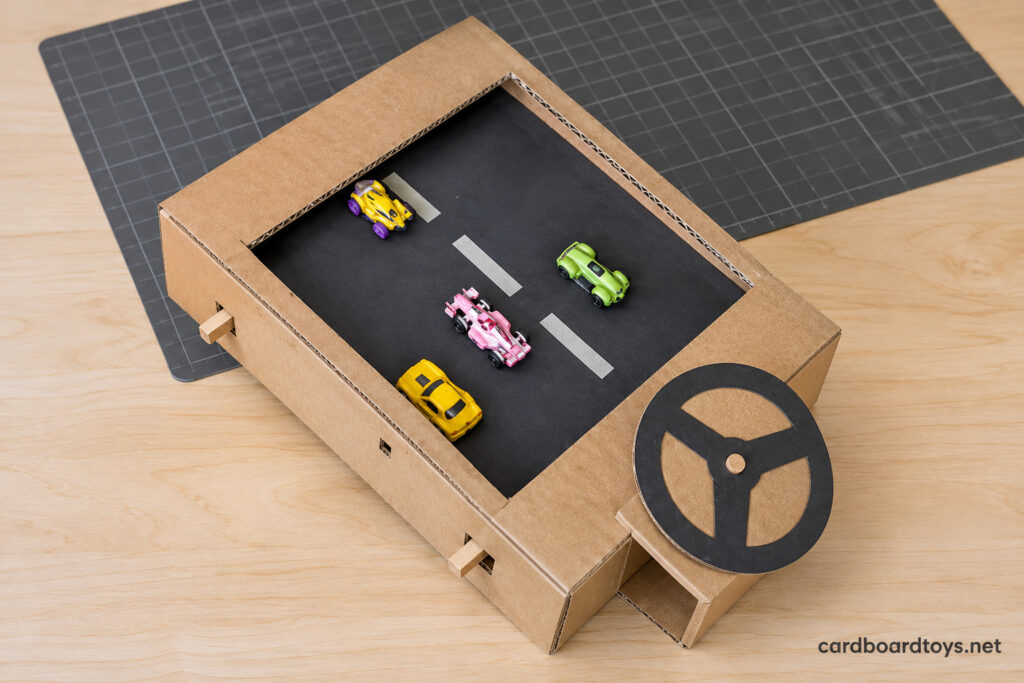
Picture an arcade driving game made from a box. A black road with white lane marks scrolls toward you when you turn a crank on the side, and toy cars ride along on it as traffic. Your own car hangs on a string across the road, and a steering wheel on the front pulls it left or right so you can swerve out of the way.
Cardboard rollers, a loop of poster board and one piece of string make it all work. No batteries, no motor.
One Player or Two
A single child can crank with one hand and steer with the other, which takes some practice. It also works well as a team game: one person controls how fast the road moves while the other tries to survive. Brothers and sisters, or a parent and child, can swap jobs after every crash.
Under the fun there are two simple machines. The crank spins a roller, and the roller pulls the belt like a treadmill. The steering column winds string onto itself on one side while letting it out on the other, and that tug moves your car. Children can see each part turning and work out why the car follows the wheel.
Before You Start
- Skill level: medium. No single part is hard, but the belt must be snug and the steering string needs careful threading.
- Time: 2 to 3 hours including glue cooling.
- Age: 6 and up can roll the rollers, tape the lane lines and test drive. An adult should handle the knife, the hole poking and the glue gun.
Safety first: snip the point off every skewer that pokes out of the box. Toy cars with small parts that come off are not safe for children under 3. Keep fingers clear of the hot glue tip.
Tools
- Craft knife
- Sturdy scissors
- Metal ruler
- Drawing compass
- Mini glue gun
2026 Prices
- Reused corrugated cardboard for the tray, rollers, frame and stand $0.00
- 1 sheet of black poster board, 22 × 28 in. $1.56
- About 2 yd. of masking tape for the lane lines $0.11
- 3 bamboo skewers, about 12 in. long $0.23
- About 4 ft. of thin cotton string $0.05
- 2 bendy plastic straws $0.04
- 1 reused paper towel tube and 1 bottle cap $0.00
- About 5 mini hot glue sticks $0.61
- 4 or 5 small cars from the toy box $0.00
Total $2.60
Making the Game
Step 1: Cut the Box Pieces and Axle Holes
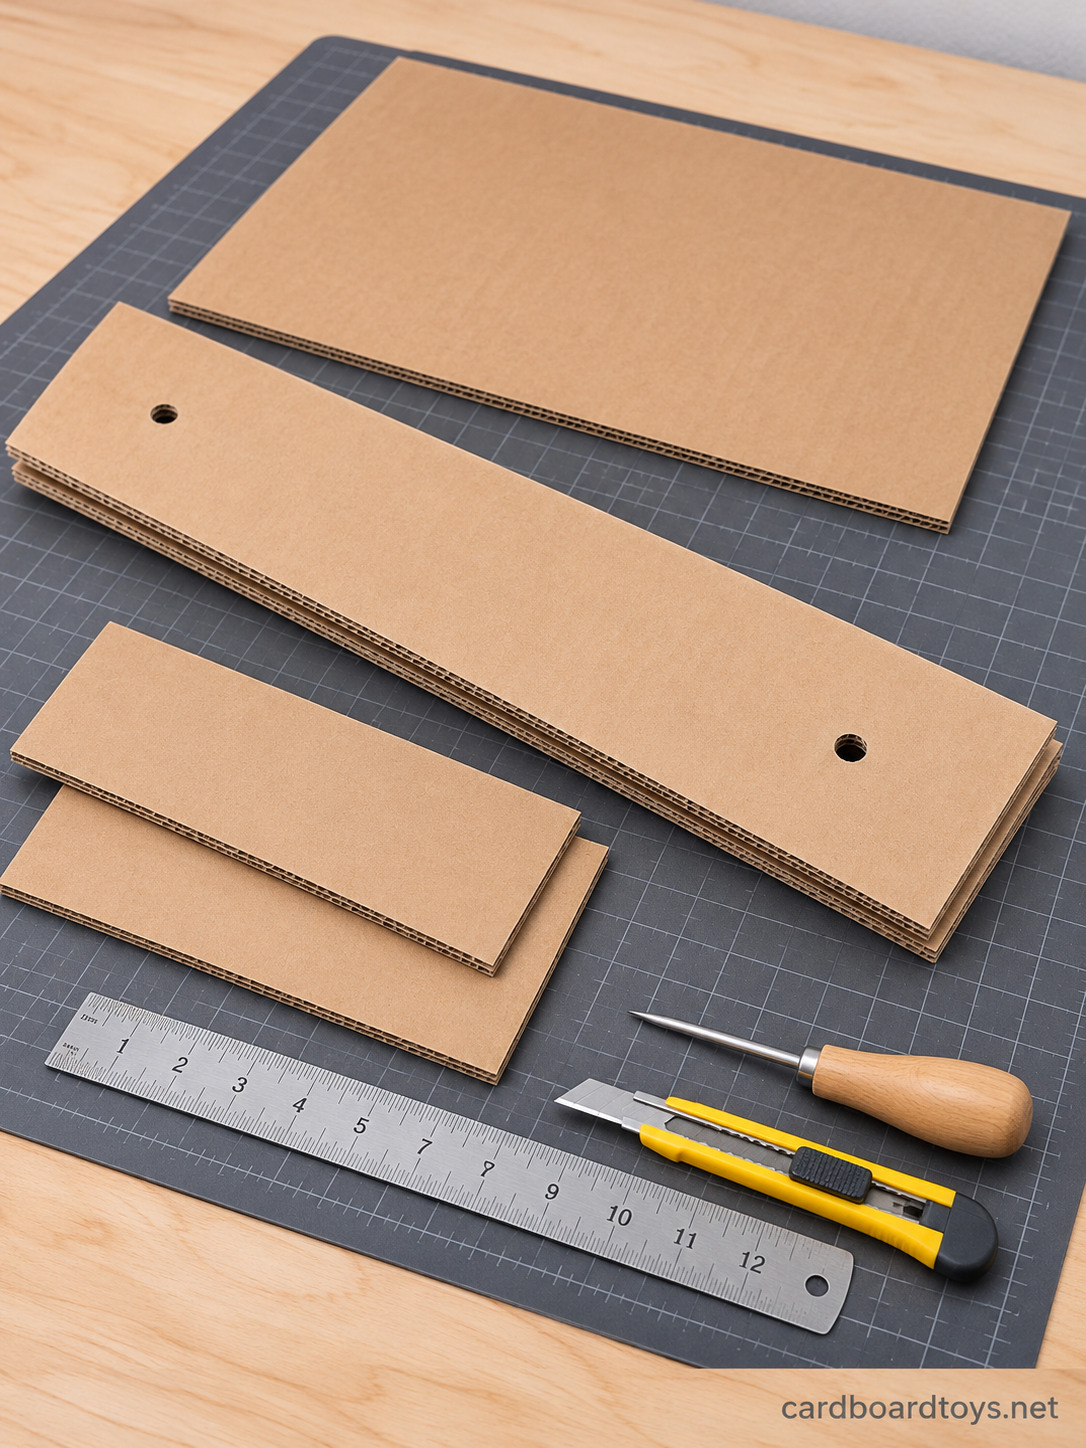
Cut a base 12 x 8 1/2 inches (30 x 22 cm), two long walls 12 x 4 inches (30 x 10 cm) and two short walls 8 1/2 x 4 inches (22 x 10 cm).
Each long wall needs two holes for the roller axles: 1 1/2 inches in from each end and 2 inches up from the bottom. Stack the two long walls and poke through both at once, so the holes match. Holes that do not match make the rollers sit at an angle, and the belt will creep to one side.
Step 2: Glue the Tray Together
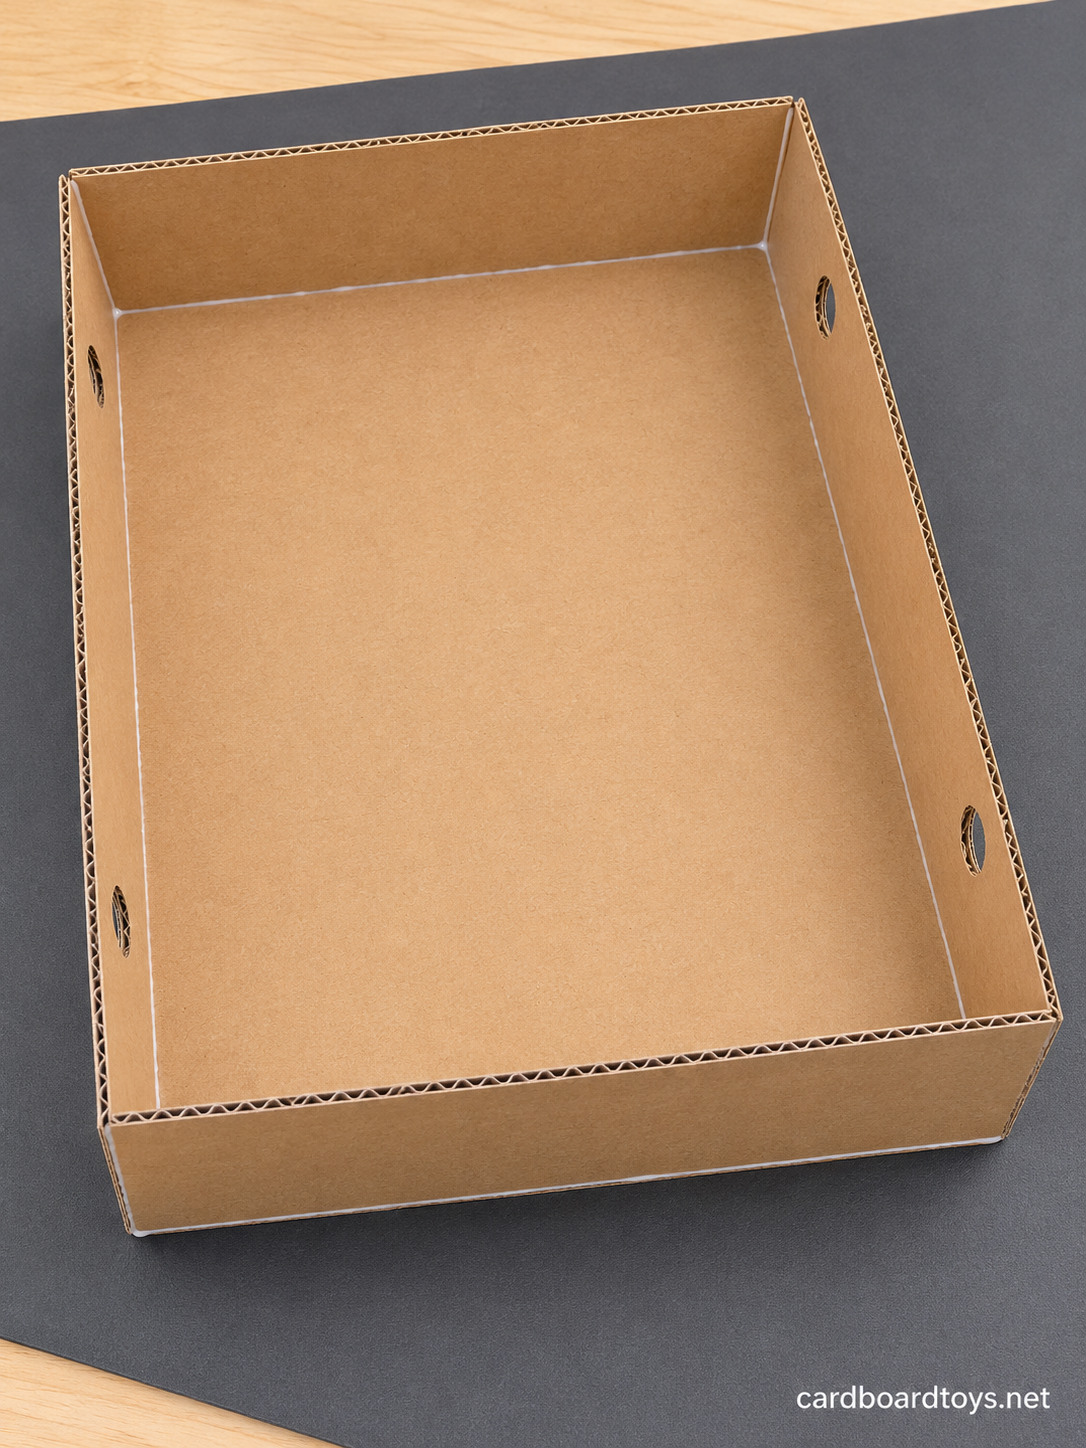
Glue the long walls onto the long edges of the base, then fit the short walls between them. Hold each corner square until the glue cools. You now have an open tray with two axle holes near each end.
Step 3: Roll Two Rollers
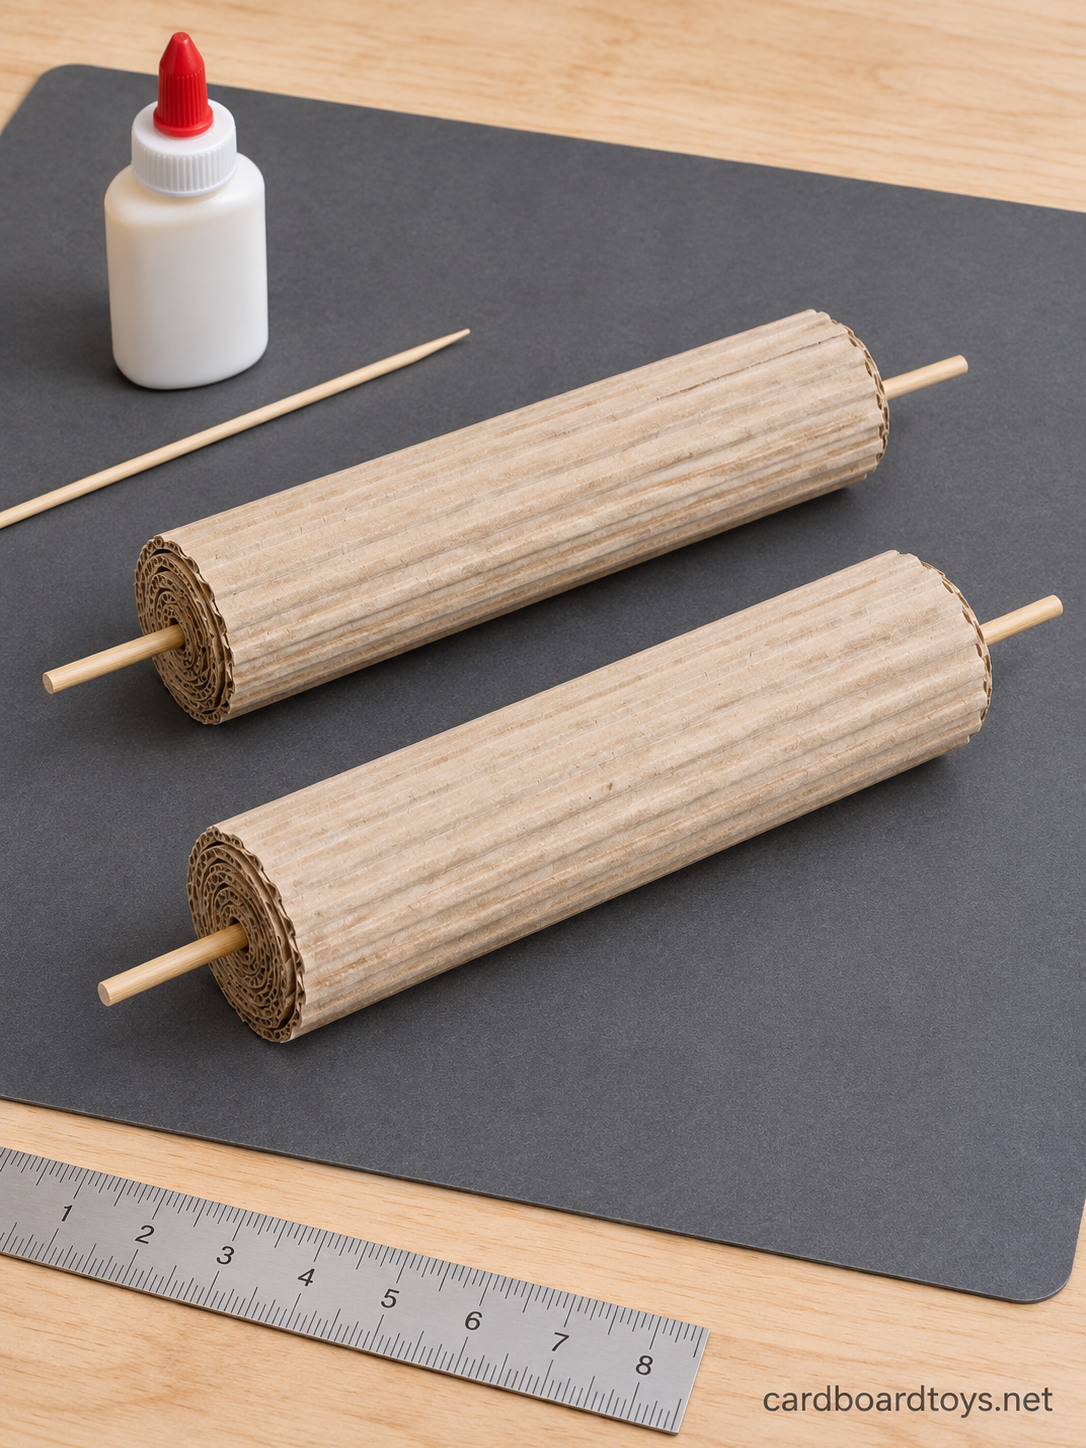
Cut two cardboard strips about 7 3/4 inches wide and 15 inches long. Lay a skewer along one short edge, run a line of glue beside it and roll the strip tightly around the skewer, adding glue every few inches. Stop when the roll is about 1 1/2 inches (4 cm) thick and glue the end down.
Let the skewer stick out the same amount on both sides. Make the second roller exactly like the first. If one is thicker, the belt will not lie flat.
Step 4: Put the Rollers in the Tray
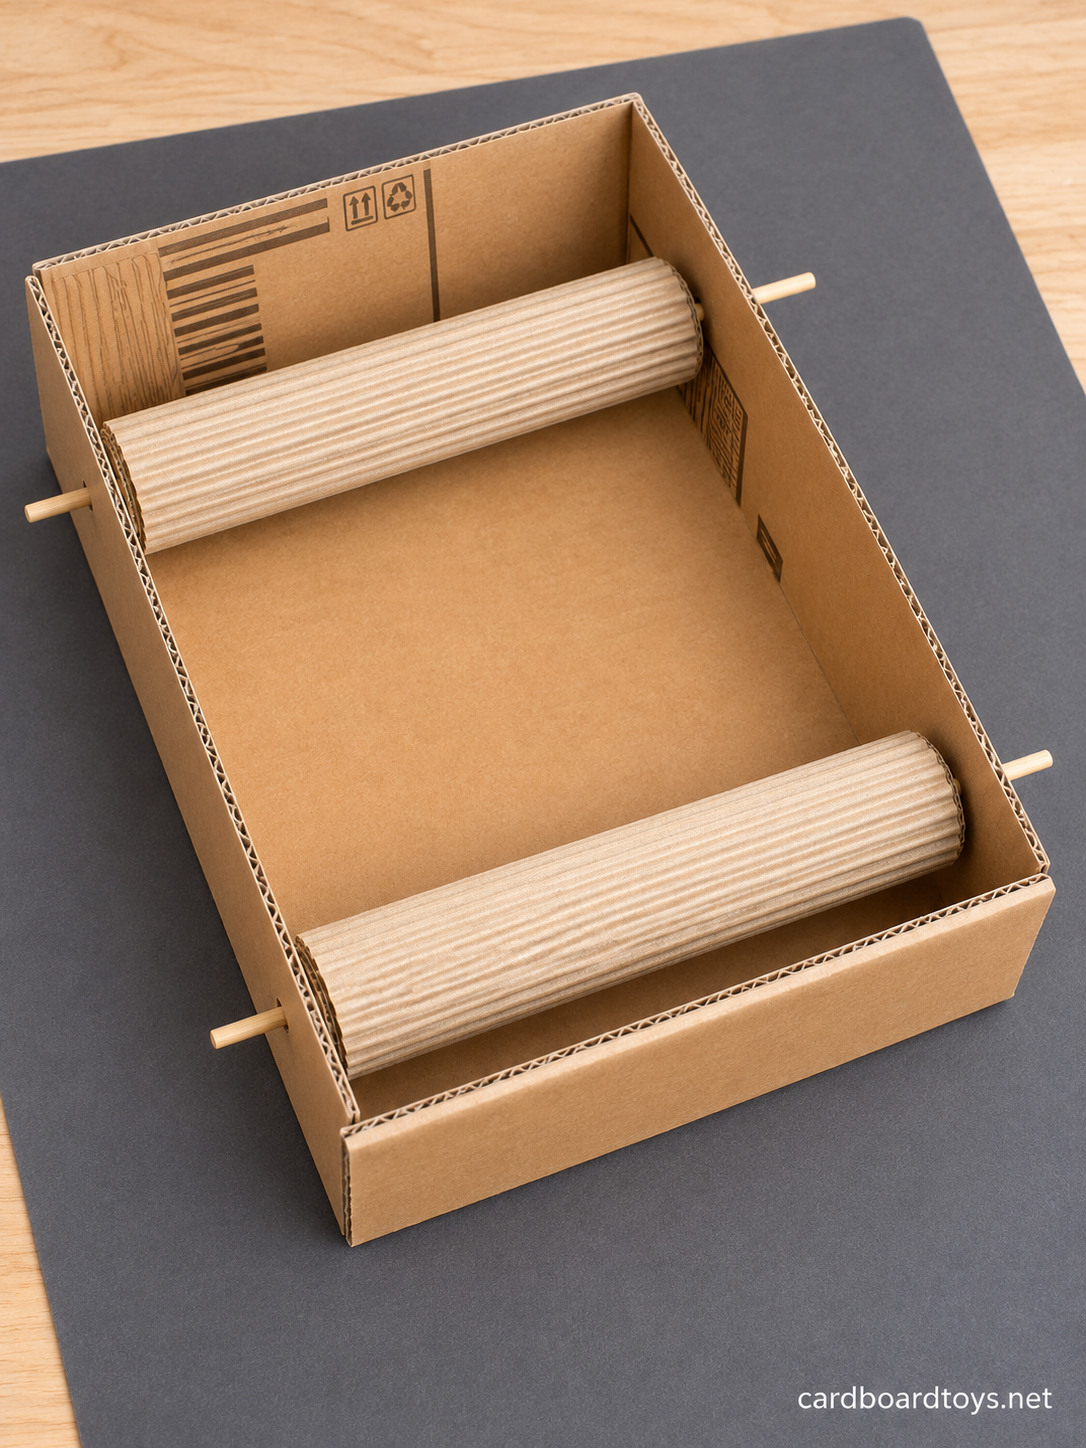
Slide one roller in near one end of the tray and push its skewer out through the two holes. Do the same at the other end. Spin each one with your fingers. It should turn freely without rubbing the walls. Trim the roller ends or widen a hole if it wobbles.
Step 5: Make the Road
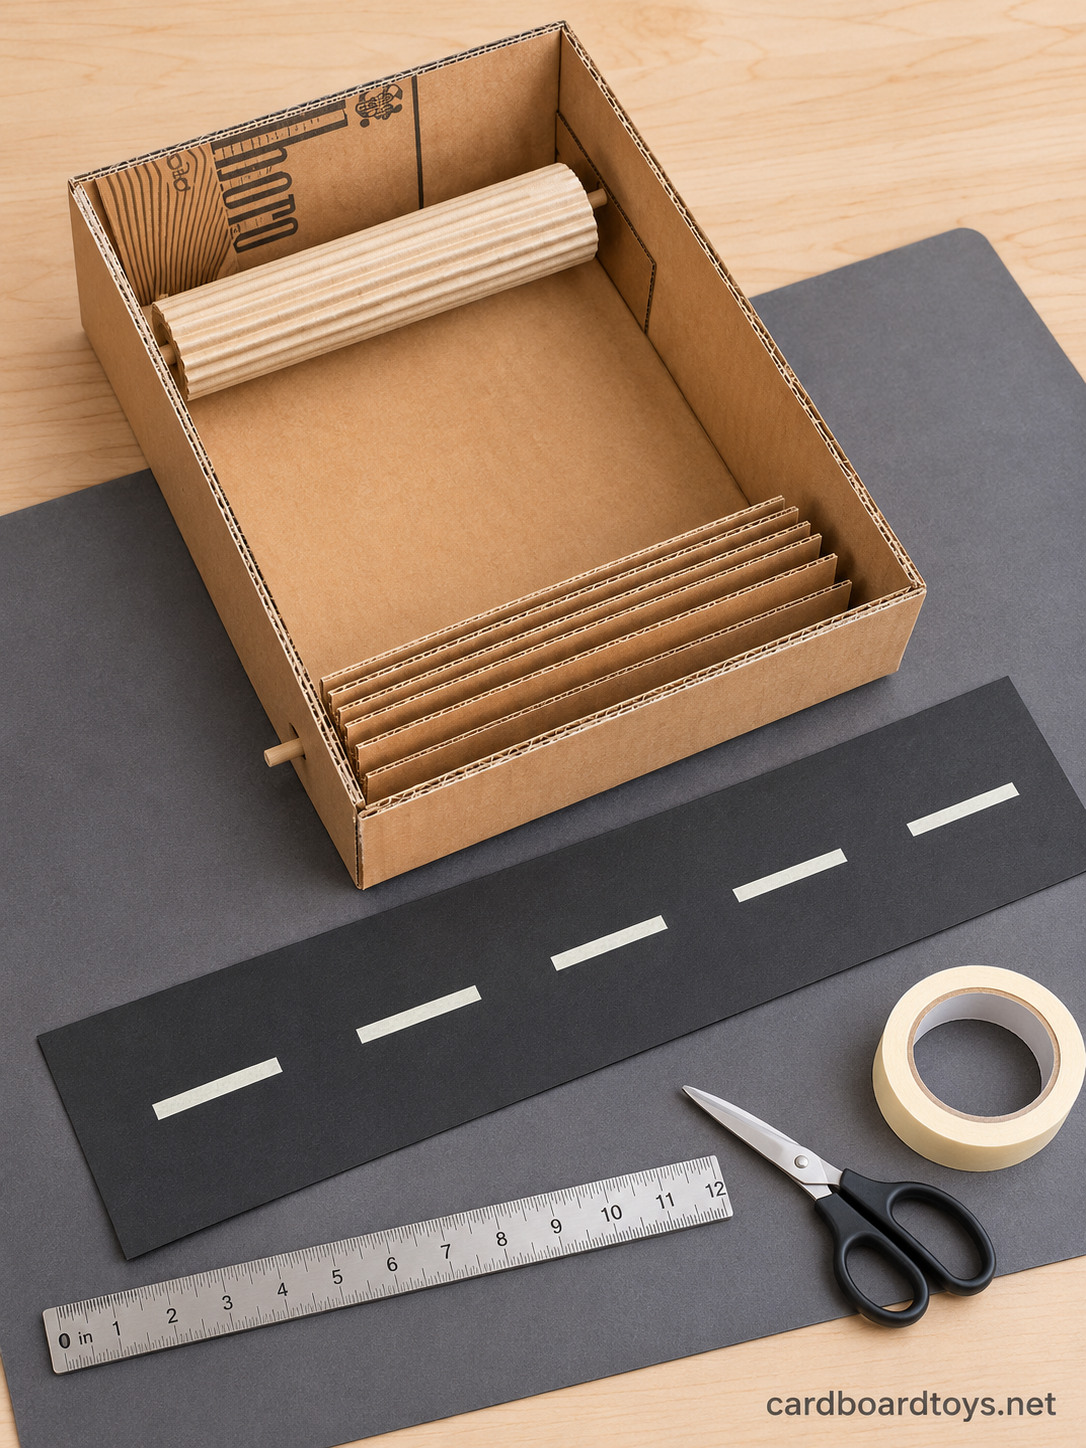
Cut black poster board into a strip about 7 inches wide and 25 inches long. Stick short pieces of masking tape down the middle, each about 1 1/2 inches long with an equal gap between them. That dashed line turns the strip into a road.
Step 6: Wrap the Road Around the Rollers
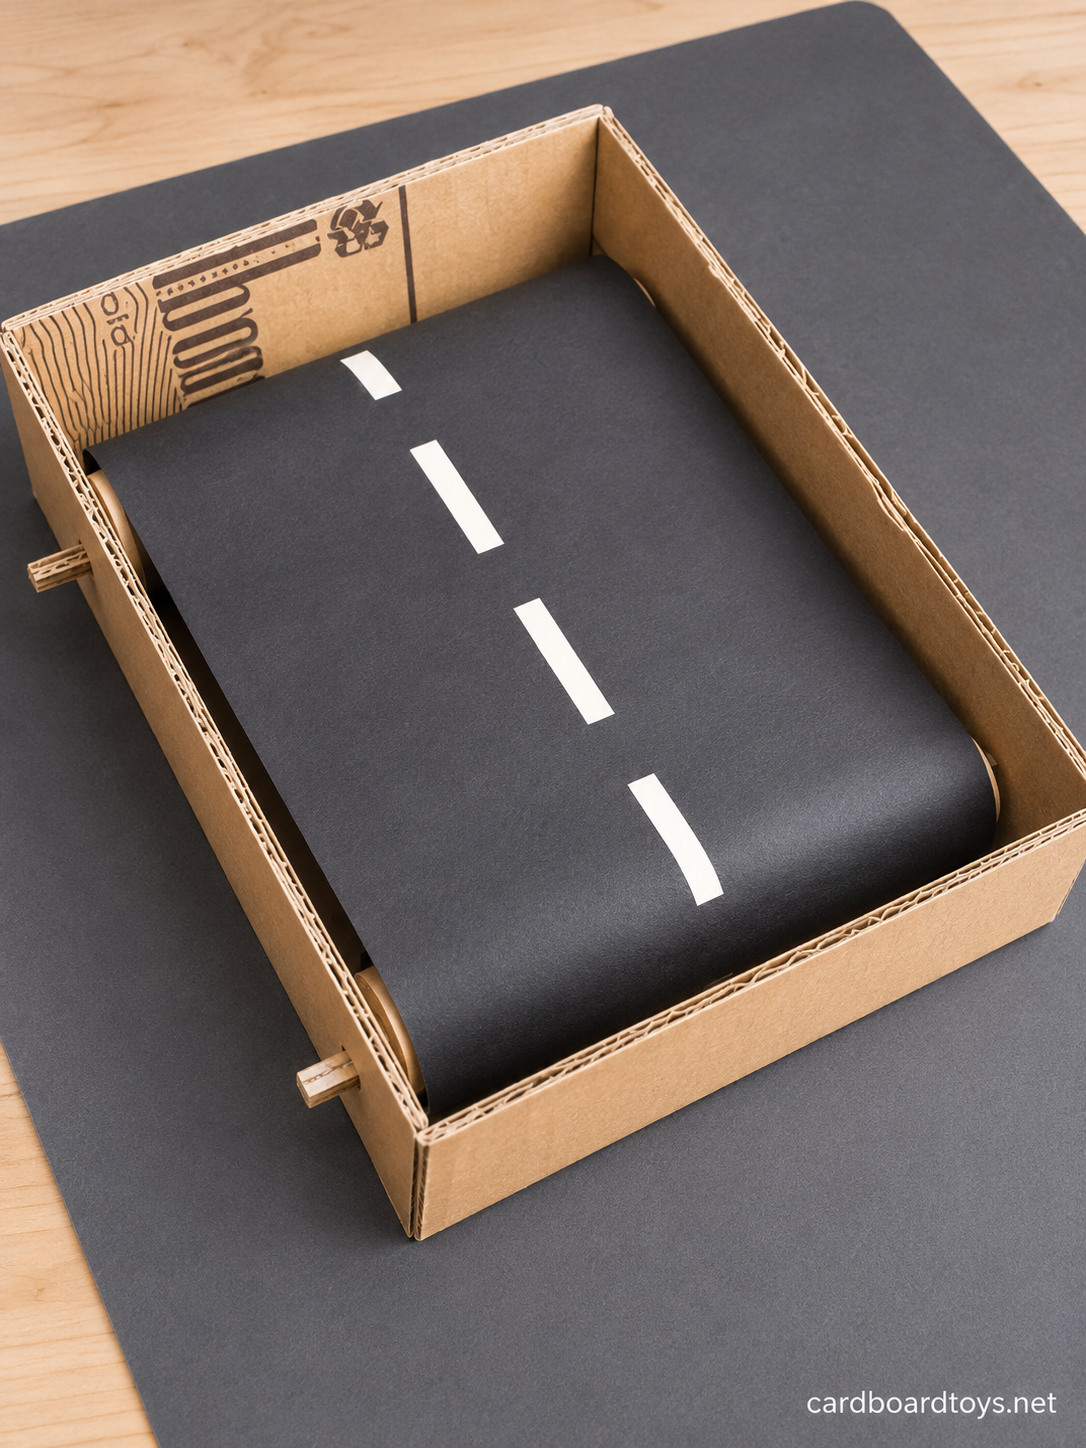
Loop the strip over the top of both rollers and back underneath. Pull it snug, overlap the ends by about an inch and glue them together on the underside.
The loop should not sag between the rollers, yet it should still move when you turn a roller by hand. If the roller slips inside the belt, wrap masking tape around that roller to give it more grip.
Step 7: Make the Crank
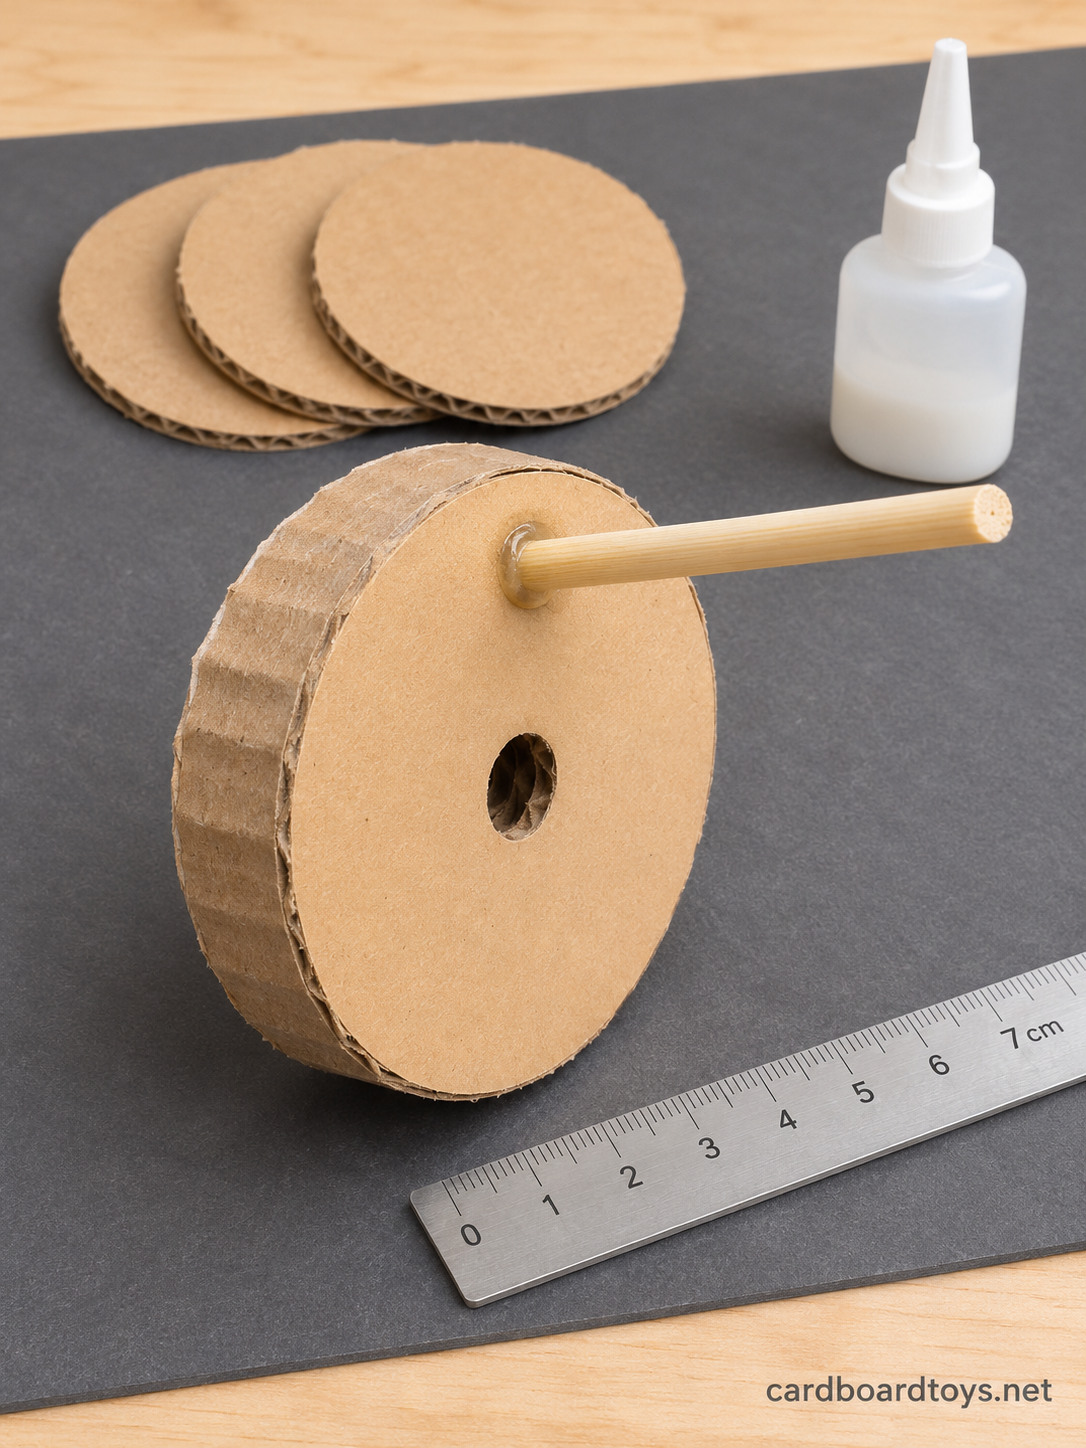
Draw three circles about 2 3/4 inches (7 cm) wide, cut them out and glue them into one thick wheel. Poke a snug hole in the center and a second hole near the edge. Glue a 2 inch piece of skewer into the edge hole as a handle.
Step 8: Fix the Crank to a Roller
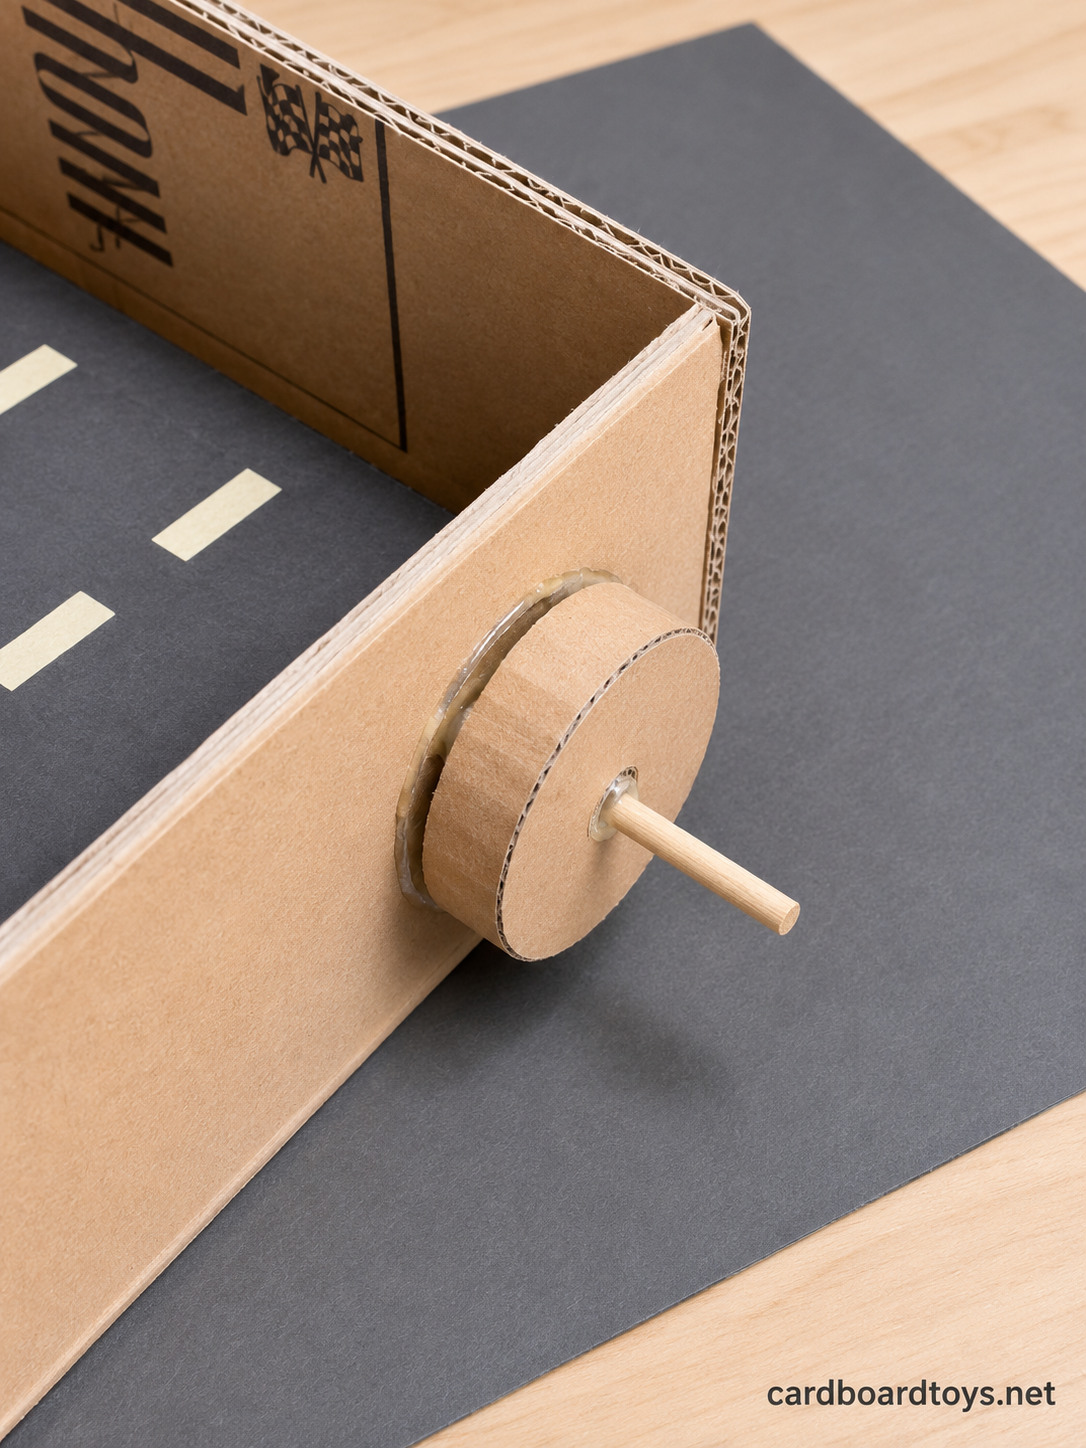
Push the crank onto one roller axle outside the tray and glue it. Then put glue where the skewer goes into the roller at both ends, so the crank, skewer and roller all turn as one. Turn the handle and the road should start to move.
Step 9: Glue Down the Traffic
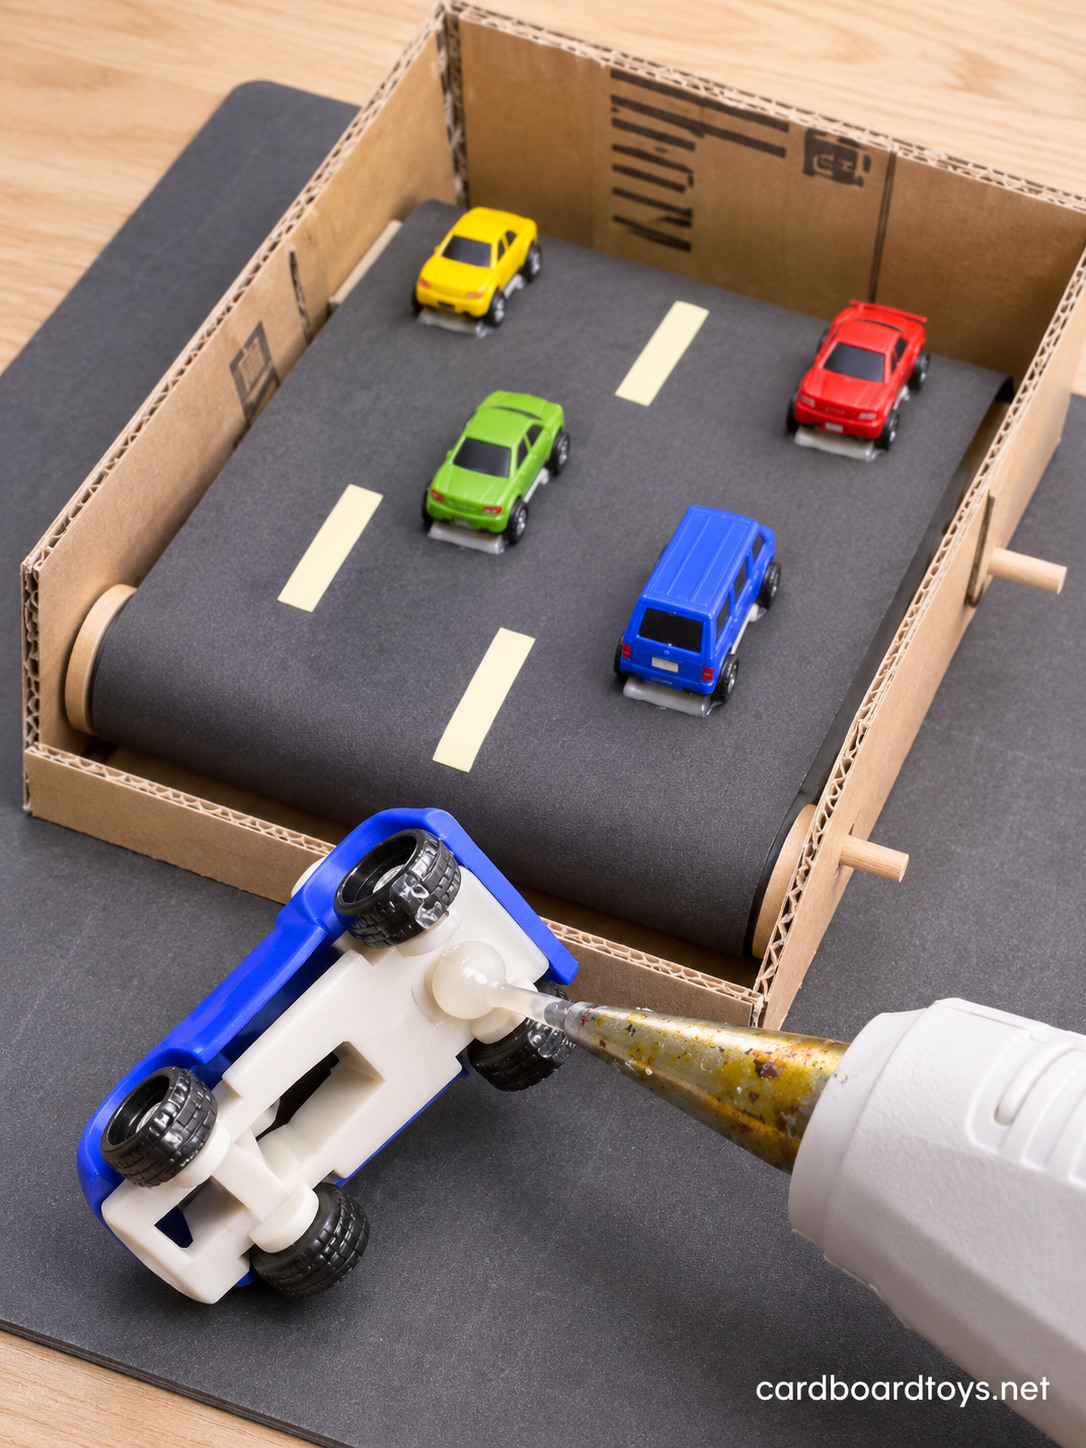
Put a blob of hot glue under each traffic car and press it onto the road. Space them around the loop and in different lanes so they come at you one by one. Keep one car loose. That one is yours to drive.
Step 10: Add a Frame on Top
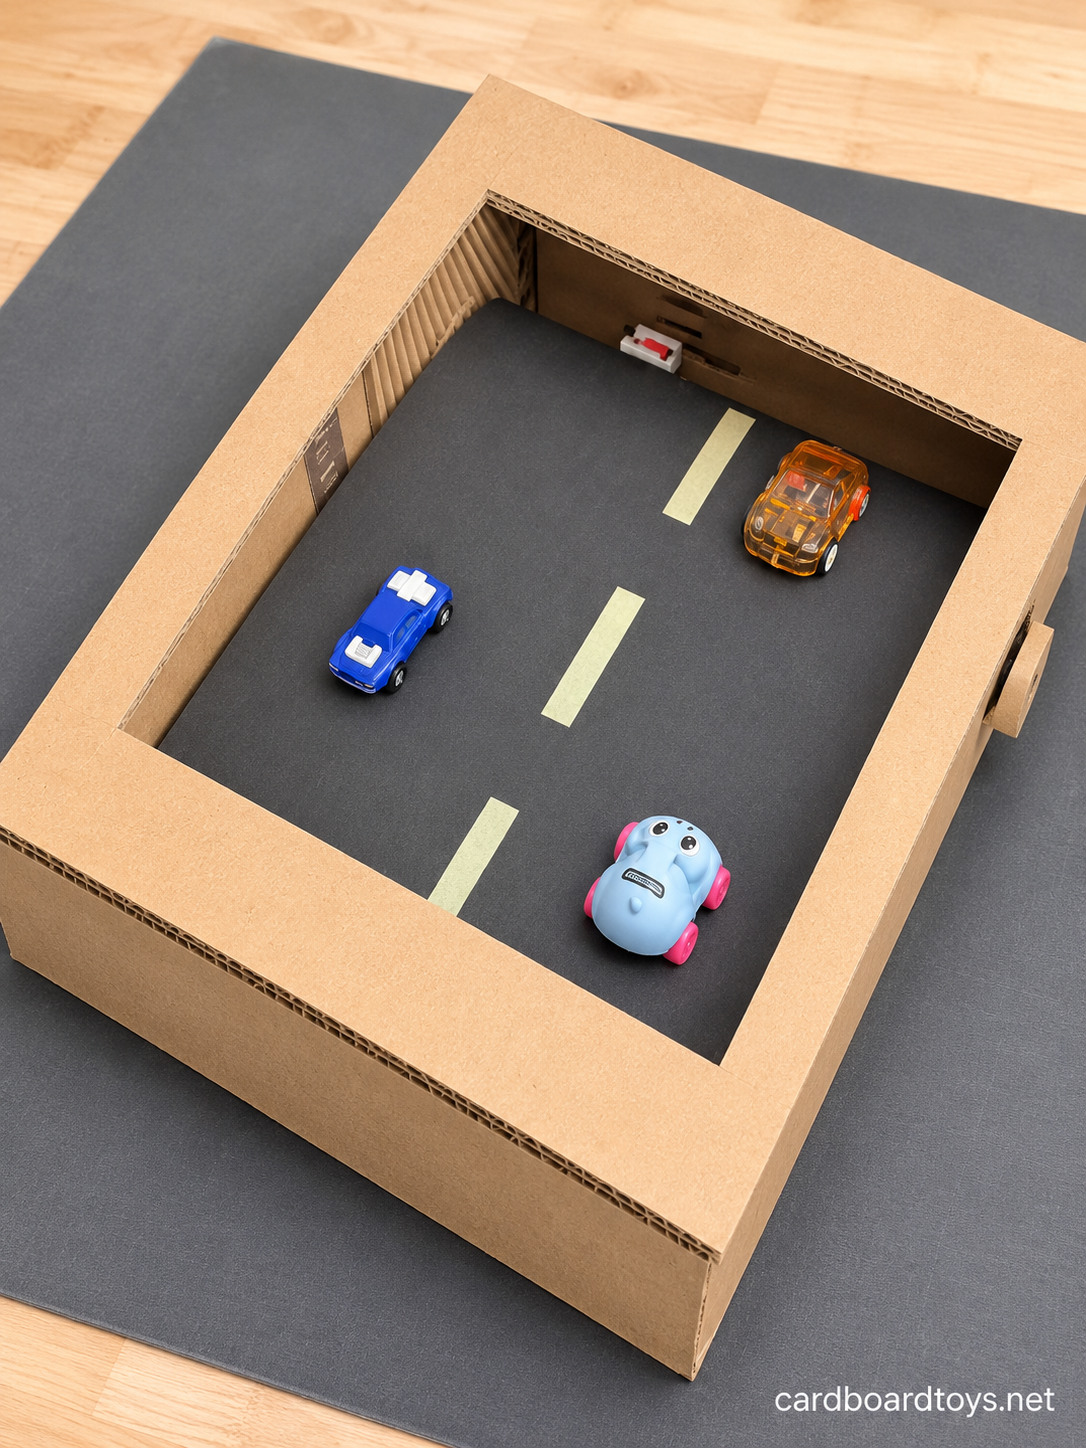
Cut a panel the size of the tray, 12 x 8 1/2 inches, and cut a big window out of the middle, leaving a border about 1 1/4 inches wide. Glue it on top of the walls. The frame hides the rollers and the belt seam, so you only see the road sliding past.
Step 11: Make the Steering Stand
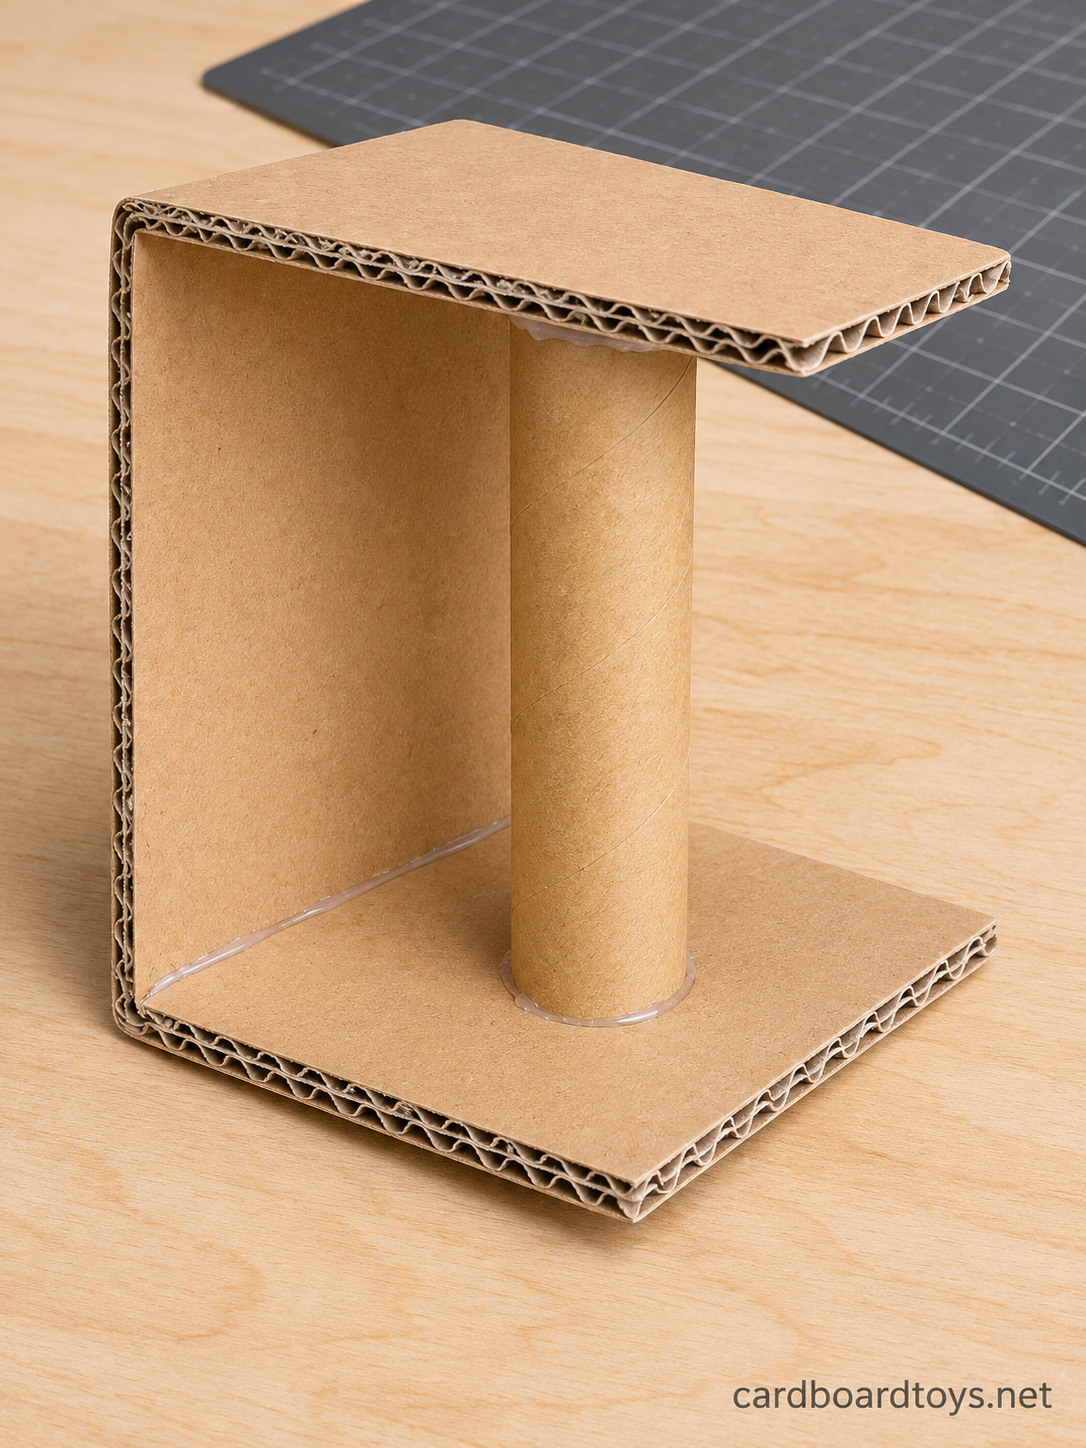
Cut three rectangles about 2 1/2 x 3 inches. Glue them into a C shape: one standing back panel with a shelf at the top and another at the bottom. Cut a 3 inch piece of paper towel tube and stand it inside the C. This is the steering column, and the string will wrap around it.
Step 12: Add the Cap and the Wheel
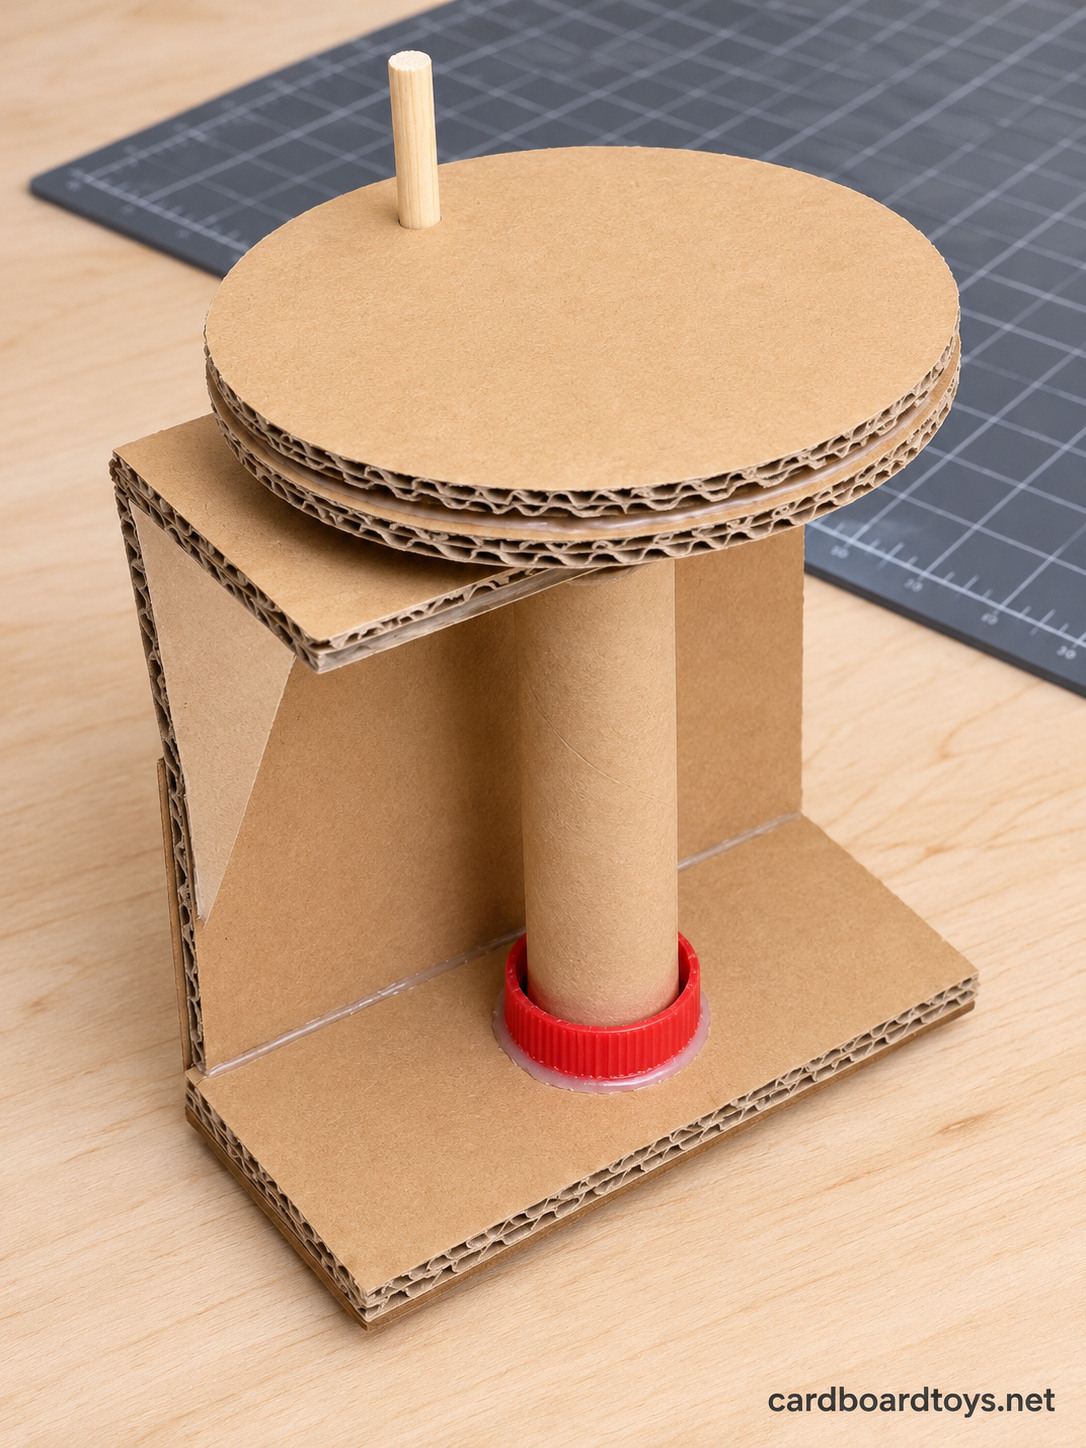
Cut a hole in the top shelf just big enough for the tube. Cut the top out of a bottle cap and glue the ring over the hole. The smooth plastic lets the column turn easily.
Cut two circles about 4 inches (10 cm) wide, glue them together and glue them on top of the tube. Push a short piece of skewer into it near the edge to grip while steering.
Step 13: Attach the Stand to the Tray
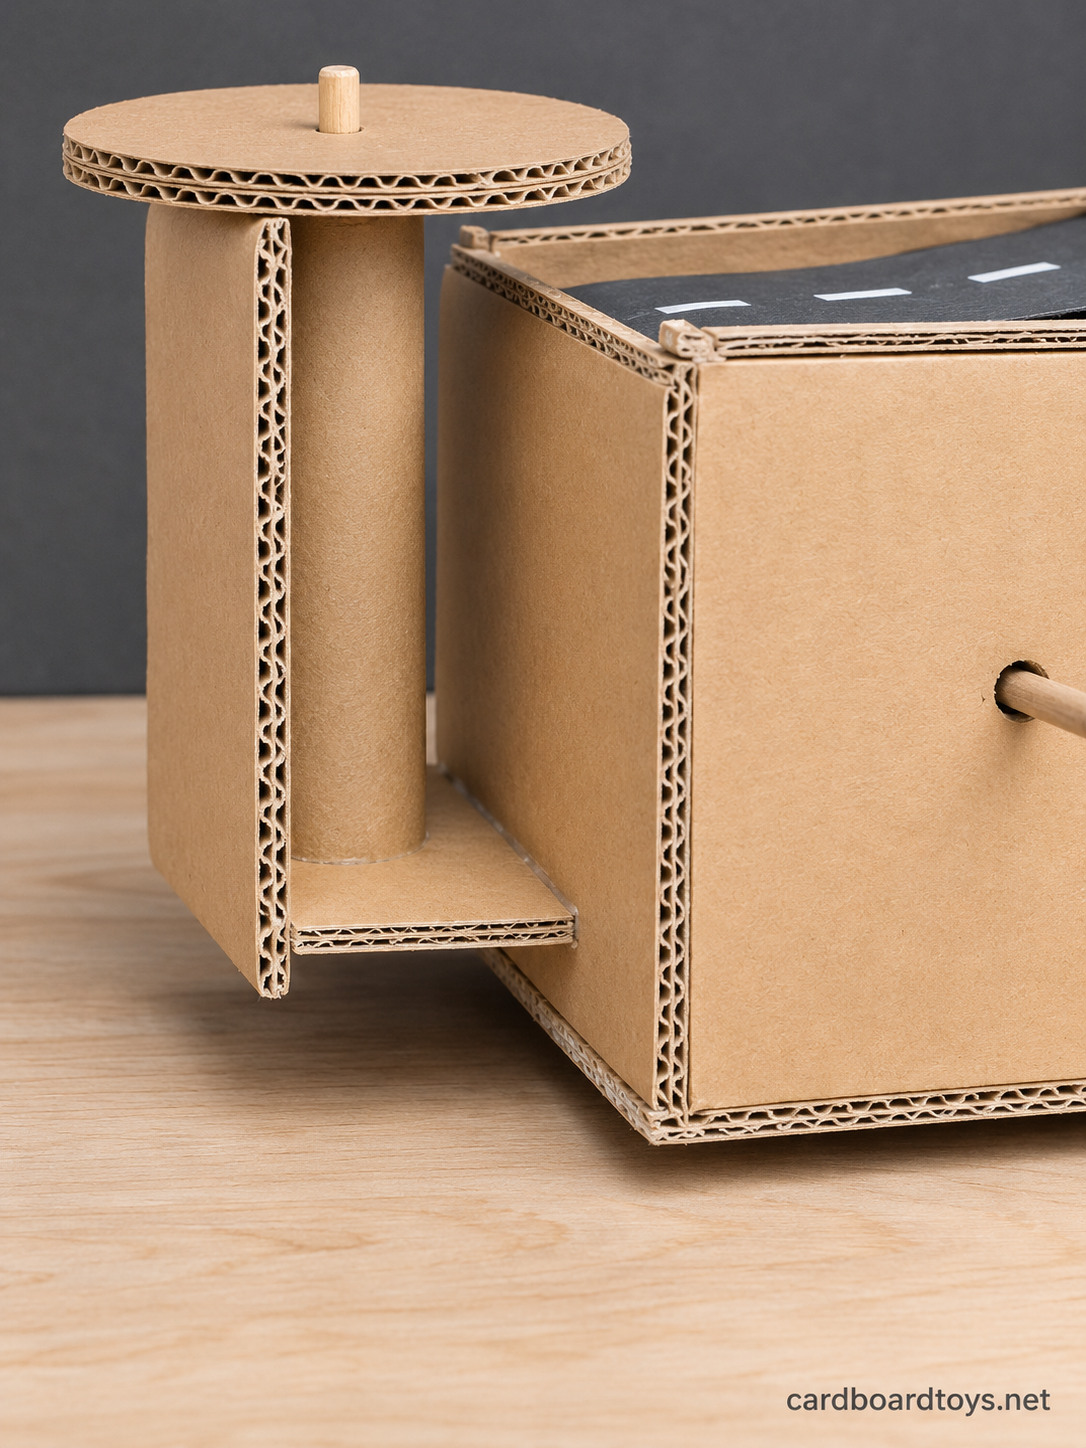
Glue the back of the stand to the middle of the front wall so the wheel sits just above the frame. Turn the wheel and make sure the tube spins without scraping the shelves.
Step 14: Fit the String Guides
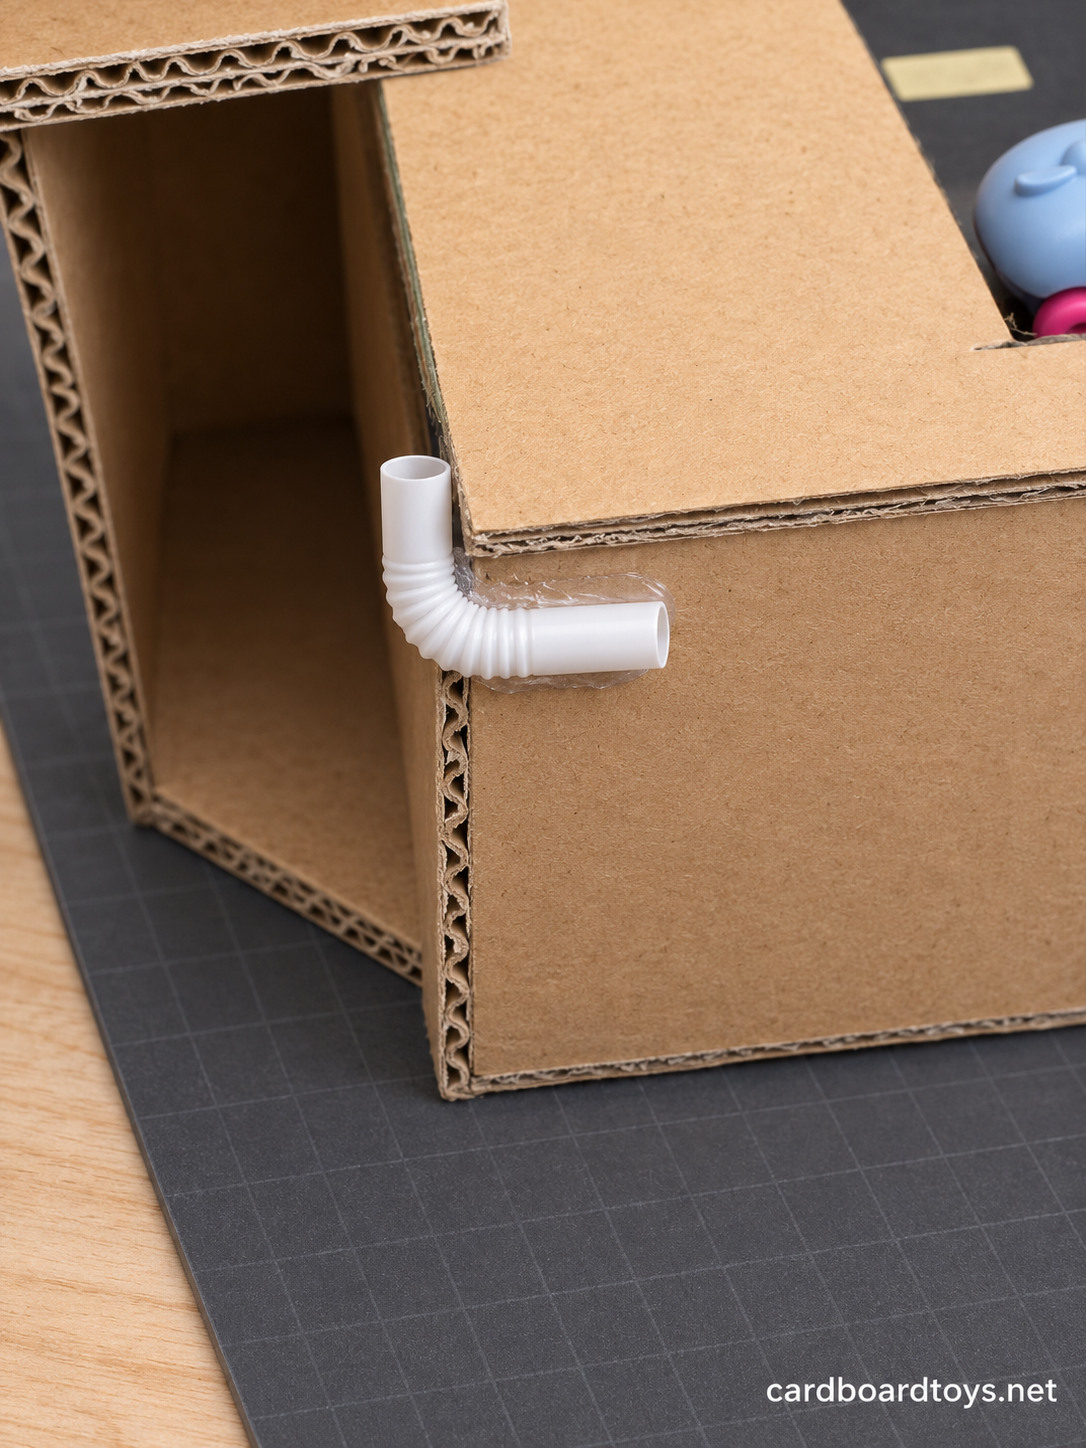
Poke a small hole through each long wall near the front, at the height where the middle of your car will be. Glue a short piece of straw into each hole so the string runs through smooth plastic.
Cut the bendy part off two straws and glue one to each front corner on the outside of the tray. These little elbows steer the string around the corners toward the stand.
Step 15: Thread the Steering String
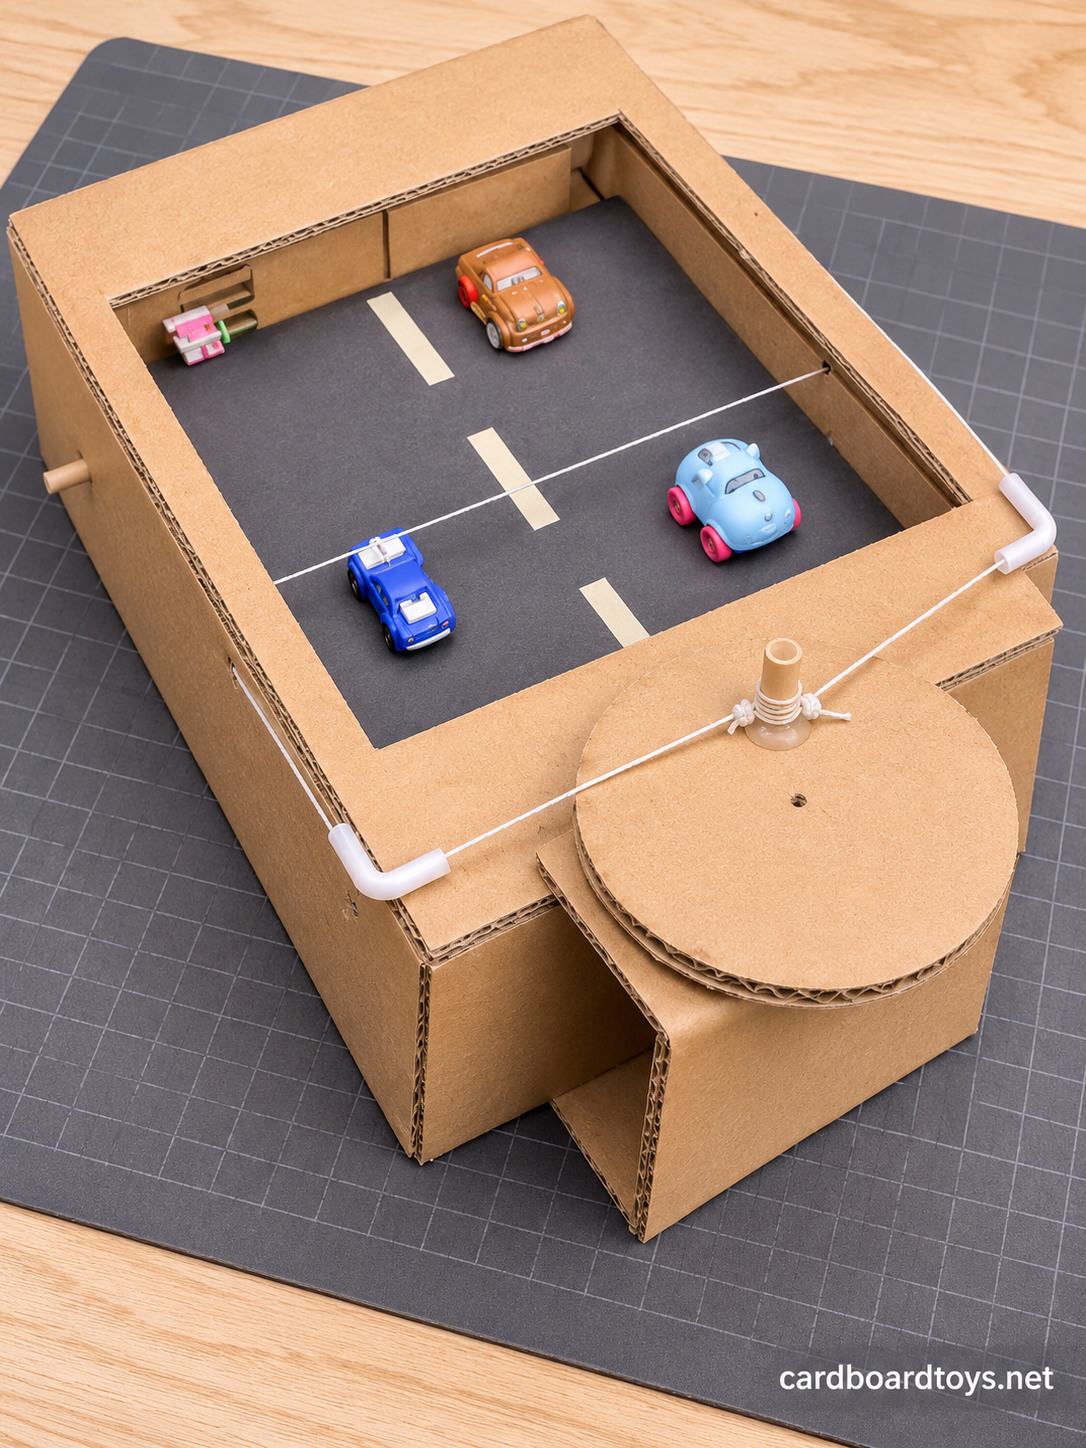
Run the string across the road from one wall hole to the other. On each side, take it along the outside of the wall, through the corner elbow and over to the column. Wind one end around the tube a few turns clockwise and the other end a few turns counterclockwise. Tie both ends to the tube and add a drop of glue.
Turn the wheel and watch: one side should pull in while the other side lets out. Cut off any extra string once it works.
Step 16: Attach Your Car
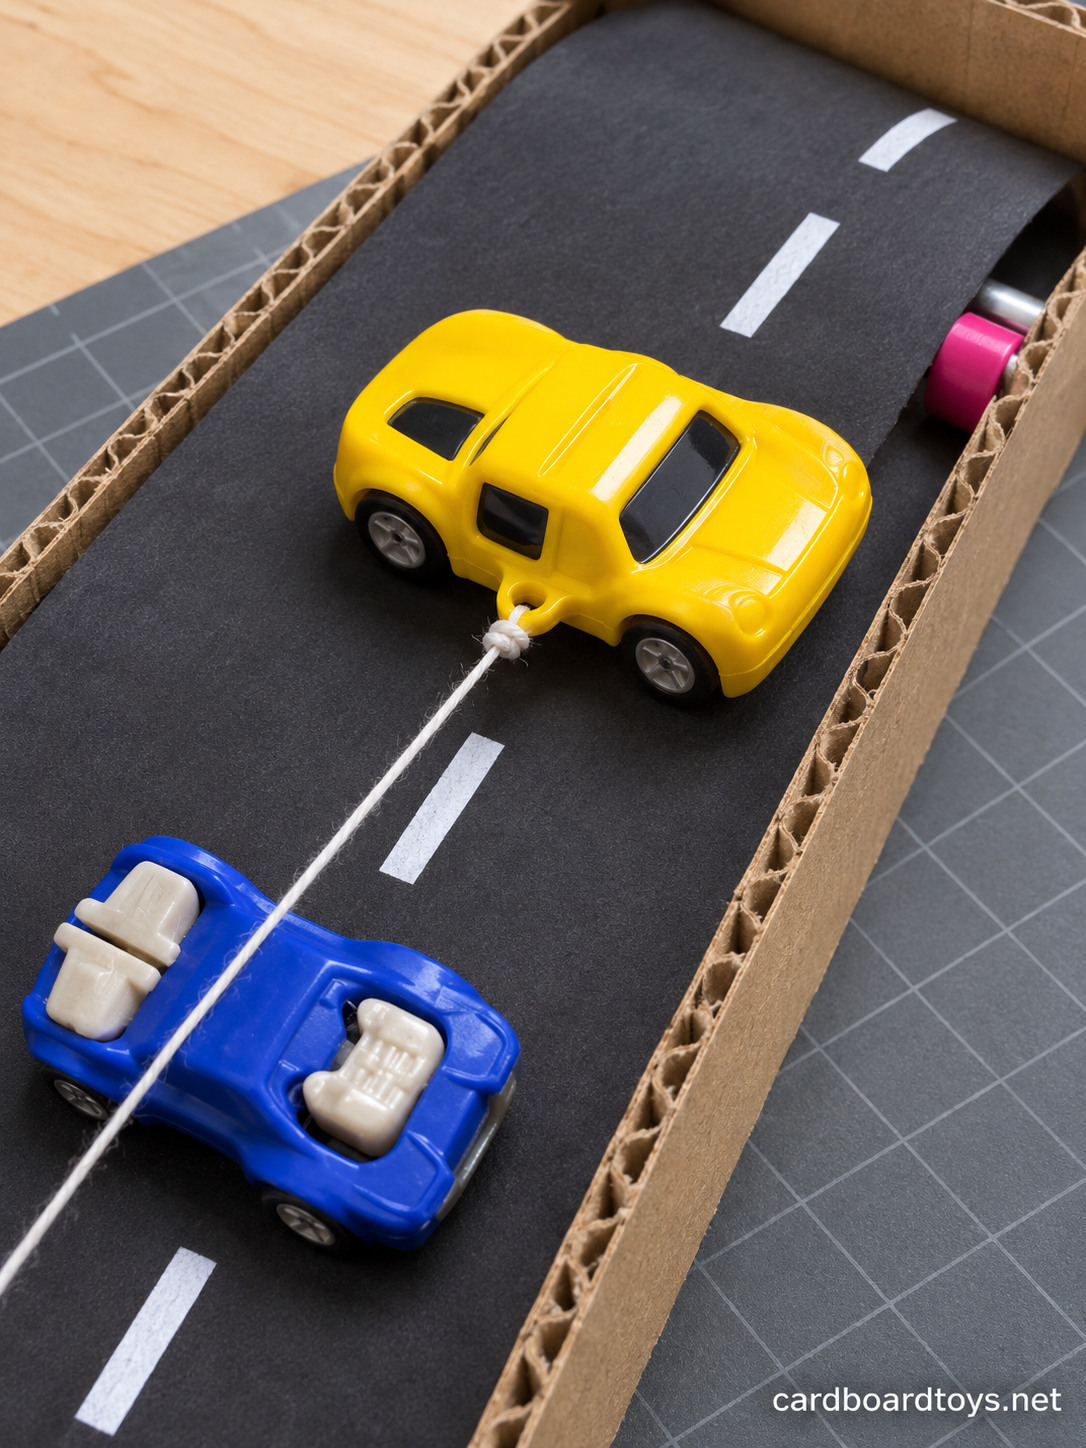
Set your car on the road near the front of the window, right under the string. Tie the string around the middle of the car, or glue it on with a small dot of glue on each side. Now the wheel moves your car across the lanes while the traffic rolls underneath.
Step 17: Finish the Steering Wheel
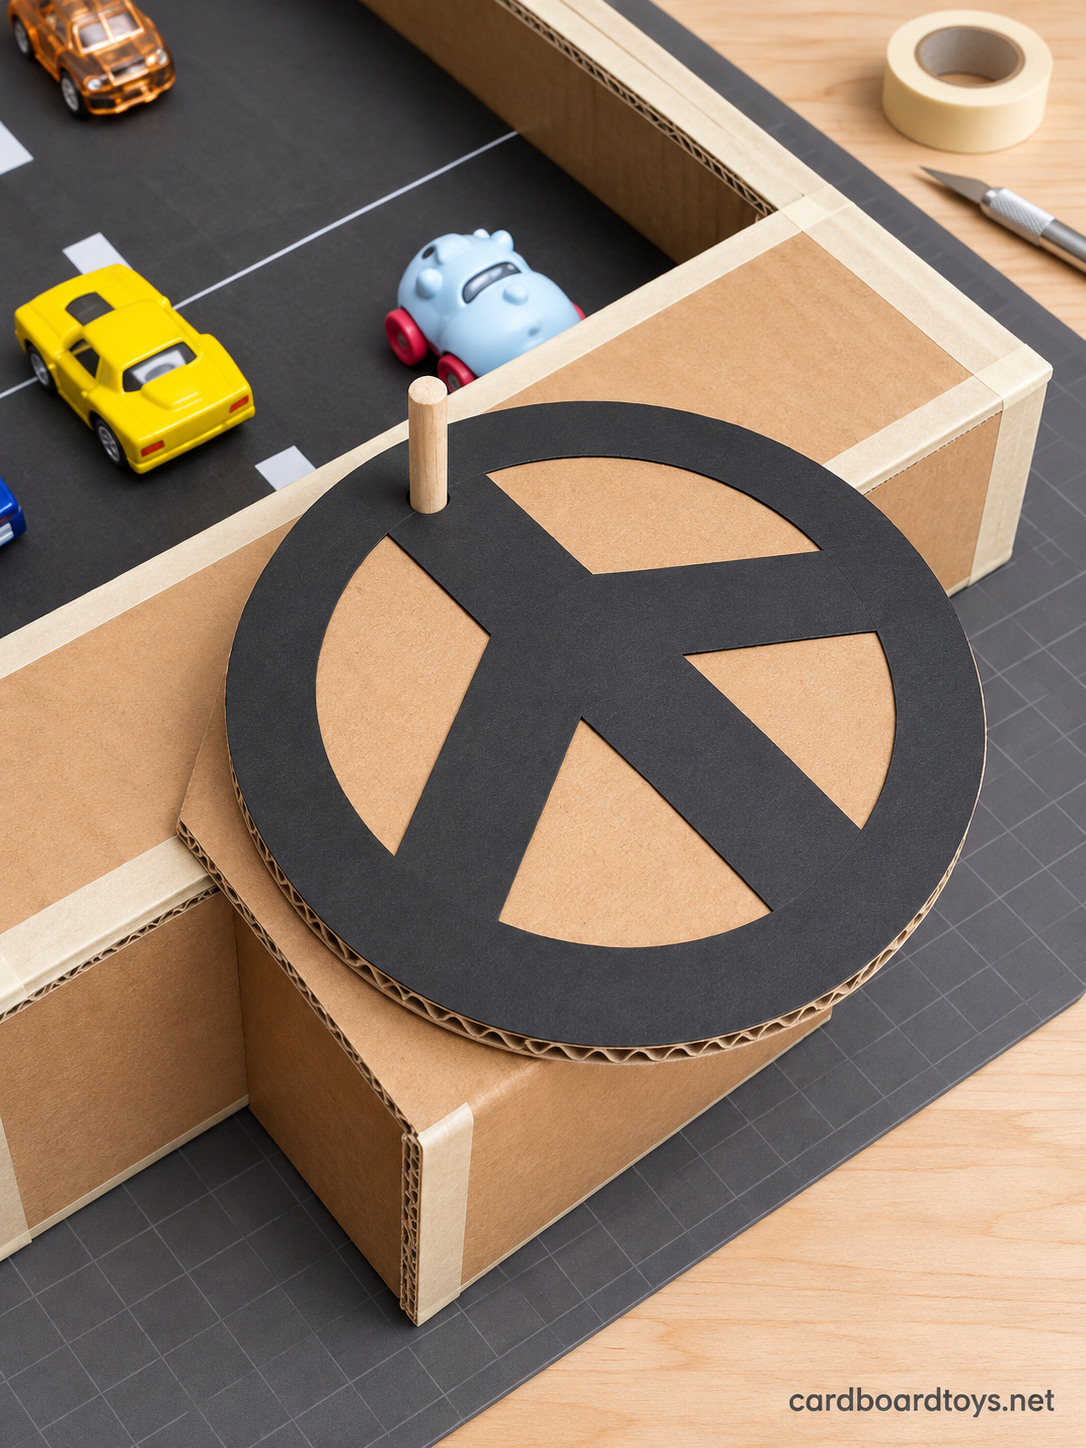
Cut a ring and three spokes from black poster board and glue them on the wheel so it looks like the real thing. Extra strips of masking tape along the frame edges finish the look.
Step 18: Start Driving
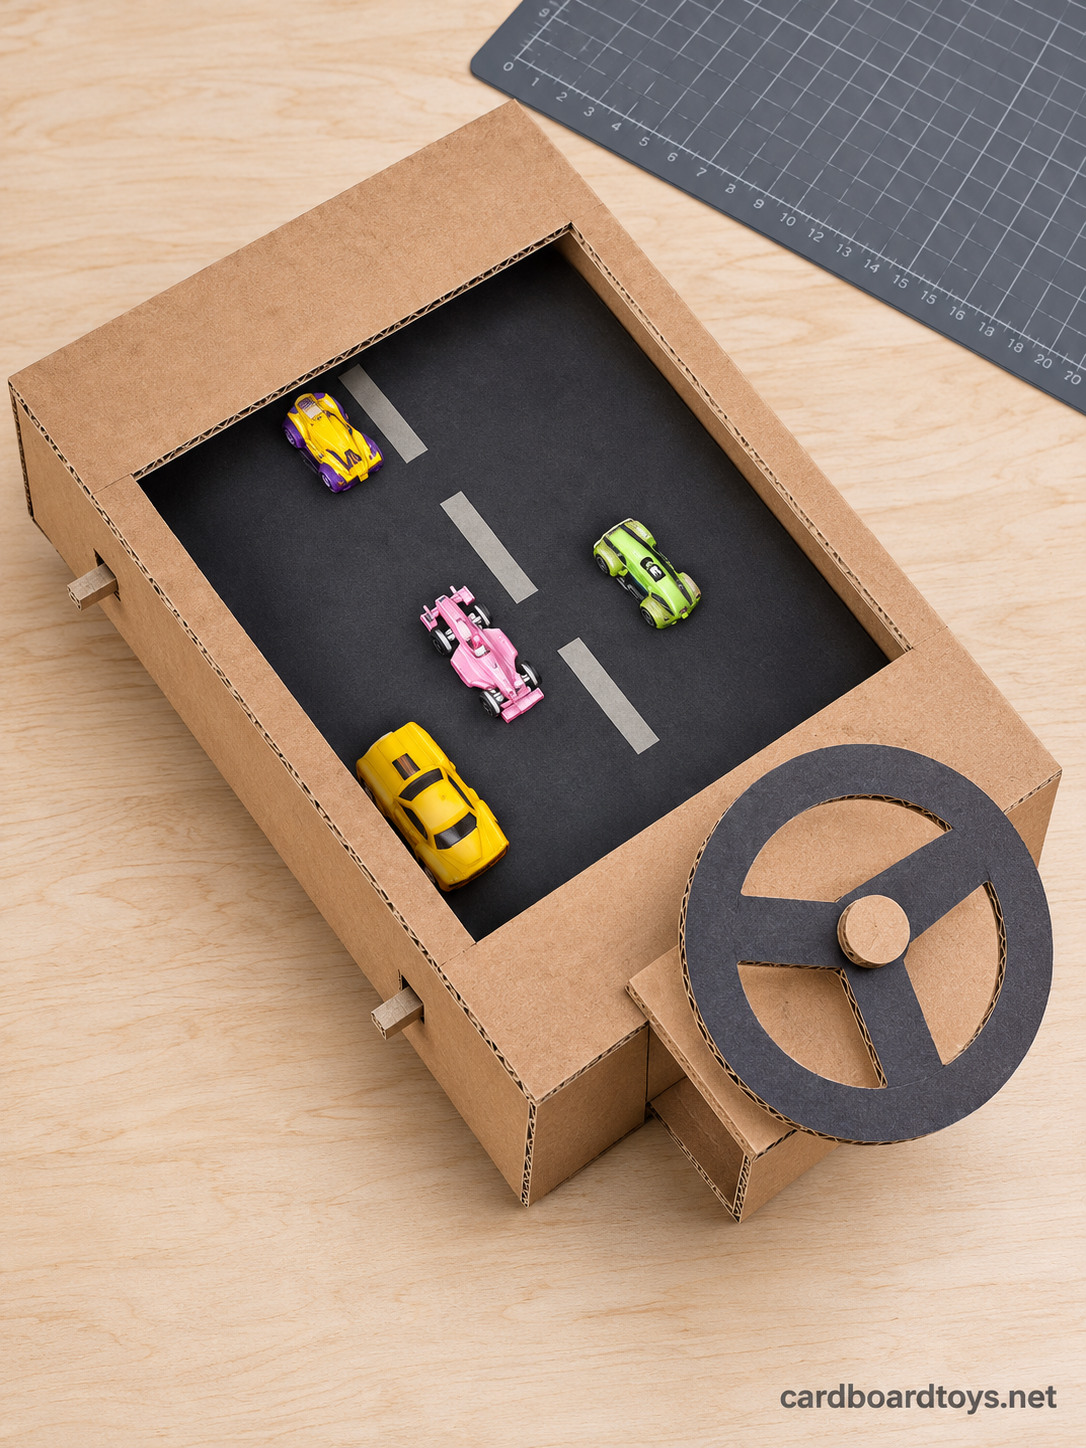
Crank slowly at first and the traffic comes toward you. Steer to slip between the cars. Speed up when you feel brave. Hitting a car ends the turn and the next driver takes over.
If your car rubs on the road, raise the side holes a little so the string lifts it. If the belt stops when a traffic car reaches the frame, that car is too tall to pass under. Swap it for a flatter one.
Save the Plans
Pin the card below so the measurements are ready for the next rainy afternoon.