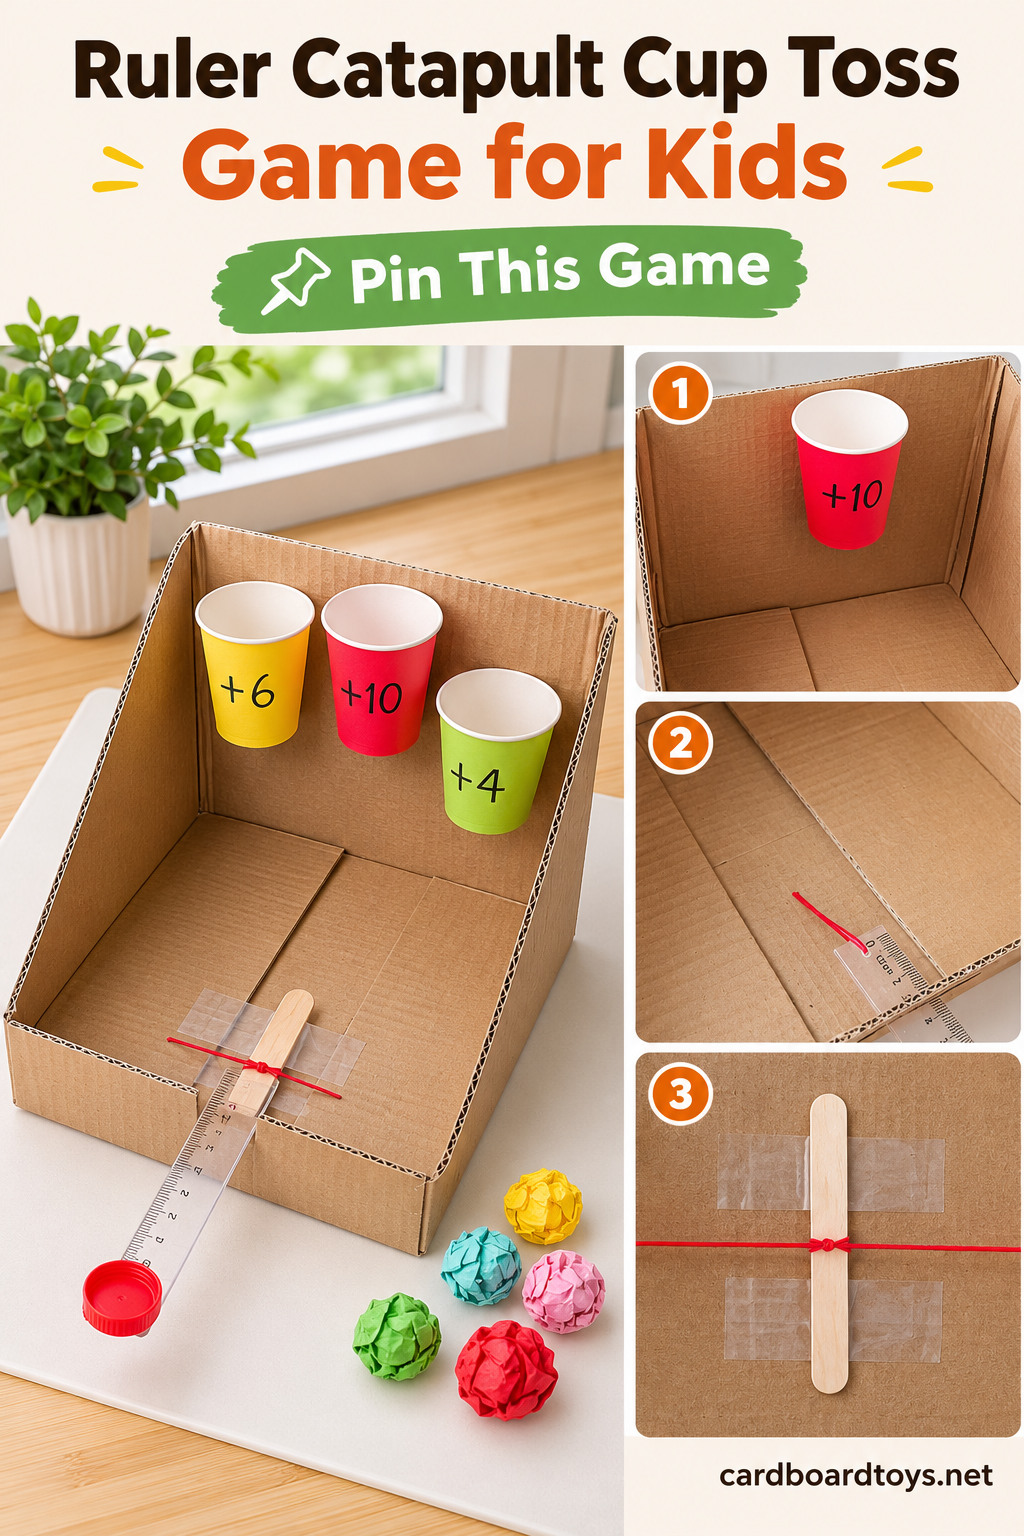

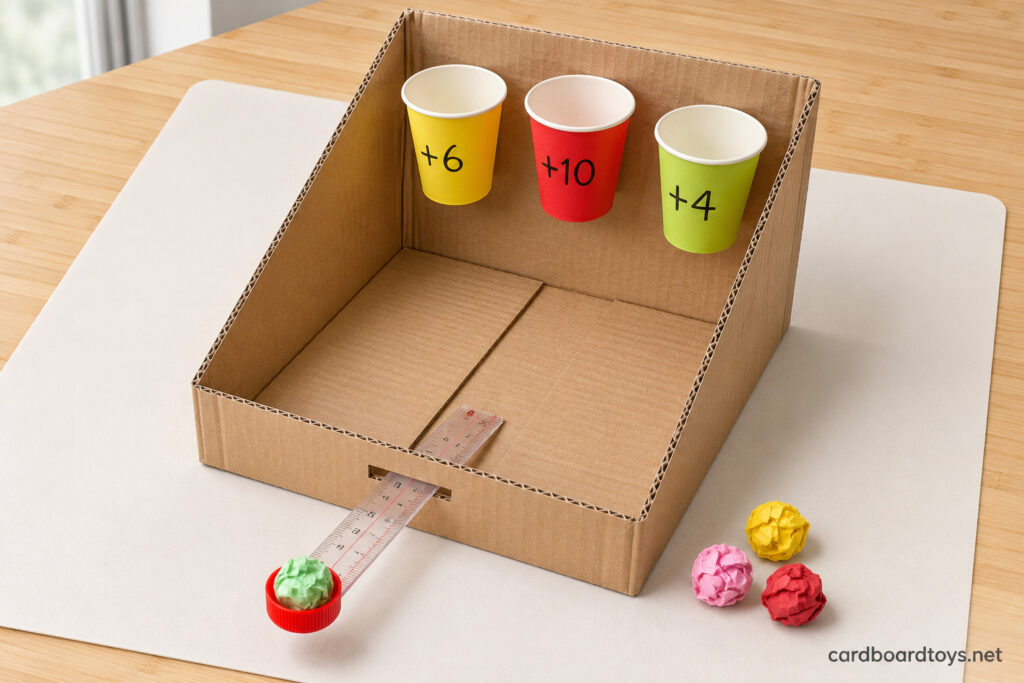
Here is a scoring game where a plastic ruler is the launcher. One end is tied to the floor of a cardboard box, the middle sits in a slot in the front wall, and a bottle cap glued to the outer end holds a paper ball. Push that end down, let go, and the ruler flicks the ball over the wall toward three paper cups worth different points.
There are no rubber bands and no hinges. The spring comes from the plastic itself. With a box, three cups, a ruler and some string, the game is ready in about half an hour.
How the Game Plays
Each player gets five paper balls. Land them in the cups, add up the points, and the highest total wins. The cups hang at different heights, so children soon notice that a deeper press sends the ball higher and farther. They start adjusting their aim after every shot without anyone telling them to.
Adding the scores is quick mental math, and figuring out how hard to press is a first look at force and angle. The build is short and the playing lasts a lot longer, which makes it a good pick for a wet afternoon.
Difficulty at a Glance
- Skill level: easy. Only the slot in the front wall needs a careful cut.
- Time: 30 to 40 minutes.
- Age: 5 and up can write on the cups, tie the string and crumple the balls. An adult should cut the box, make the slot and use the glue gun.
Safety first: use only crumpled paper as ammo. Marbles, beads or anything hard can hurt someone. Point the launcher at the box, never at a face, and let the glue on the cap cool completely before kids touch it.
Tools
- Black marker
- Hot glue gun
- Craft knife
2026 Prices
- 1 reused cardboard box, about 12 in. on each side $0.00
- 3 paper cups in different colors $0.36
- 1 flexible 6 in. plastic ruler with a hole at one end $8.32
- 1 reused plastic bottle cap $0.00
- About 16 in. of thin string $0.02
- 1 craft stick $0.06
- About 2 ft. of clear tape $0.05
- 2 sheets of colored paper $0.08
- About 1 mini hot glue stick $0.12
Total $9.01
Putting It Together
Step 1: Shape the Box
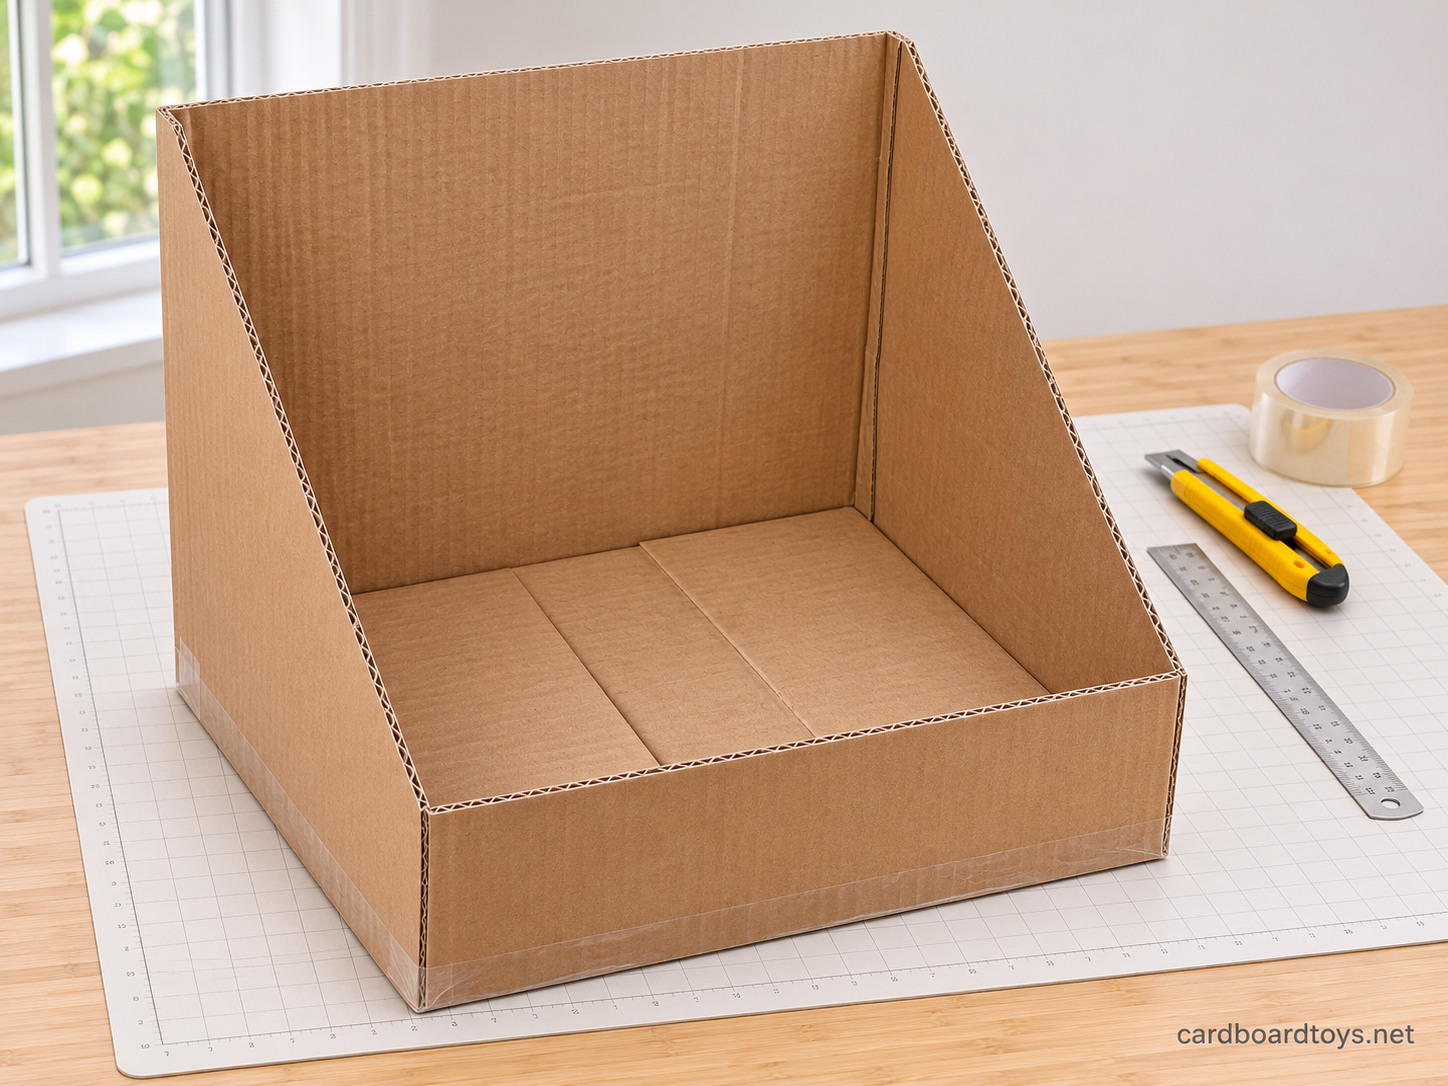
Open the box and cut away all the top flaps. Now cut the two side walls at a slant. Leave them full height at the back and bring them down to about 4 inches (10 cm) at the front. Cut the front wall straight across at the same 4 inches. Keep the bottom closed, and tape any loose bottom flaps from outside so the floor is flat and firm.
The tall back wall is where the cups go. The short front wall lets the ball fly over easily. Draw both slanted lines with a ruler first so the sides match.
Step 2: Number and Hang the Cups
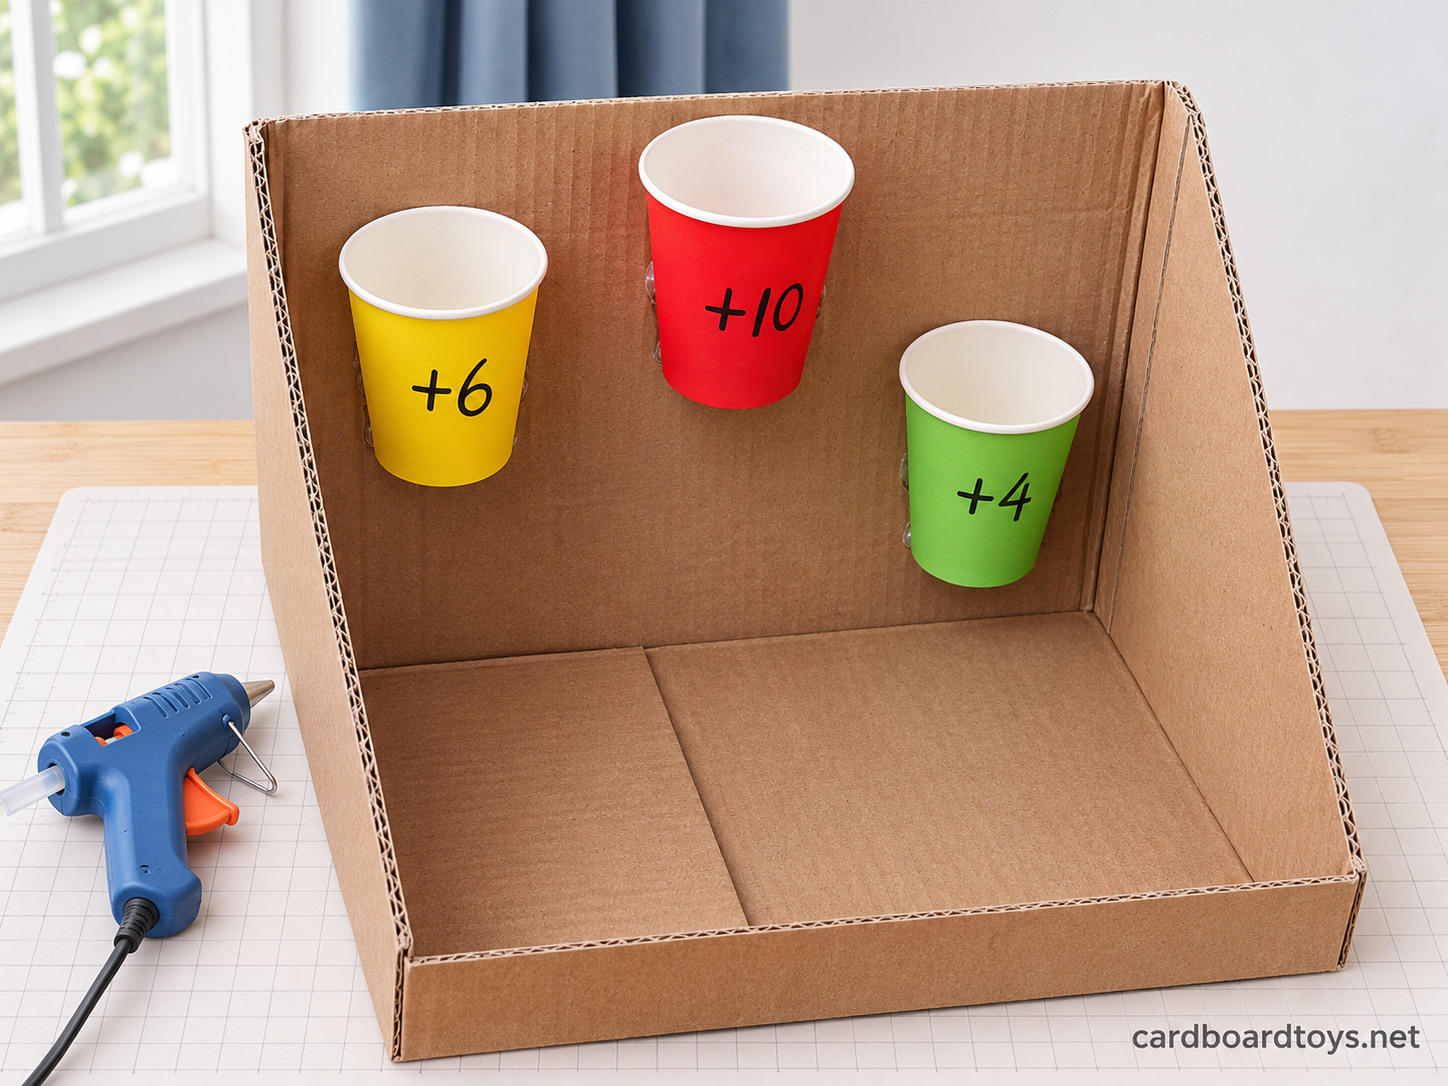
Write a score on each cup: +10 on red, +6 on yellow, +4 on green. Run a line of hot glue down the back of the red cup and stick it high on the back wall in the middle. Put the yellow cup at the same height to the left and the green one a little lower on the right.
Hold each cup for a few seconds while the glue sets, with the opening facing up and tipped slightly toward the player. The top cup is the hardest to hit, so it earns the most points.
Step 3: Stick the Cap on the Ruler
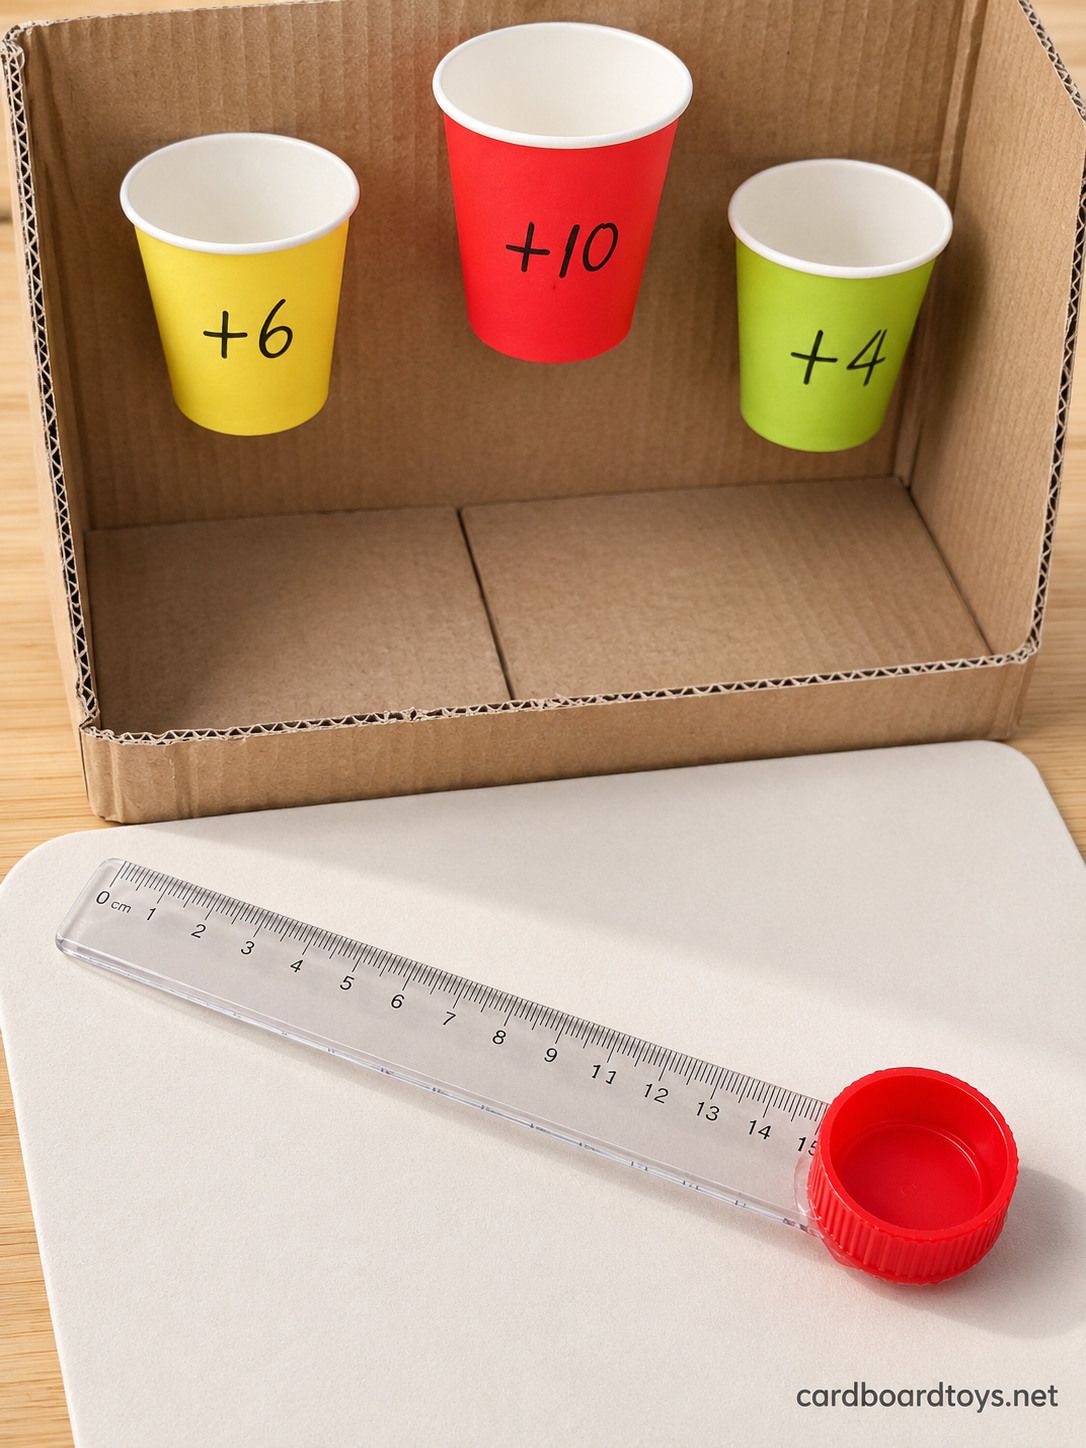
Take the end of the ruler that has no hole. Put a dot of hot glue on the top of the bottle cap and press it onto that end with the open side up. The cap becomes a tiny bowl for the ball. Let it cool and give it a small pull to be sure it is solid.
Step 4: Tie the String to the Ruler
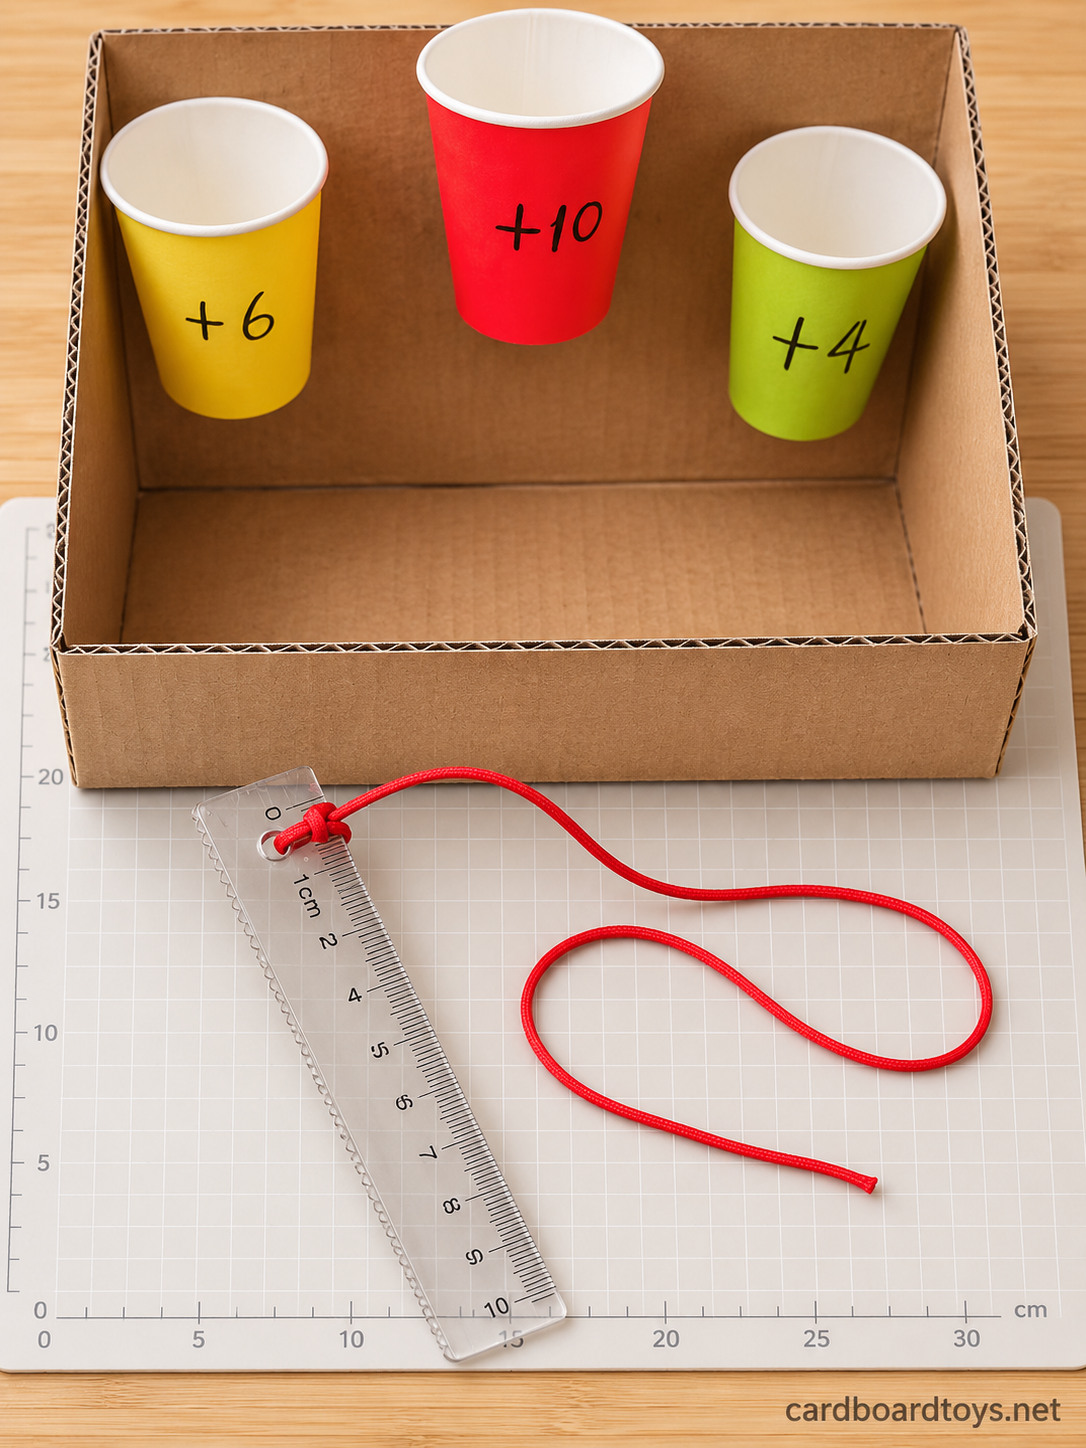
Push the string through the hole at the other end of the ruler and tie a double knot. Leave a long tail, about 12 inches (30 cm). This tail will tie the ruler to the floor of the box.
Step 5: Tape the Floor
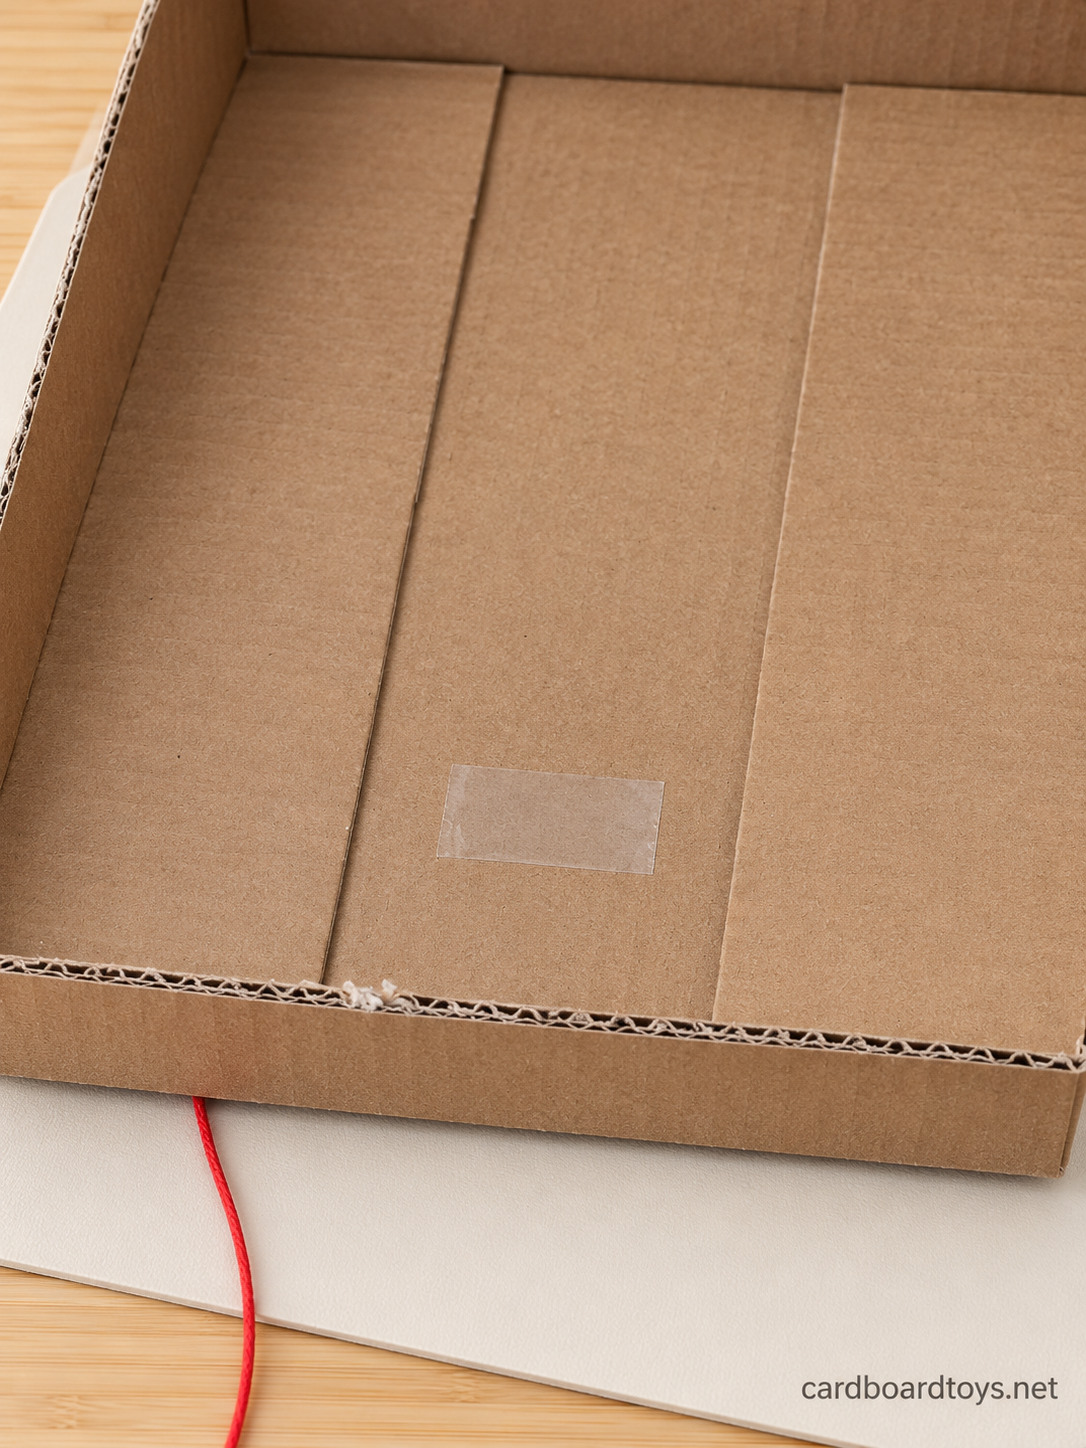
Find the center of the front wall and measure about 1 inch (2.5 cm) straight back along the floor. Cover that spot with two or three overlapping strips of clear tape. Every shot pulls on this spot, and the tape stops the cardboard from ripping.
Step 6: Make a Hole in the Tape Patch
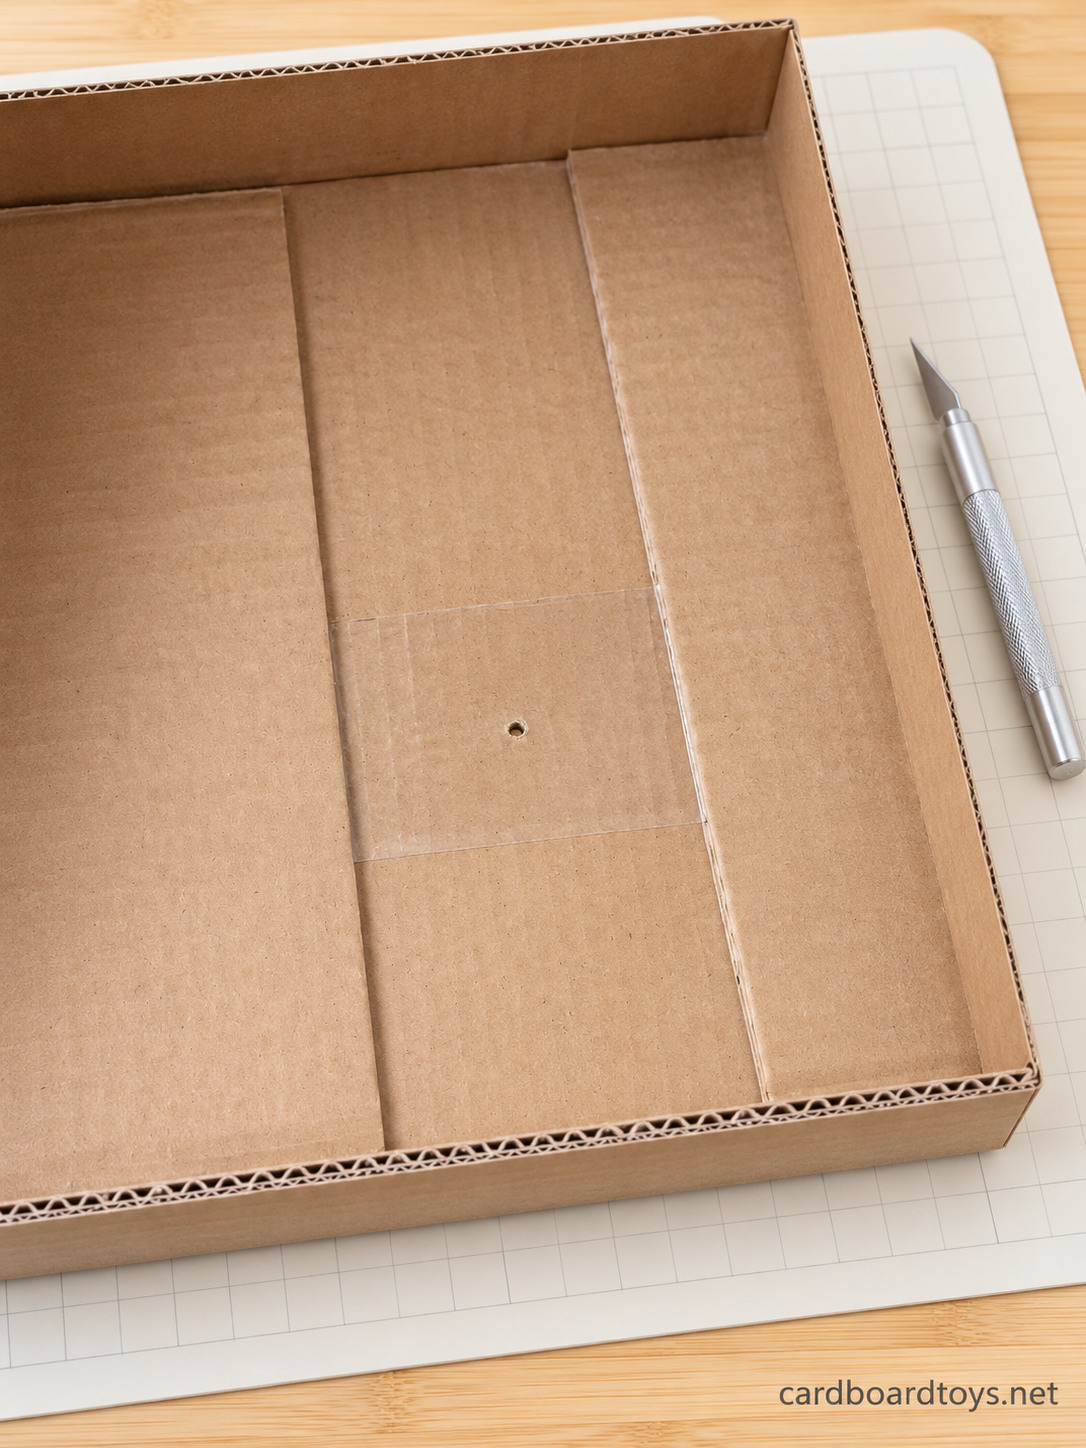
Push the knife tip or a pencil through the middle of the taped patch to make a small hole in the floor. It only has to be big enough for the string.
Step 7: Cut the Ruler Slot
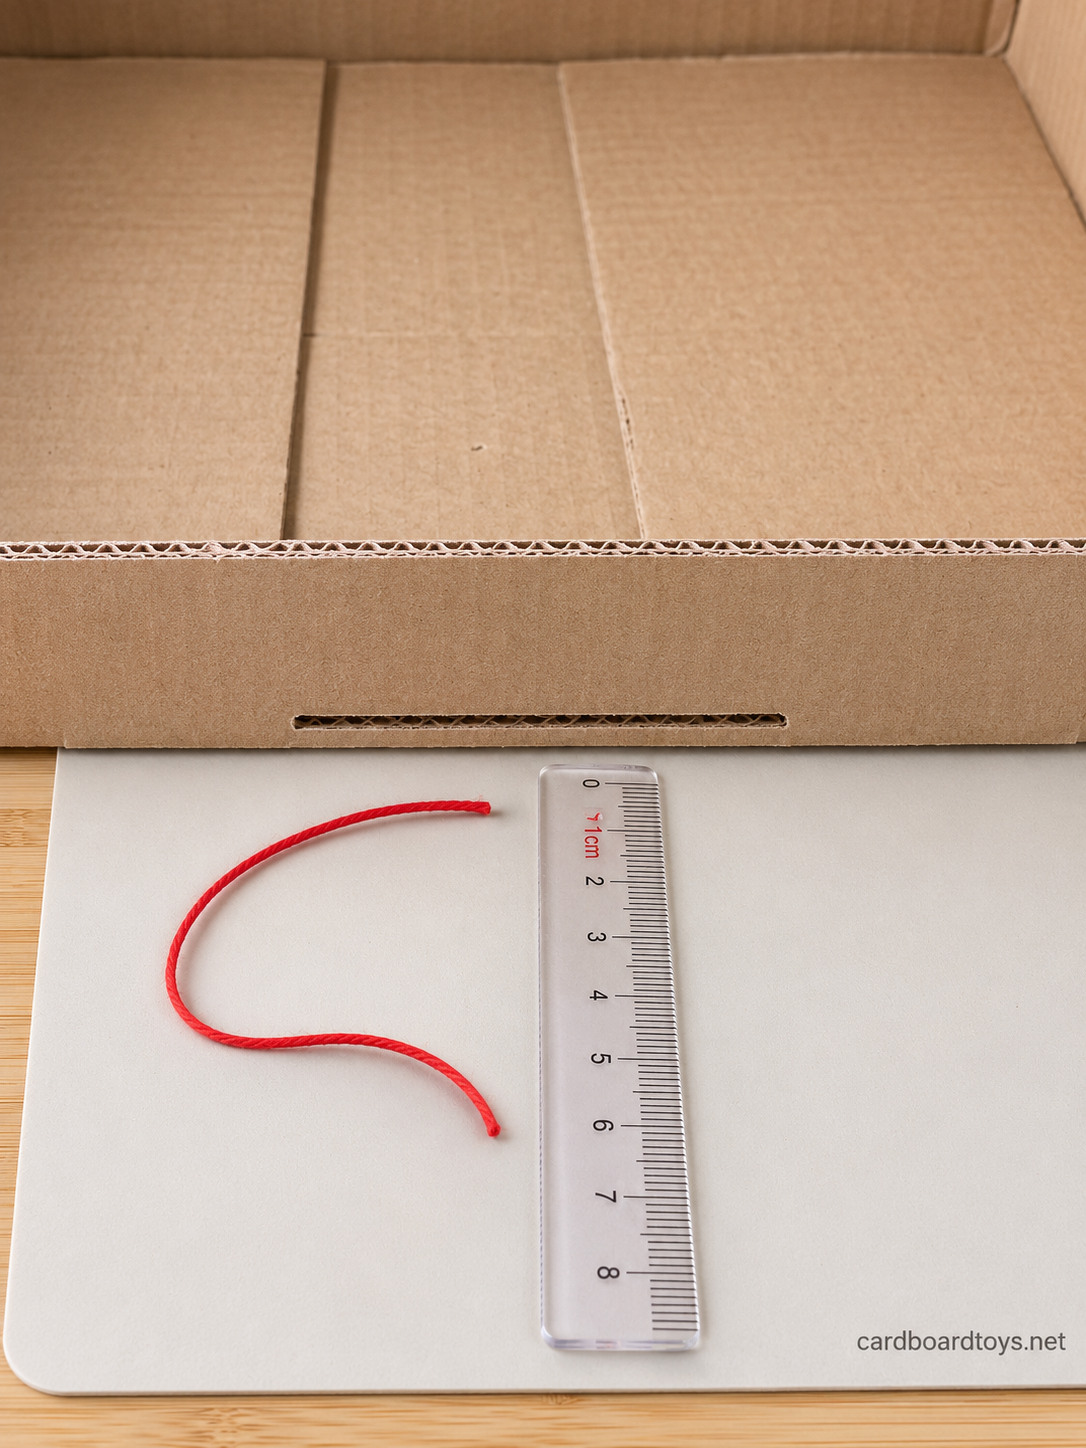
Hold the ruler flat against the outside of the front wall, centered and right at floor level, in line with the floor hole. Mark its width. Cut a thin slot there at the very bottom of the wall, a little wider than the ruler and about 1/4 inch (6 mm) high.
Slide the ruler in to test. It should move through easily without flopping. Start with a tight slot. You can always make it bigger, never smaller.
Step 8: Push the Ruler Through
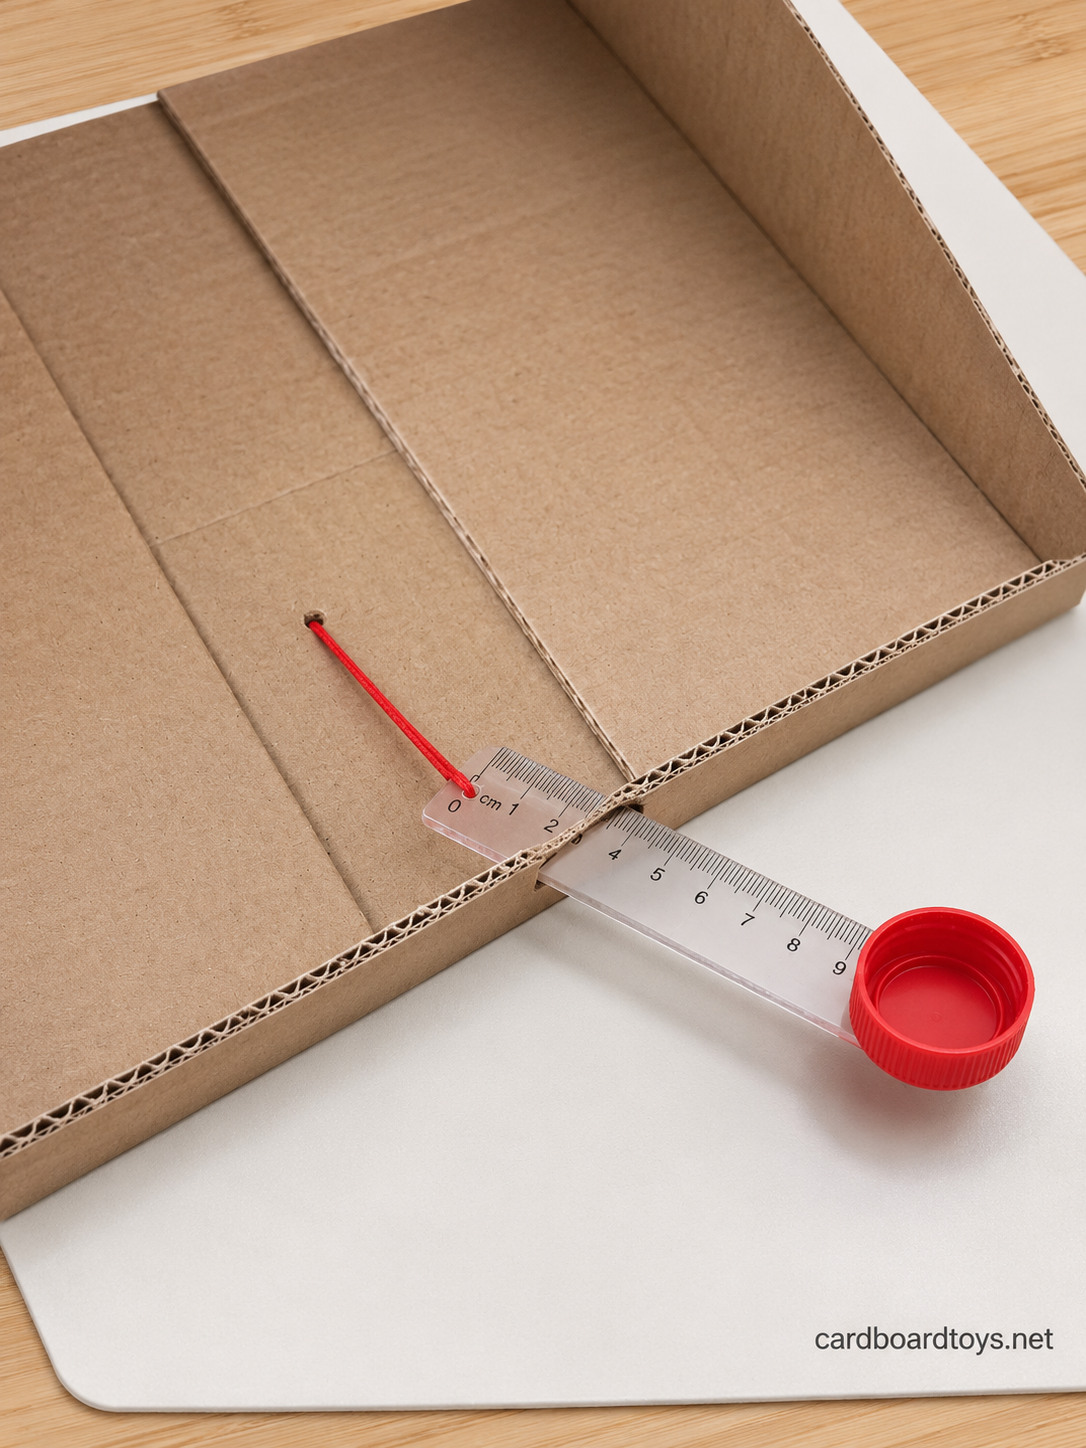
From outside the box, feed the string end of the ruler through the slot. Push the string tail down through the floor hole. Slide the ruler in until its hole sits right above the floor hole, about 1 inch inside the box. The rest of the ruler, cap included, stays outside with the cap facing up.
Step 9: Lock the String Under the Box
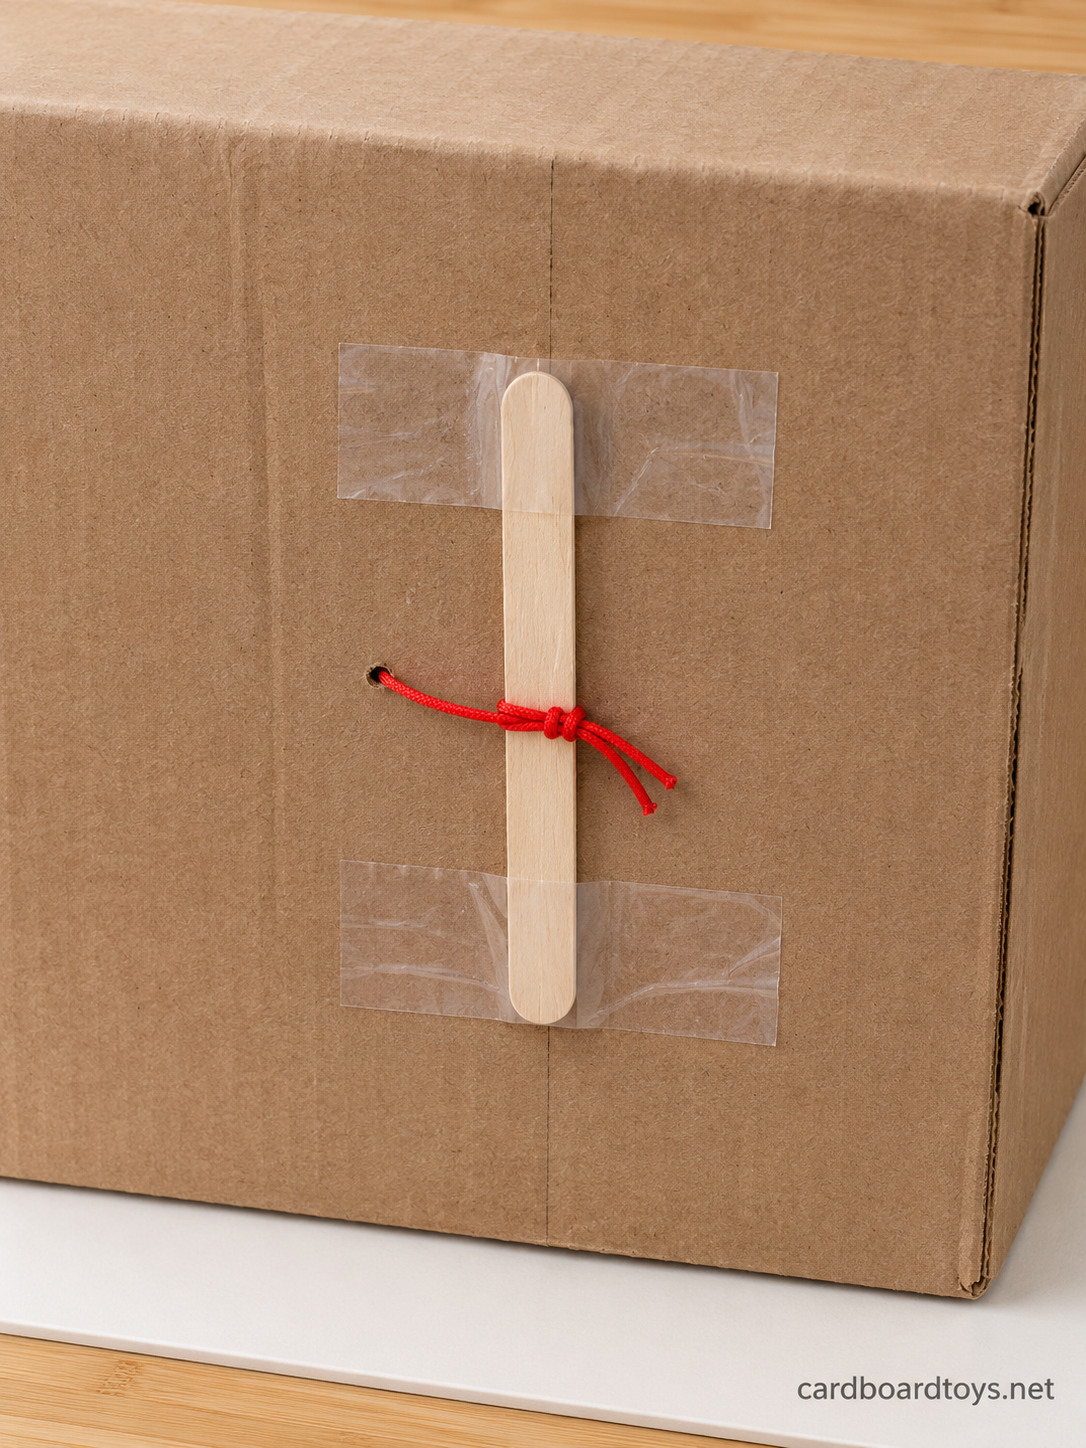
Tip the box onto its back so the bottom faces you. Tape the craft stick flat across the bottom next to the hole, with tape over both ends of the stick. Pull the string until the inside end of the ruler is pressed tight to the floor, then tie it around the middle of the stick with a double knot. Cut off the extra.
The stick spreads the pull so the knot can never slip through the hole. Make the string tight. If the inside end of the ruler can lift up, the shot loses most of its power.
Step 10: Crumple the Balls
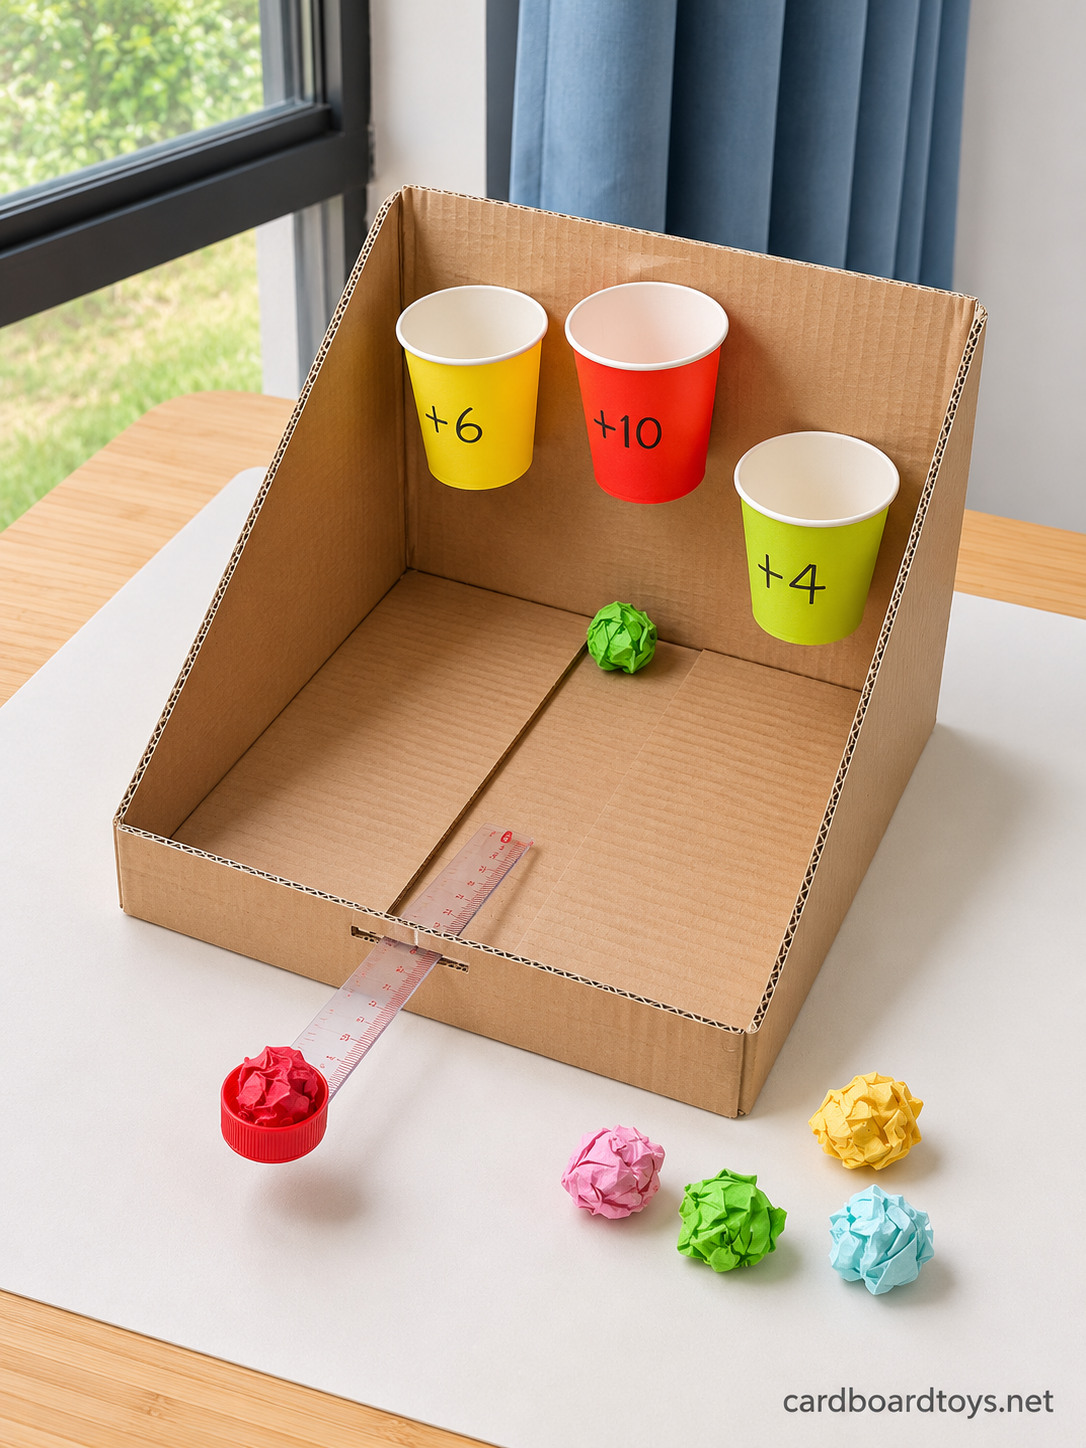
Tear colored paper into squares about 4 inches (10 cm) wide and scrunch each one into a loose ball. A good ball rests in the cap without rolling off but is still light enough to fly. Make at least five per player, in different colors so everyone knows which shots are theirs.
Put the box on a table with the cap end facing the player and drop a ball in the cap.
Step 11: Launch and Keep Score
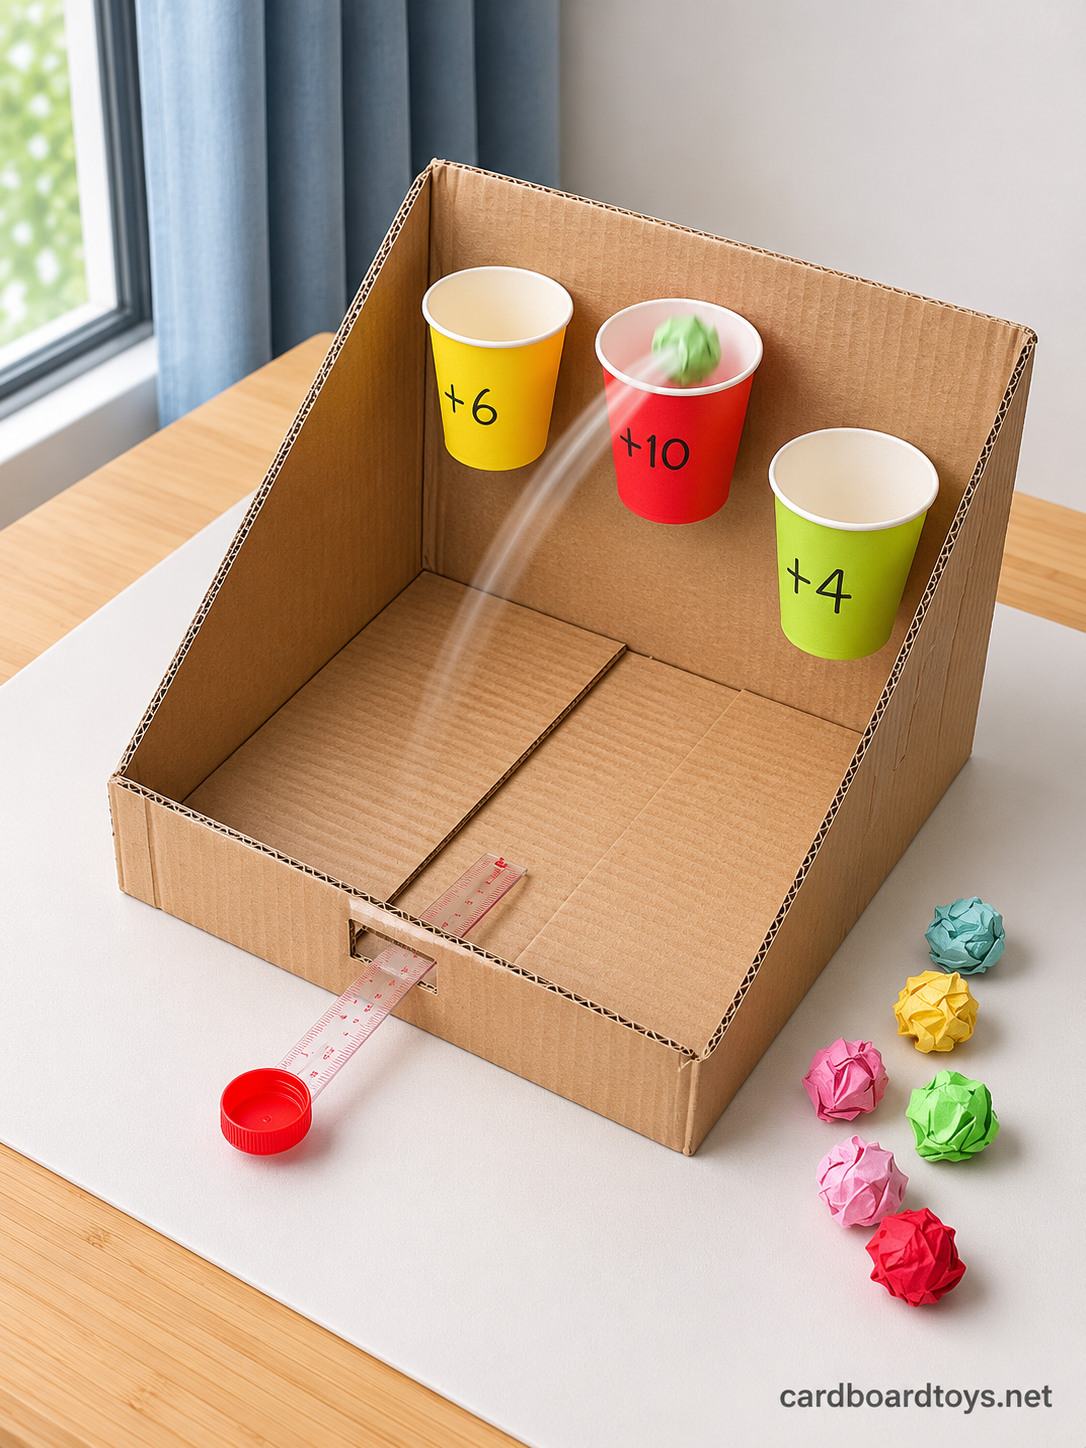
Press the cap end down toward the table with one finger, then lift your finger away. The inside end is tied down, so the ruler bends against the edge of the slot and springs back, throwing the ball over the front wall toward the cups.
Five shots each, write down the points and see who wins. Falling short? Press a bit deeper. Flying over the back? Press less, or try a slightly bigger, lighter ball.
A ruler that slides around needs a tighter string under the box. A ruler that barely springs is usually sitting in a slot that is too tall, so it tilts instead of bending.
Watch It Work
The clip shows one press of the ruler sending a paper ball into a cup.
Pin This Game
Save the card below to remember the slot position and the craft stick anchor when a friend wants a game of their own.