
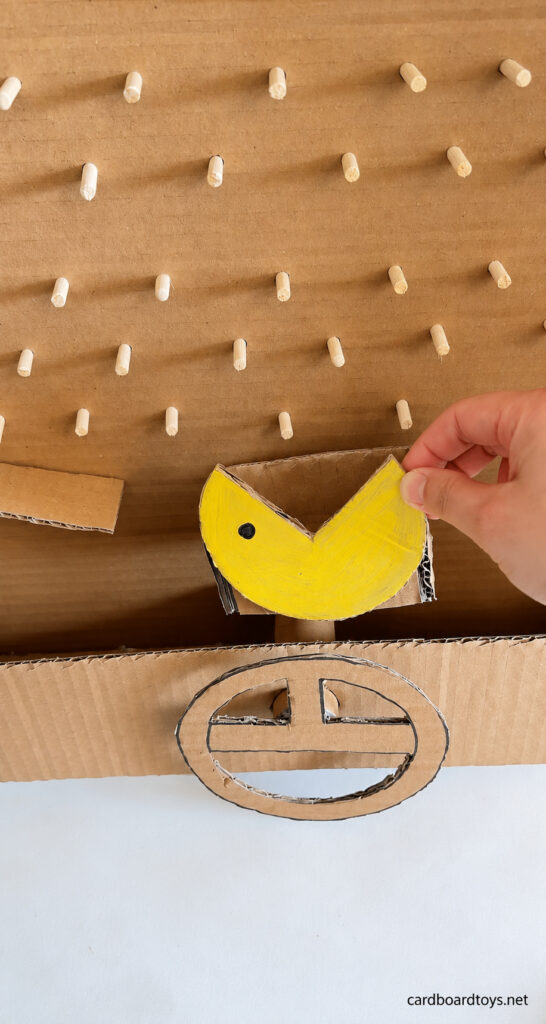
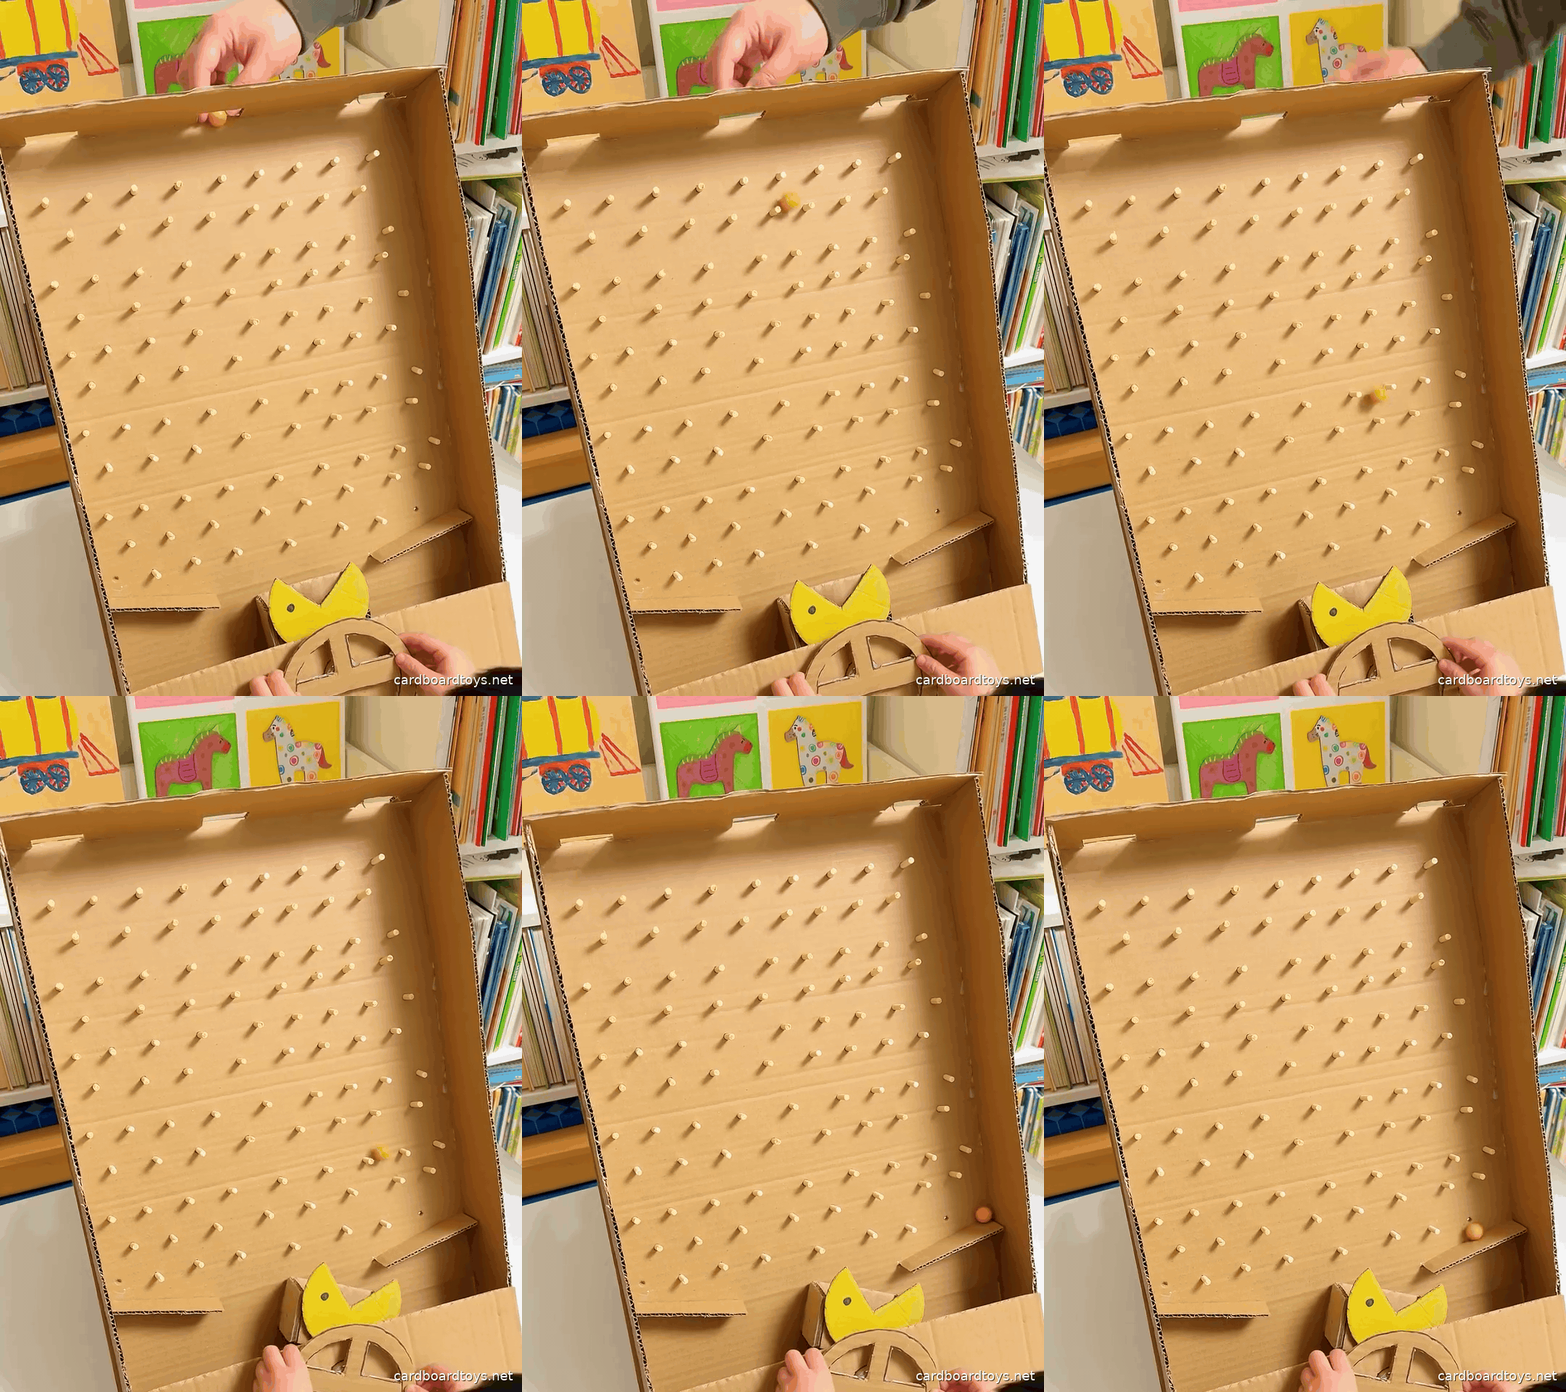
A small ball takes an unpredictable route down this homemade pegboard, but the player has a useful control at the bottom. Turning a cardboard steering wheel rotates a yellow catcher, bringing its open mouth toward the next bounce. This DIY falling ball game combines a shallow box, short wooden pegs, and a paper tube axle in one upright play board. Two sloping guides bring balls from the edges back toward the catcher, while the lower front panel holds the turning mechanism. The challenge comes from watching the ball and adjusting the mouth before it reaches the bottom. Start with one ball at a time, then count how many catches can be made in five drops. The construction below keeps the simple brown board and yellow character, with close views of the holes, wheel, and catching pocket.
Difficulty and Project Time
Difficulty Medium. The repeated peg holes take patience, and the wheel and catcher need to turn together without rubbing against the front panel. An adult should prepare the wooden pieces, make the holes, cut the cardboard openings, and handle the hot glue. Allow about 2 to 3 hours for assembly, with extra time for paint and adhesive to dry. The finished activity suits children who can follow the small ball rules and use the wheel gently, with an adult supervising play.
Materials
- One firm, shallow corrugated cardboard box or lid, approximately 50 by 75 cm, with sides about 8 to 12 cm deep. Adjust the other parts to the box available.
- About 16 clean, unused, round wooden or bamboo takeaway chopsticks saved from earlier meals, approximately 20 to 23 cm long. These provide roughly 100 to 120 short pegs after trimming.
- Reclaimed corrugated cardboard for one front panel, one steering wheel, two side guides, and a small catching pocket with a yellow face.
- One clean, dry paper roll tube, about 4 cm across and 9 to 11 cm long.
- Three small colored play balls from an existing toy set, approximately 15 to 20 mm across. Use one ball at a time.
- About three glue sticks, 10.8 by 100 mm, for the fixed cardboard joints and peg backs.
- About 10 mL yellow water based craft paint for the catcher face.
Tools
- Pencil, ruler, black marker, and a small plate or compass for drawing circles.
- Suitable wood cutting snips or a fine craft saw, plus fine sandpaper for the peg ends.
- An awl or small screwdriver for opening pilot holes, with a firm sacrificial backing board.
- Craft scissors, a utility knife, and a cutting mat.
- A glue gun with its stand and a heat resistant work surface.
- A small paintbrush and a scrap of paper for checking the ball clearances.
2026 Prices
- Reused cardboard box and scraps A$0.00
- Reclaimed unused takeaway chopsticks A$0.00
- Reused paper roll tube A$0.00
- Three play balls from an existing set A$0.00
- Three glue sticks approximately A$0.75
- Yellow craft paint approximately A$0.07
Total A$0.82
Make the Pegboard and Turning Catcher
1 Prepare the Shallow Box
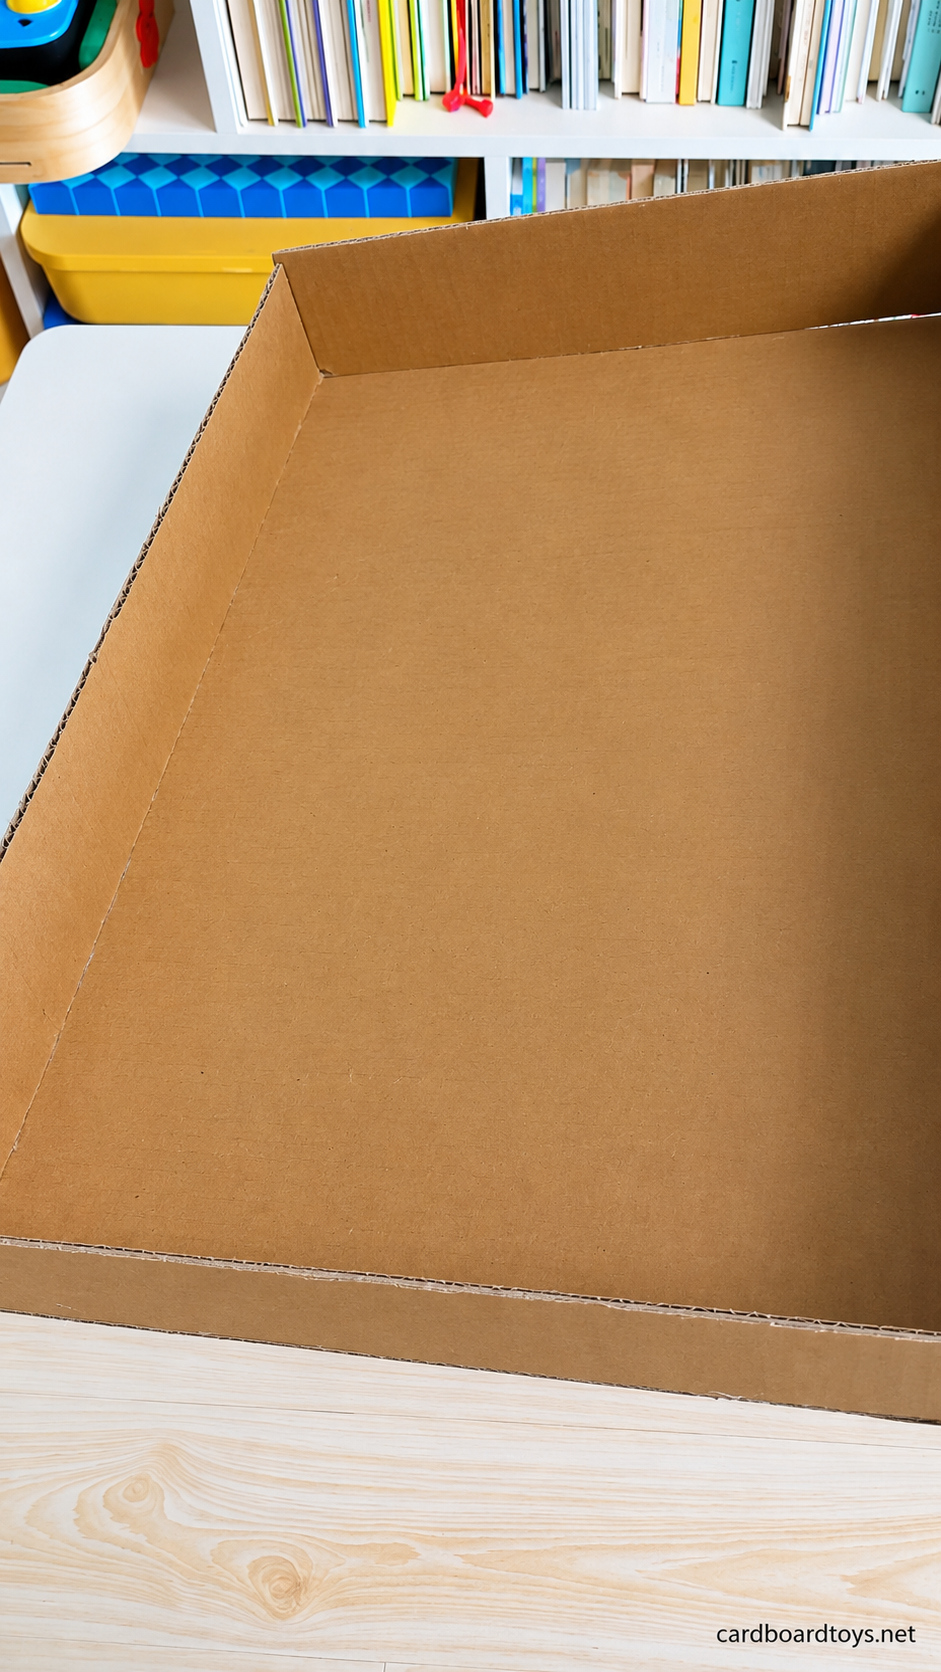
Choose a lid or tray with a flat, firm base and intact corners. Set it on the table with its open side facing up and its longer dimension running away from the player. This base will become the upright pegboard. Remove loose packaging and reinforce any separating corner seams with glue, keeping the inside playing surface smooth. Check that the sides are deep enough to contain the balls when the board is tilted. Leave a clear band across the lower end for the catcher and wheel axle. Before adding parts, stand the empty tray briefly on its short edge to check that it keeps its shape.
2 Trim the Wooden Pegs
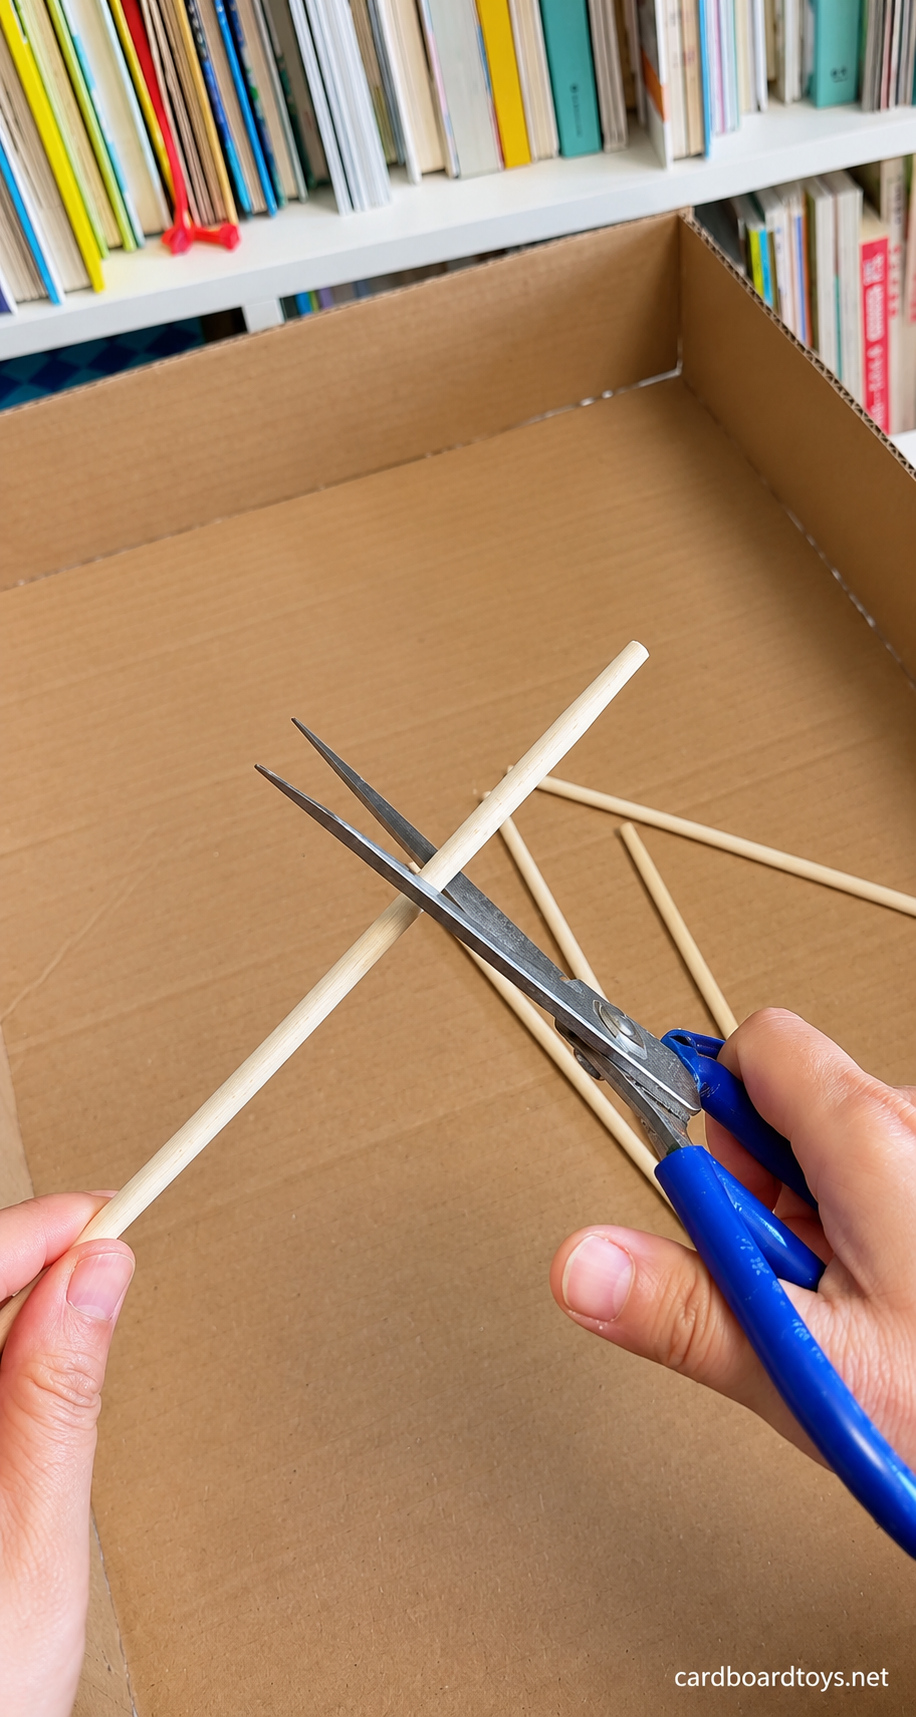
An adult should cut the straight, round portions of the chopsticks into pieces about 20 mm long. Keep the lengths consistent so the ball meets a similar projecting surface at each position. Use a tool suitable for cutting the wood, collect the offcuts, and sand every cut end until it feels smooth. Discard split pieces and sharply tapered tips. Prepare one short peg for each planned hole, plus a few spares. The photographs show the original wooden chopsticks and the cutting contact; the finished pieces should retain a round cross section rather than becoming flat craft sticks.
3 Mark and Open the Staggered Holes
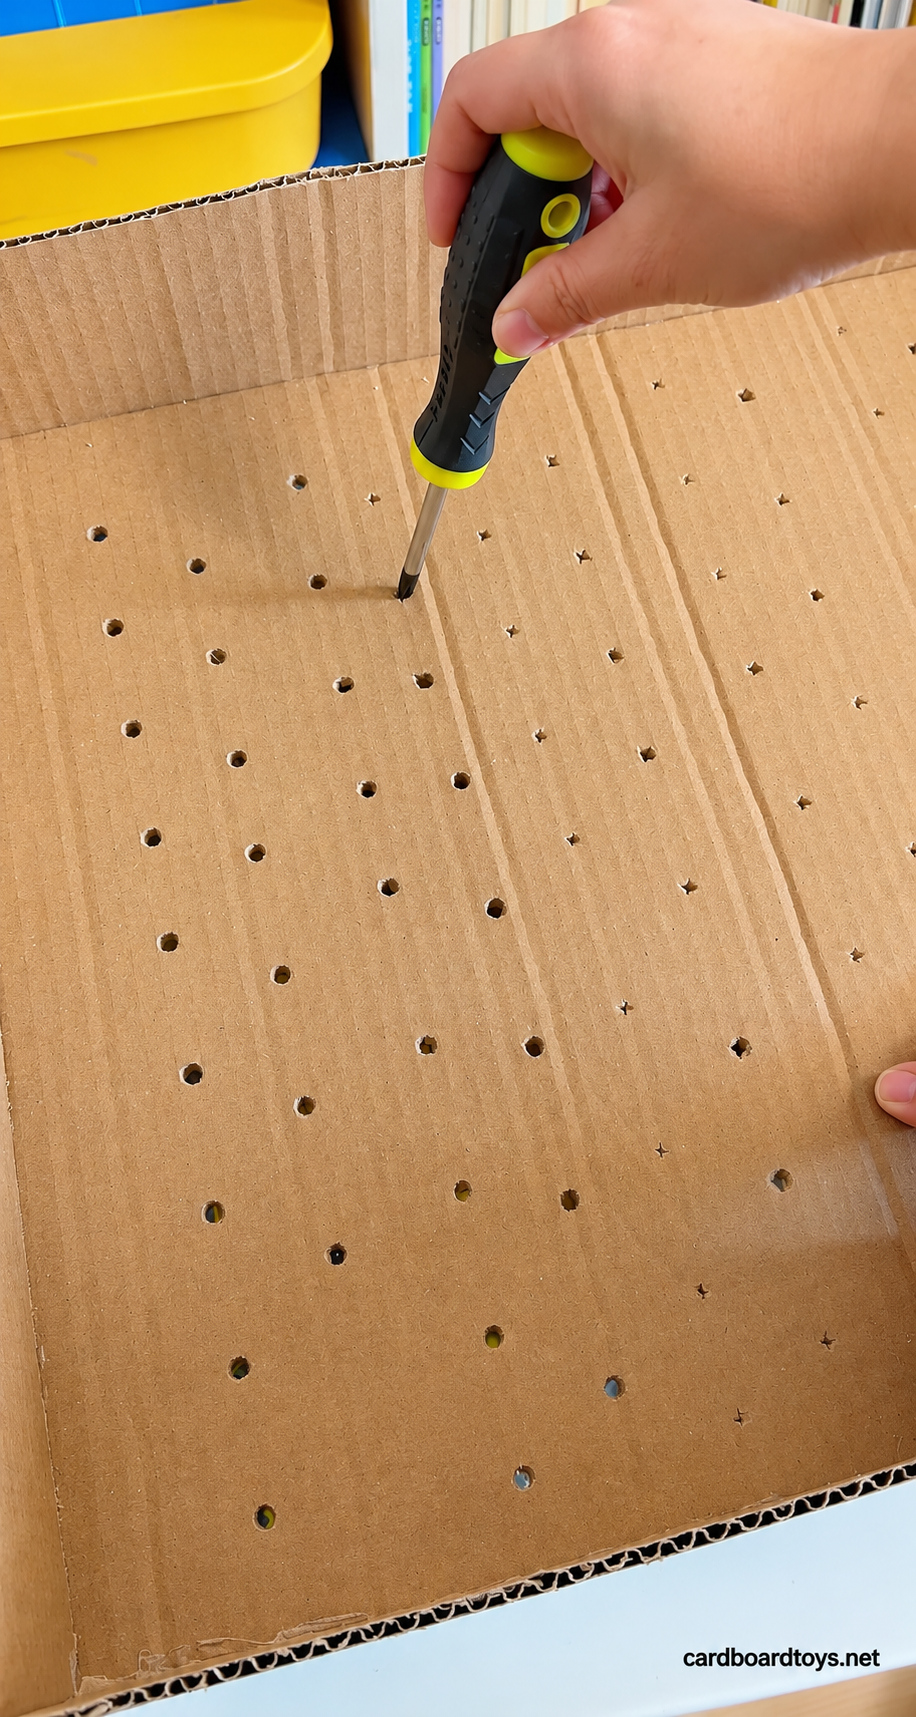
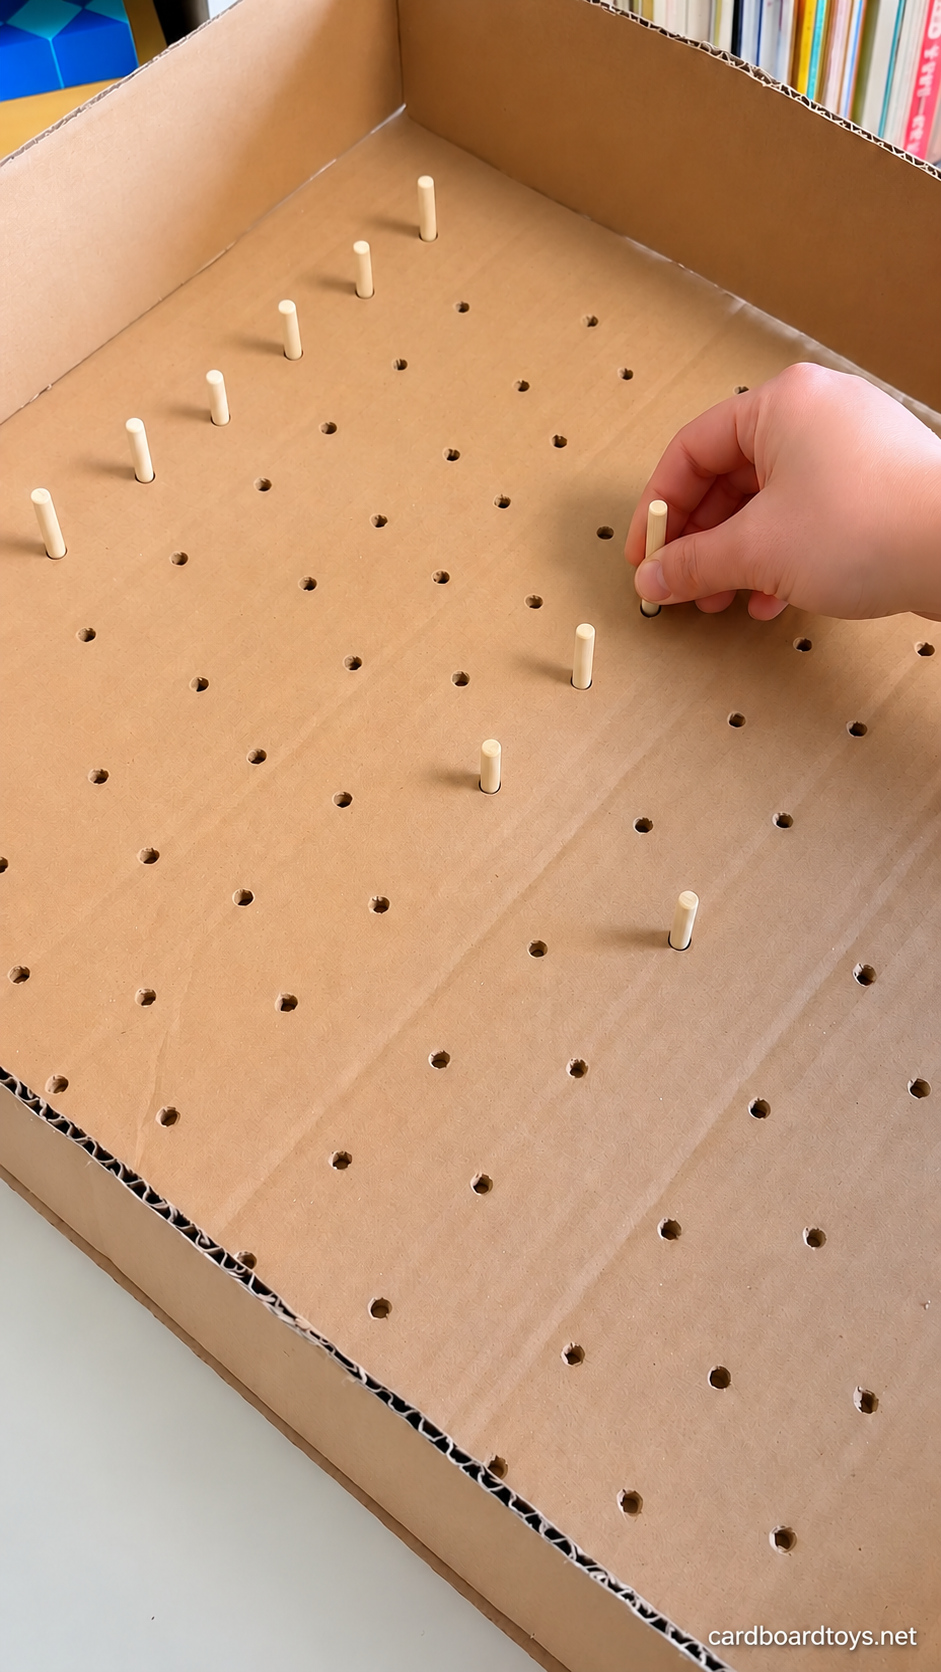
Draw a light grid over the upper playing area. Start with centers about 4 cm apart across each row and a similar distance between rows. Offset every second row by half a space, giving the ball several possible directions as it falls. Leave the bottom 15 to 18 cm clear for the guides and catcher. Check a few positions with the actual ball before making the whole grid. The gap between neighboring wooden pegs must let that ball pass freely. With the tray supported on a backing board, an adult can open the marks using an awl or small screwdriver. Make snug holes that grip the wood without tearing the cardboard.
4 Seat and Secure Each Peg
Press a wooden section into every hole from the playing side. Aim for about 12 to 15 mm of exposed wood, with the remaining length passing through the backboard. Keep the pieces approximately perpendicular to the surface and check the cut ends again for splinters. Turn the tray carefully and secure each peg at the back with a small amount of glue. Keep adhesive off the forward ends and the rolling surface. Once the joints have set, lower a ball through several neighboring gaps. Replace a loose or leaning peg now, while the lower mechanism is still out of the way.
5 Fit the Front Panel with Its Round Opening
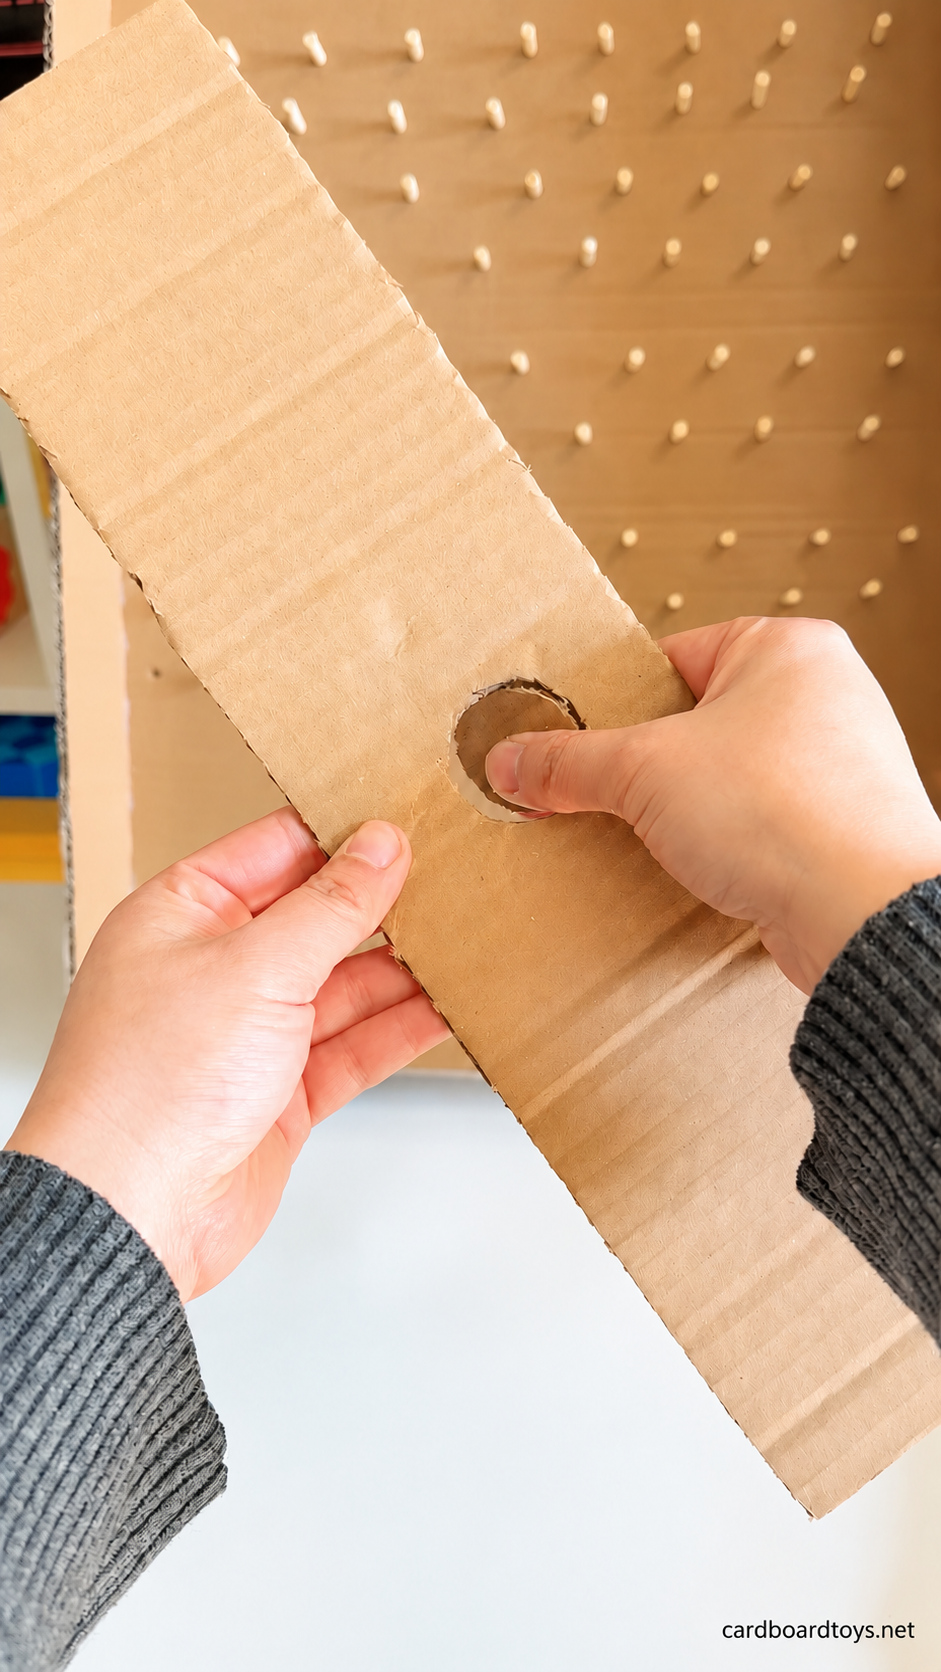
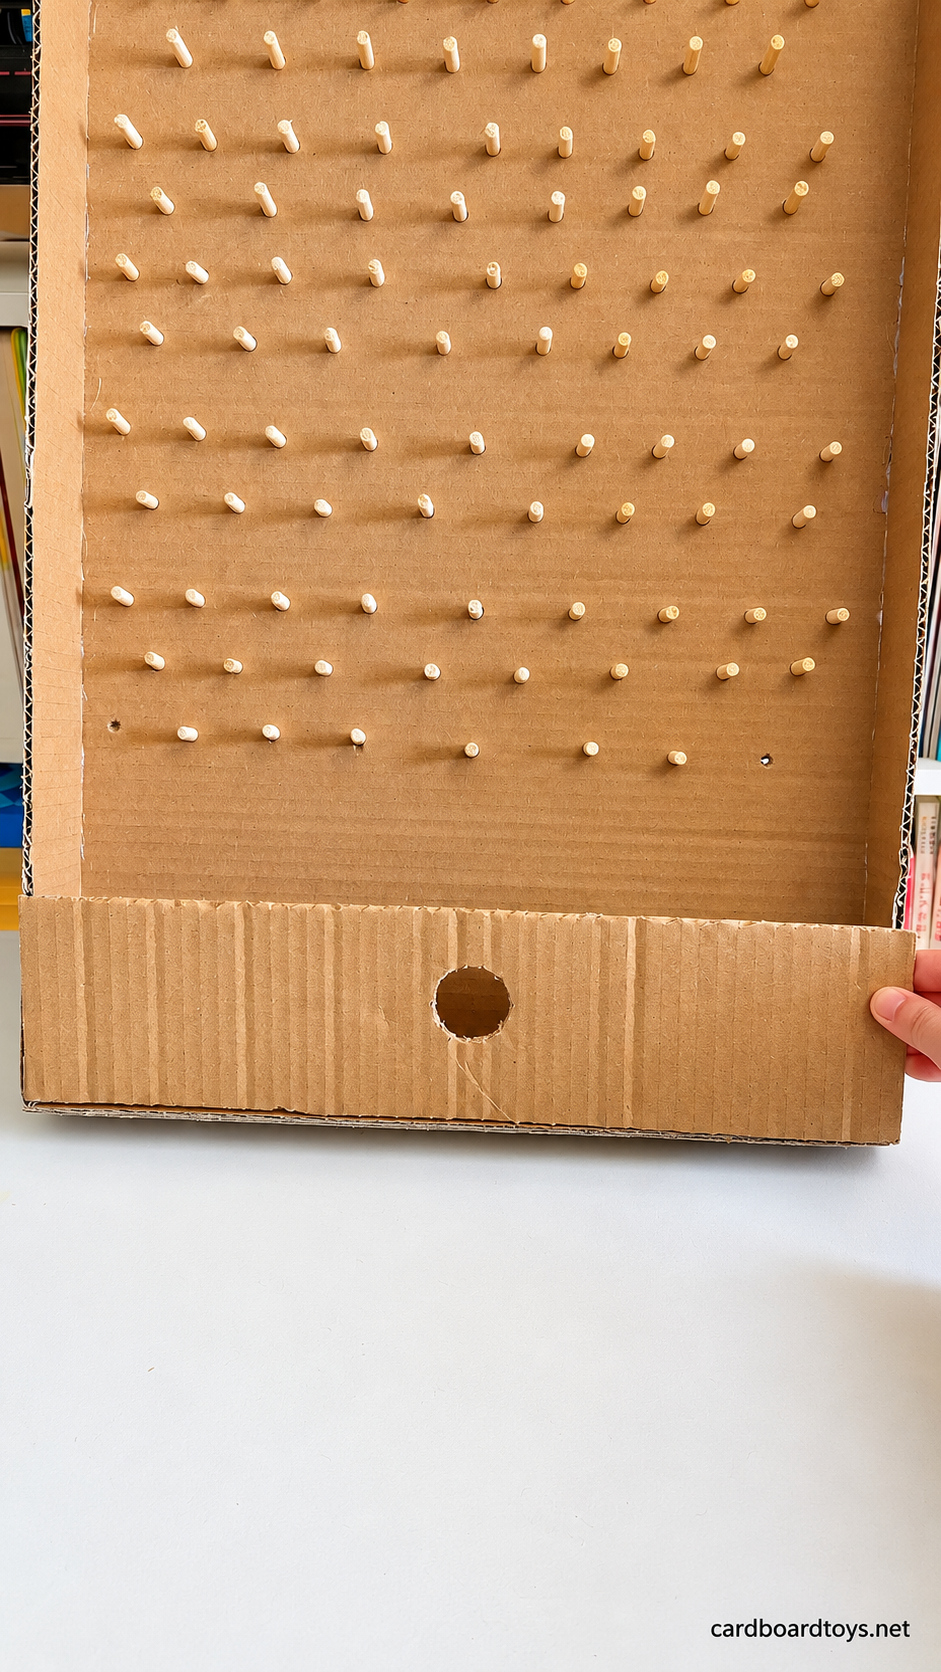
Cut a cardboard strip to fit across the lower end of the tray, approximately as tall as the tray sides are deep. When installed, this strip stands parallel to the backboard and leaves a shallow space behind it. Mark its center and trace around the paper tube. An adult should cut the circular opening on a mat, trimming gradually until the tube can rotate without crushing. Keep enough cardboard above and below the hole to support the axle. Glue the strip to the two side walls and lower edge of the tray. Keep the circular opening clear of adhesive and leave the upper edge open for access to the catcher.
6 Slide in the Paper Tube Axle
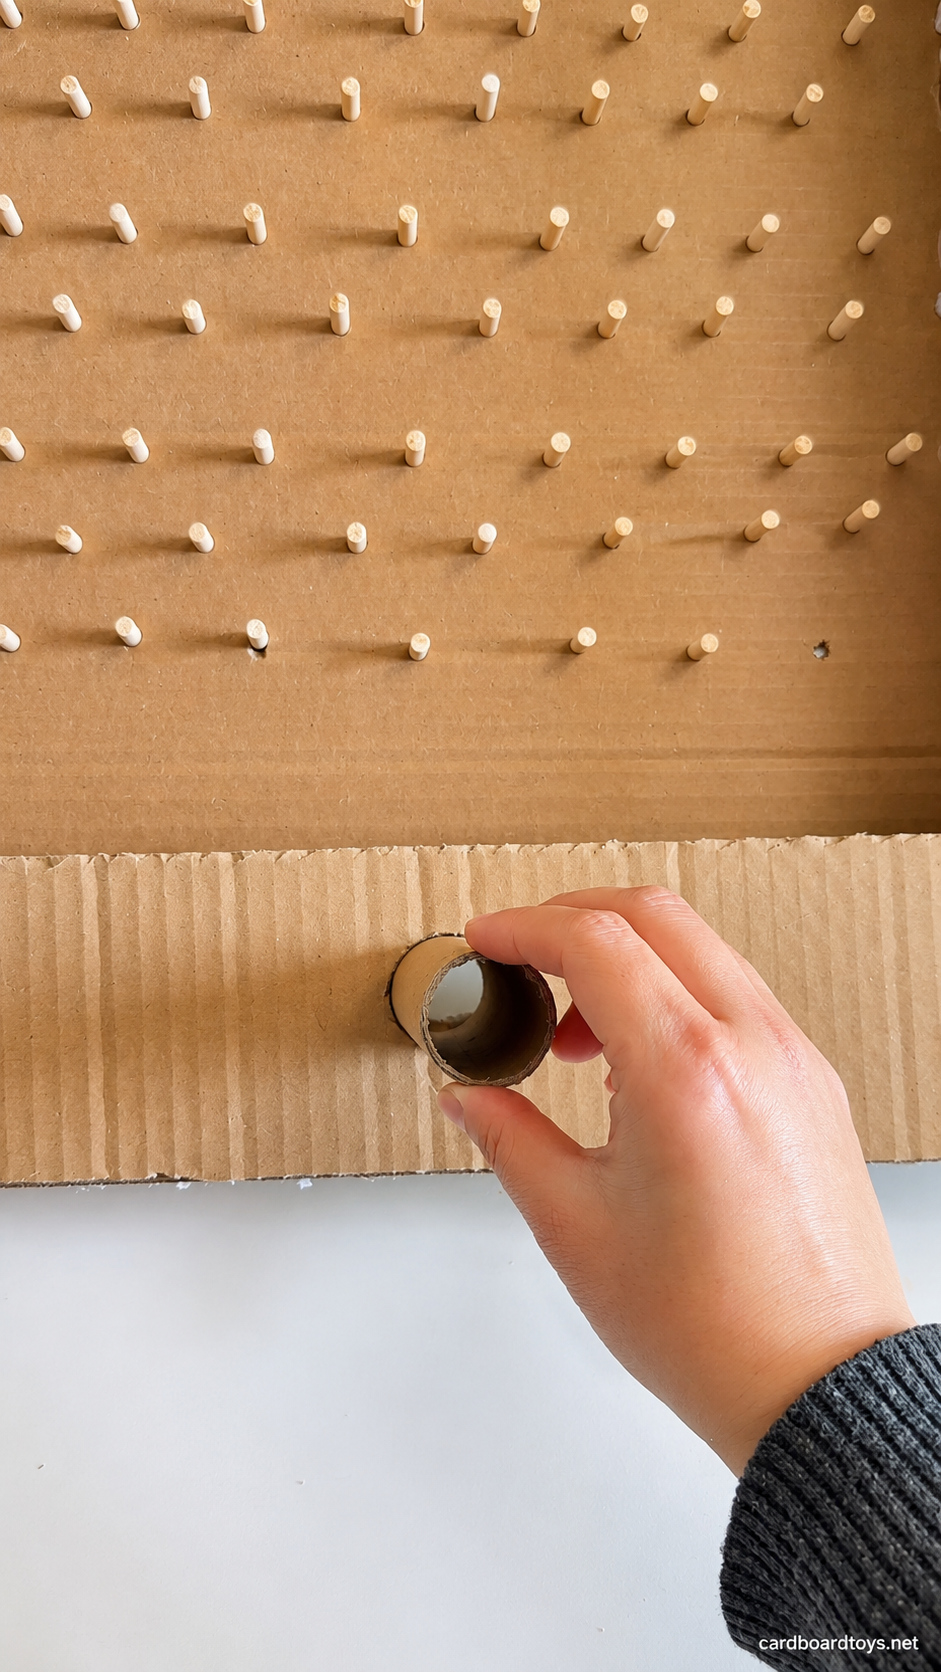
Pass the clean paper tube through the round opening from the front. Its outer end will carry the steering wheel, while its inner end will carry the catching pocket. Leave enough tube on both sides for these two joints, then turn it by hand. The panel must remain fixed while the tube rotates inside the hole. If the fit is tight, remove the tube and trim only the rough spots around the opening. If the tube reaches the backboard, shorten it slightly so its inner end clears the surface. Keep this bearing joint free of glue throughout the remaining assembly.
7 Cut the Wheel and Attach Its Center Bar
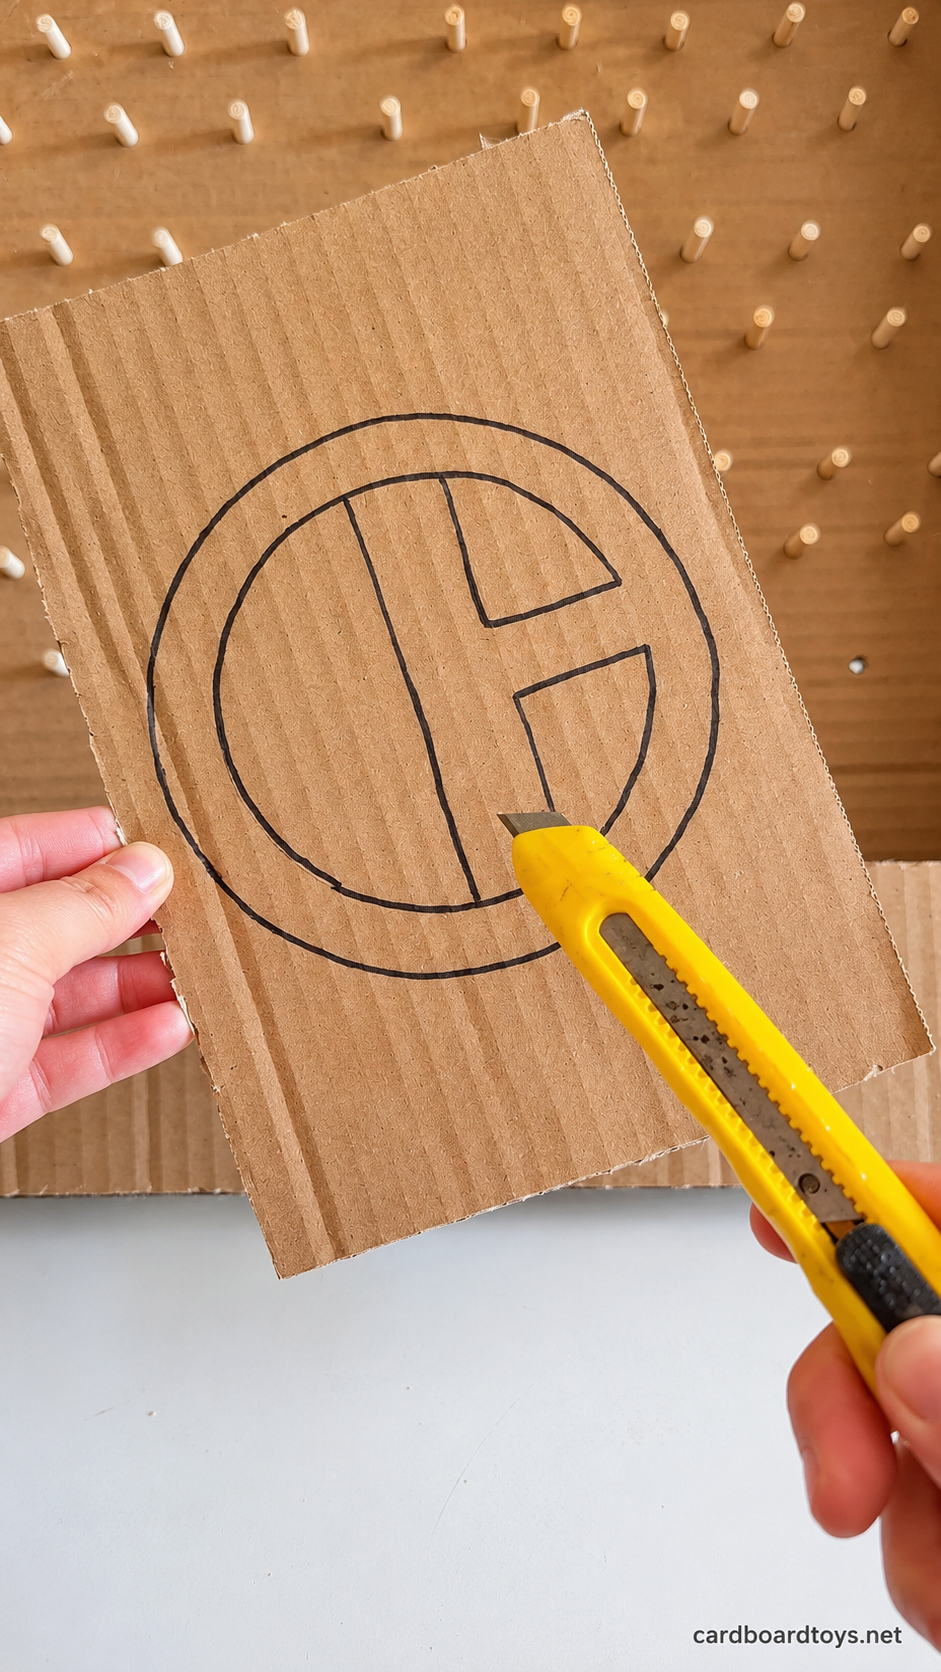
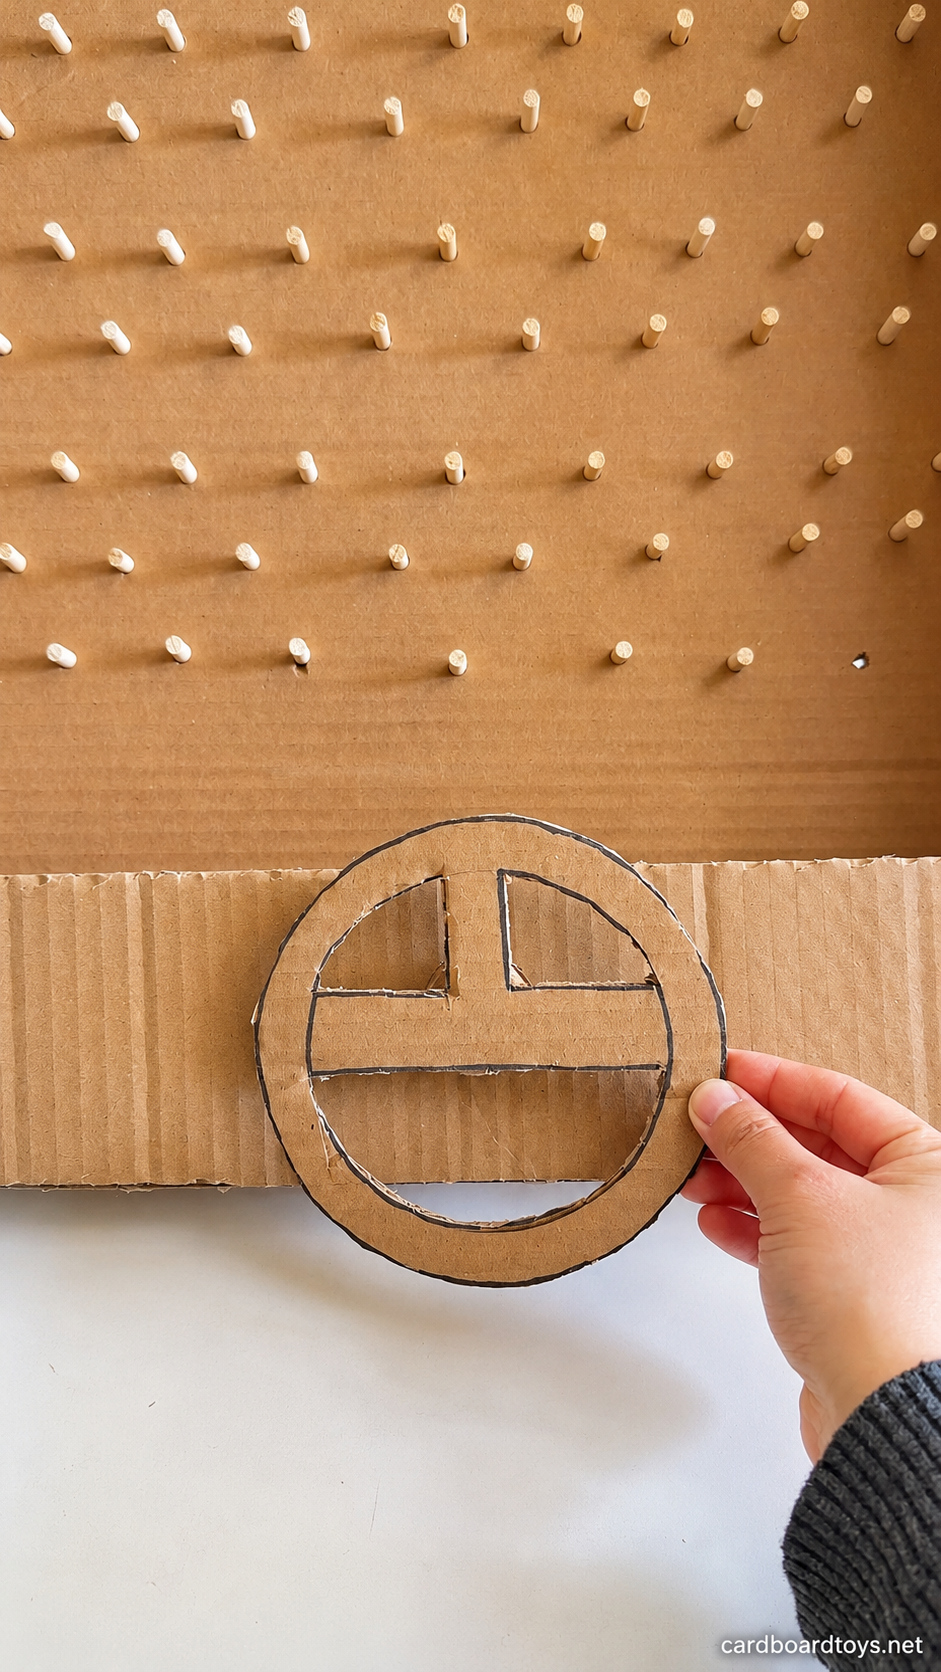
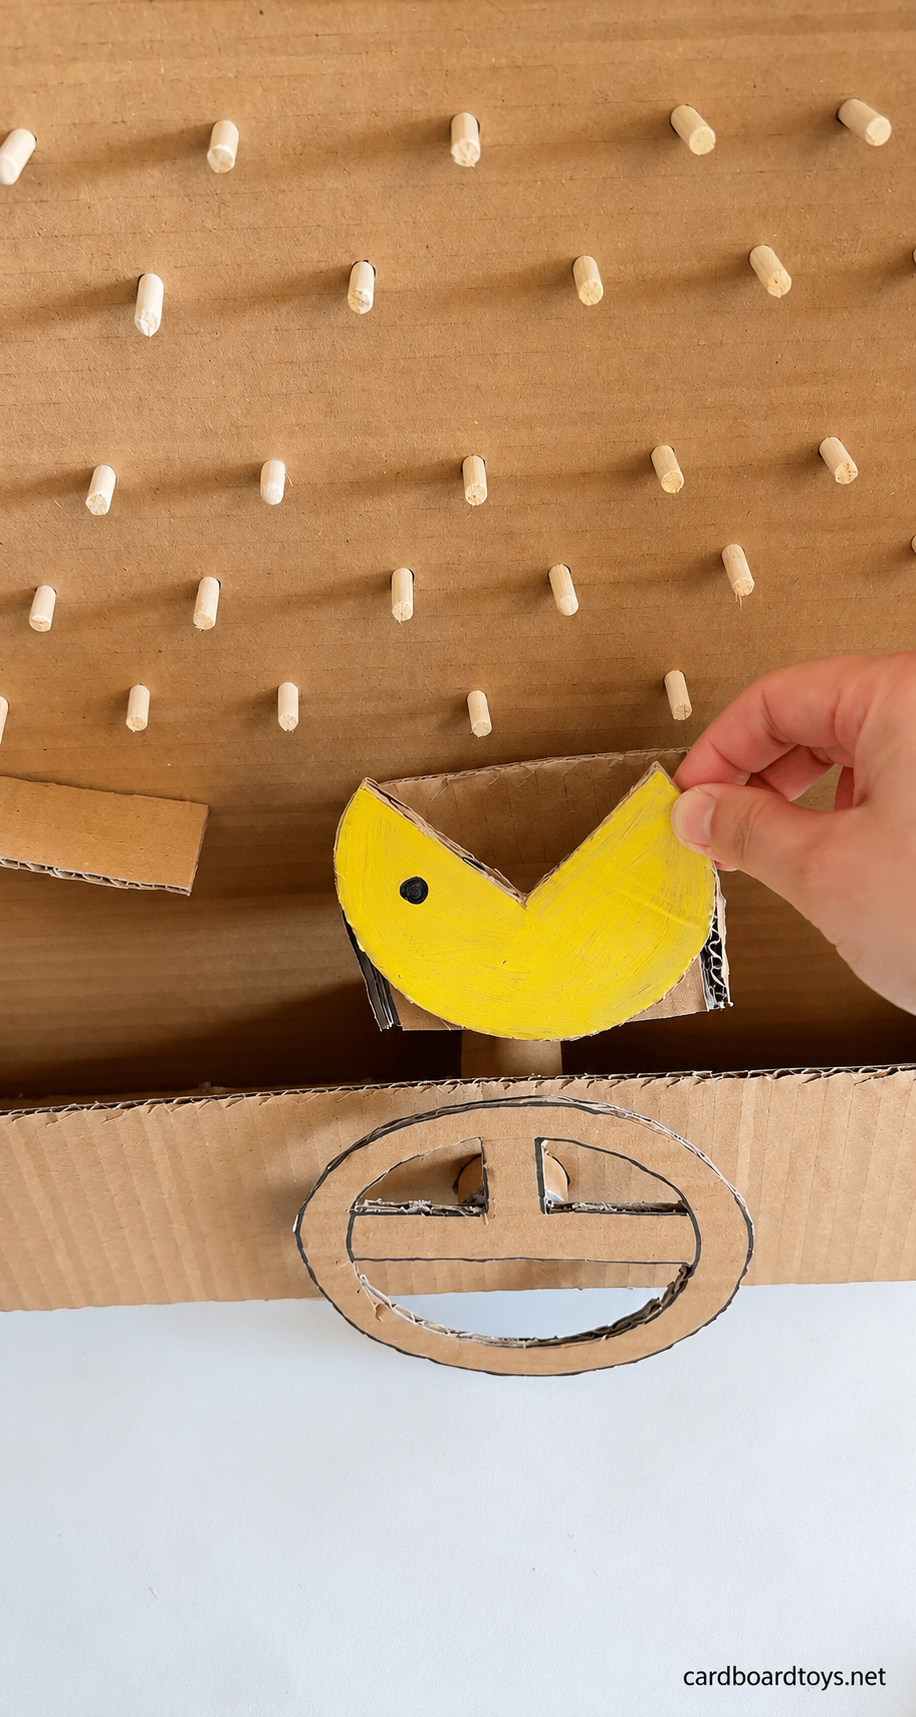
Draw a wheel about 16 to 18 cm across on sturdy scrap cardboard. Add a broad outer rim, a horizontal bar through the center, and one upright spoke joining that bar to the top of the rim. Cut away the two upper openings and the larger lower opening, keeping the bar and rim connected. An adult should make these cuts with the cardboard resting flat on a cutting mat. Place the middle of the solid center bar against the outer end of the paper tube and glue that contact firmly. Let the joint set, then turn the rim gently. The wheel and tube should move as one piece.
8 Add the Two Inward Sloping Guides
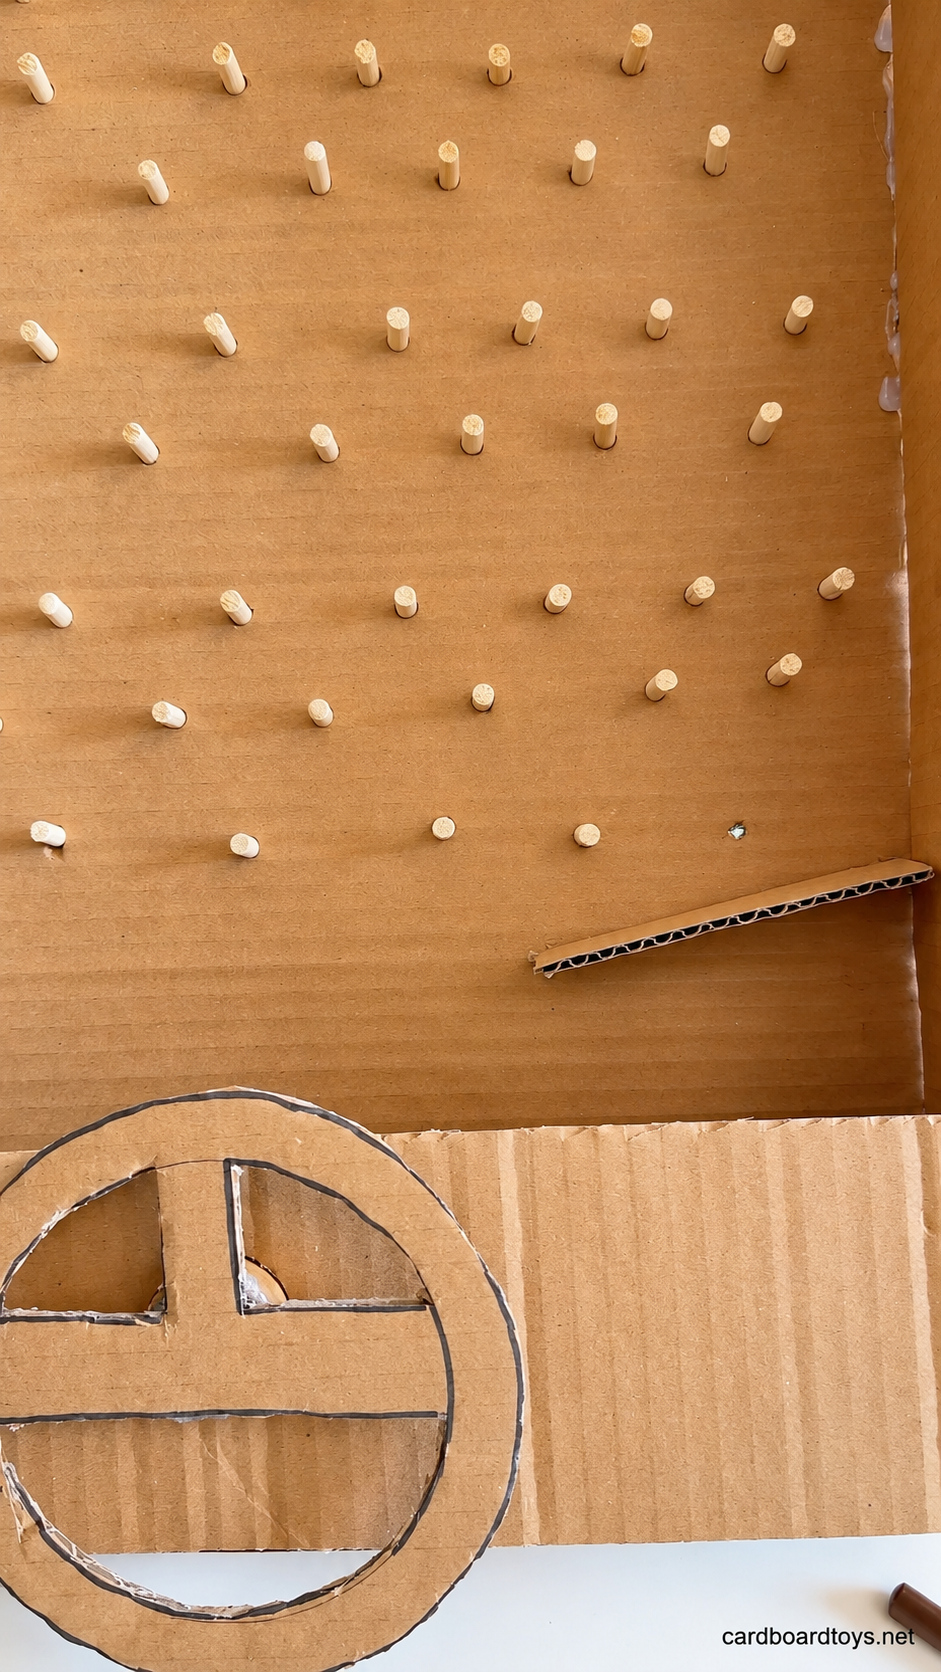
Cut two narrow cardboard strips for the lower sides of the peg field. Place one on the left and one on the right, with their inner ends slightly lower than their outer ends. Their exposed edges form small shelves that encourage balls from the sides to roll toward the middle. Glue each strip to the backboard and adjoining side wall, leaving the central catcher area open. Keep the slope gentle and the two inner ends far enough apart for the catcher to rotate. Try a ball on each guide before the adhesive fully sets. It should move inward without stopping on a glue bead or falling behind the strip.
9 Build the Yellow Catching Pocket
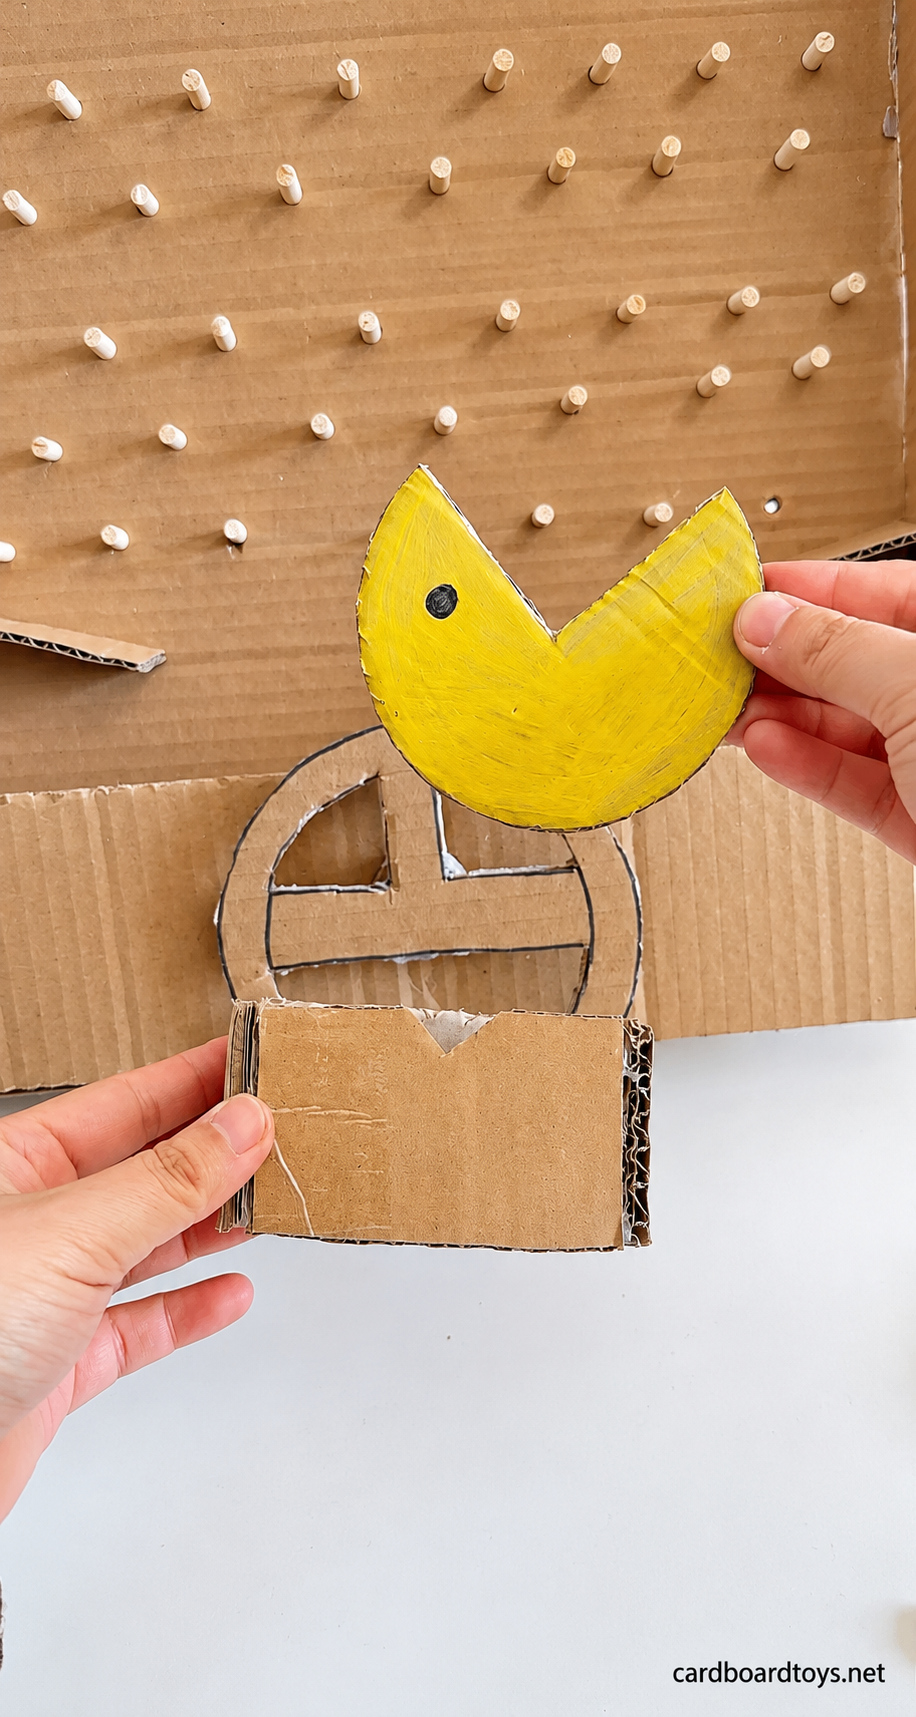
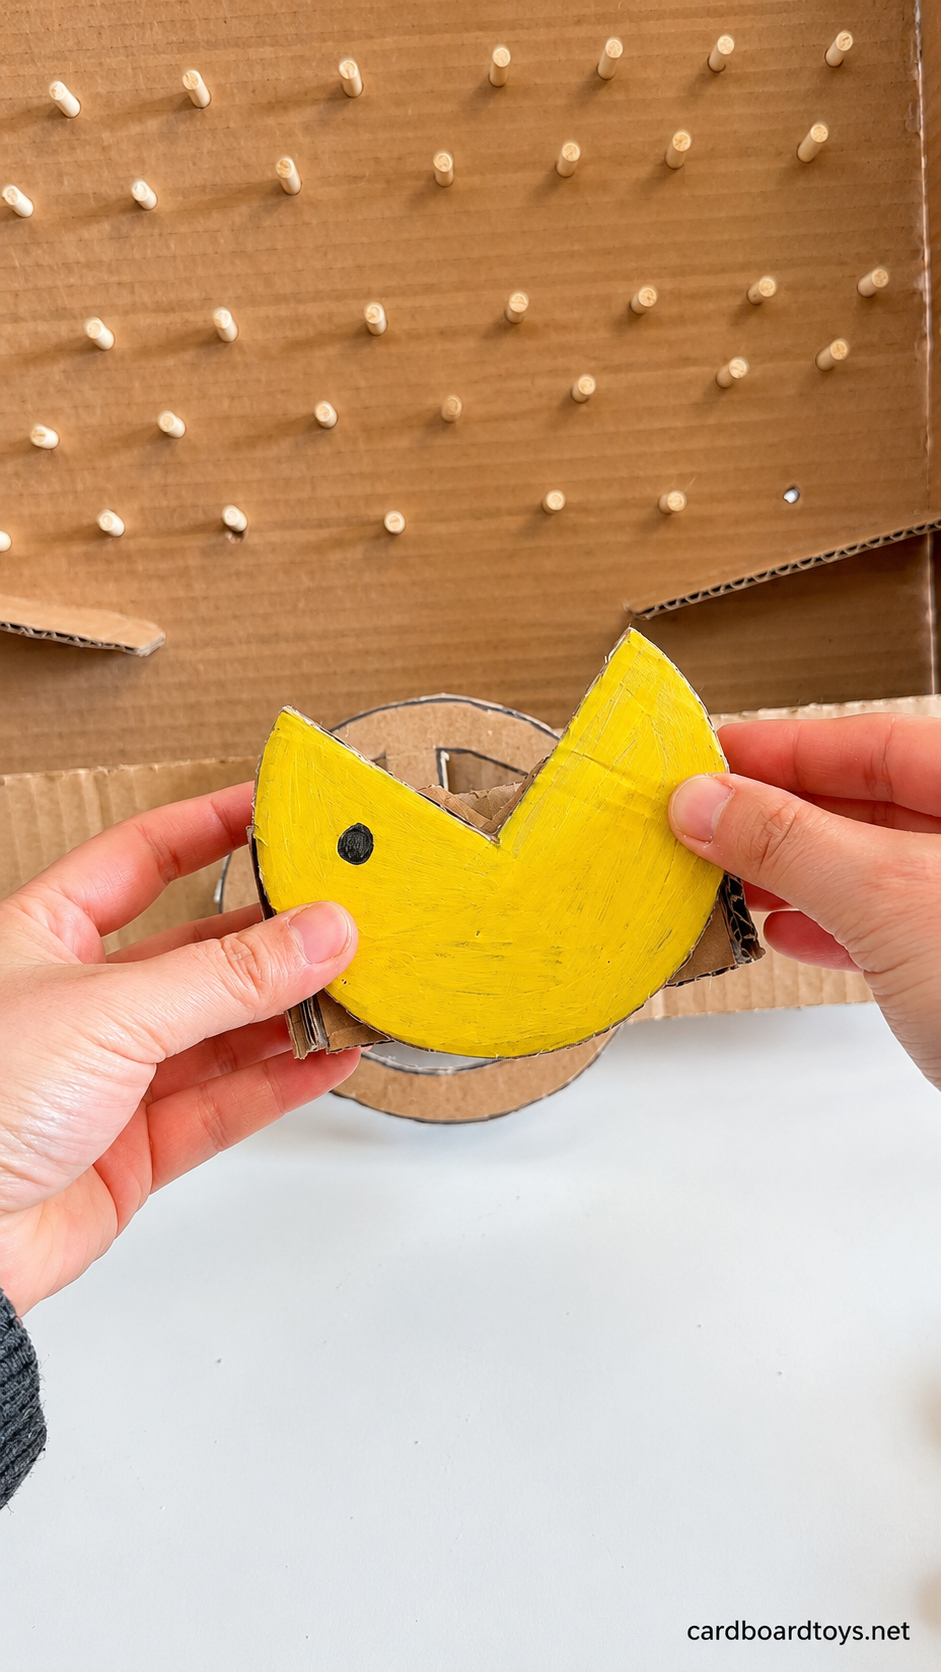
Make a shallow cardboard pocket approximately 12 to 14 cm wide, sized to fit between the guides. Cut a rectangular back and bottom, then add two short side walls. The open top must be wider than the ball, and the pocket depth must fit inside the tray without rubbing the backboard. For the face, draw a circle of similar width, remove a broad V shaped wedge from its upper edge, and paint the remaining shape yellow. Add one small black eye on the left and let the paint dry. Glue the yellow face to the front of the pocket, keeping the V opening above the pocket floor so a falling ball can enter and stay inside.
10 Join the Catcher to the Inner Tube End
Set the wheel with its horizontal bar level, and hold the catcher inside the tray with its mouth facing upward. Bring the outside of the pocket’s front wall against the inner end of the paper tube. The yellow face points toward the player, while the pocket extends backward into the tray. Glue the tube end to a solid area below the mouth, keeping adhesive away from the front panel and bearing opening. Hold the joint until it sets. Turn the wheel a little in each direction and check the pocket’s clearance against the guides, backboard, and panel. The yellow face and wheel should rotate together without the tube sliding out.
11 Try a Drop and Adjust the Catch
Place the board on a broad, stable surface with its upper edge supported securely so the playing face leans back slightly. An adult should steady the board throughout play. Turn the wheel to aim the yellow mouth upward, then release one ball near the top of the peg field. Watch it change direction between the pegs and adjust the catcher as it approaches the lower guides. A successful catch leaves the ball inside the pocket. If balls stop, check the peg gaps and guide edges. If the catcher sticks, inspect the axle opening and its clearance. Retrieve each ball before the next drop, and count catches over five turns.
Safety
This game contains small balls and removable wooden pieces that are choking hazards. Keep the complete game, offcuts, and loose parts away from children under three and anyone who puts objects in their mouth. Supervise play and count the balls afterward. An adult should cut and smooth the chopsticks, make every pilot hole, cut the panel and wheel openings, and handle the hot glue. Use suitable cutting tools on a stable work surface, keep the supporting hand outside the cutting path, and retract the knife blade immediately after use. Keep the glue gun on its stand, avoid the hot nozzle and molten adhesive, and unplug it after gluing. Let all joints cool and set before play. Check each peg and both axle joints before every session, remove any split wood or damaged cardboard, and keep fingers away from the opening around the turning tube. Secure and steady the board so it cannot fall forward when the wheel is pulled.