
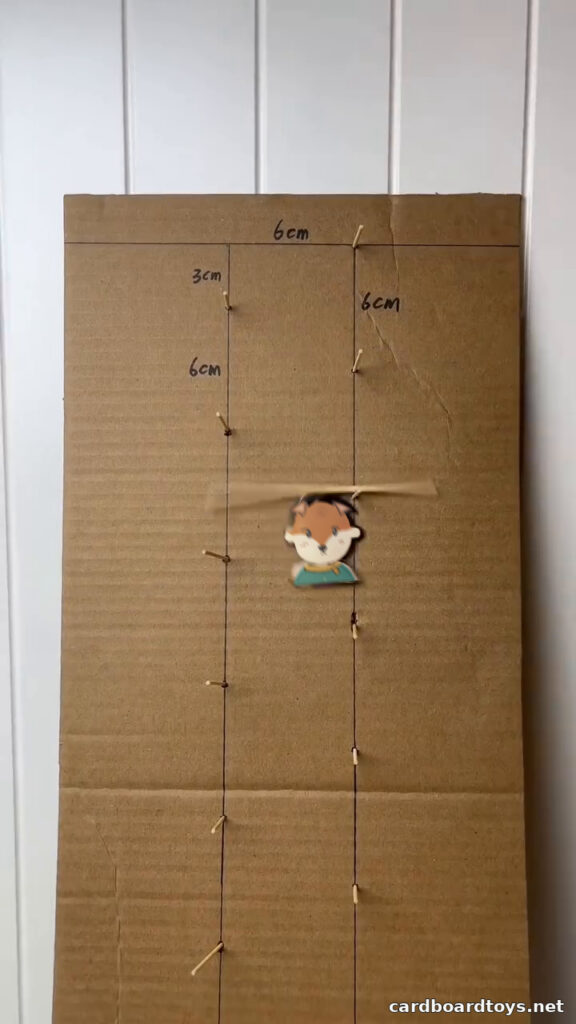
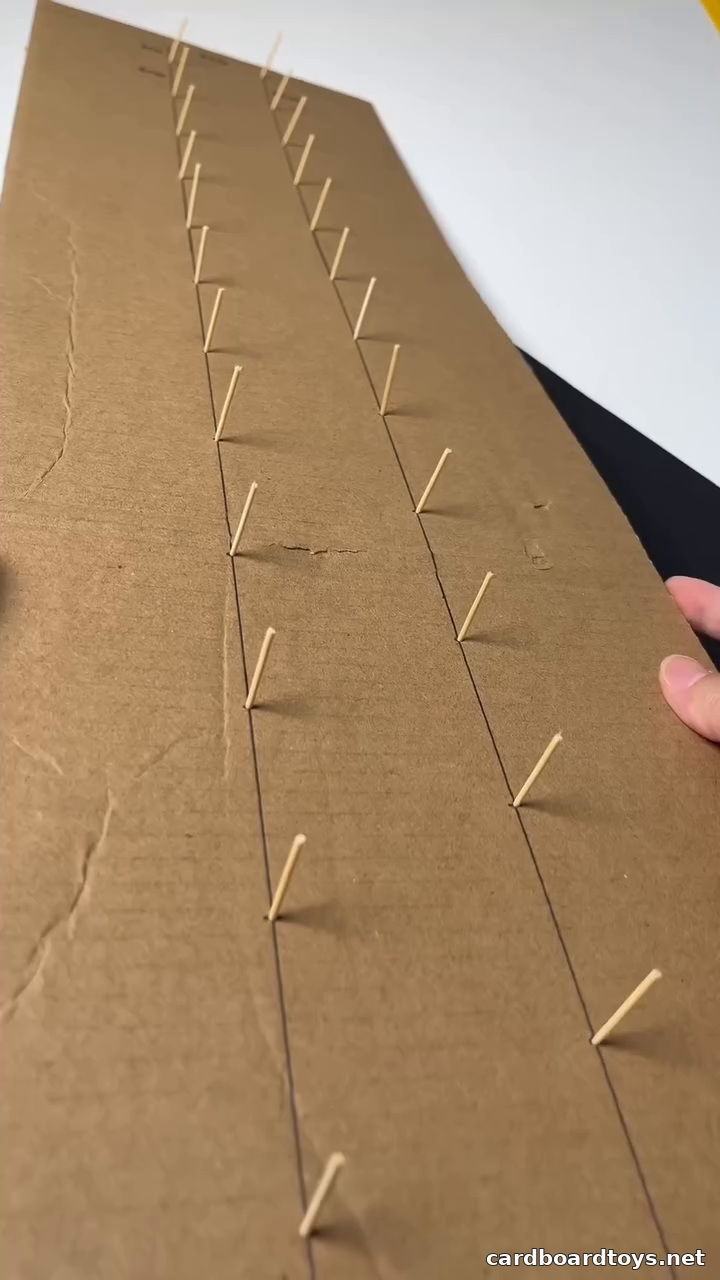
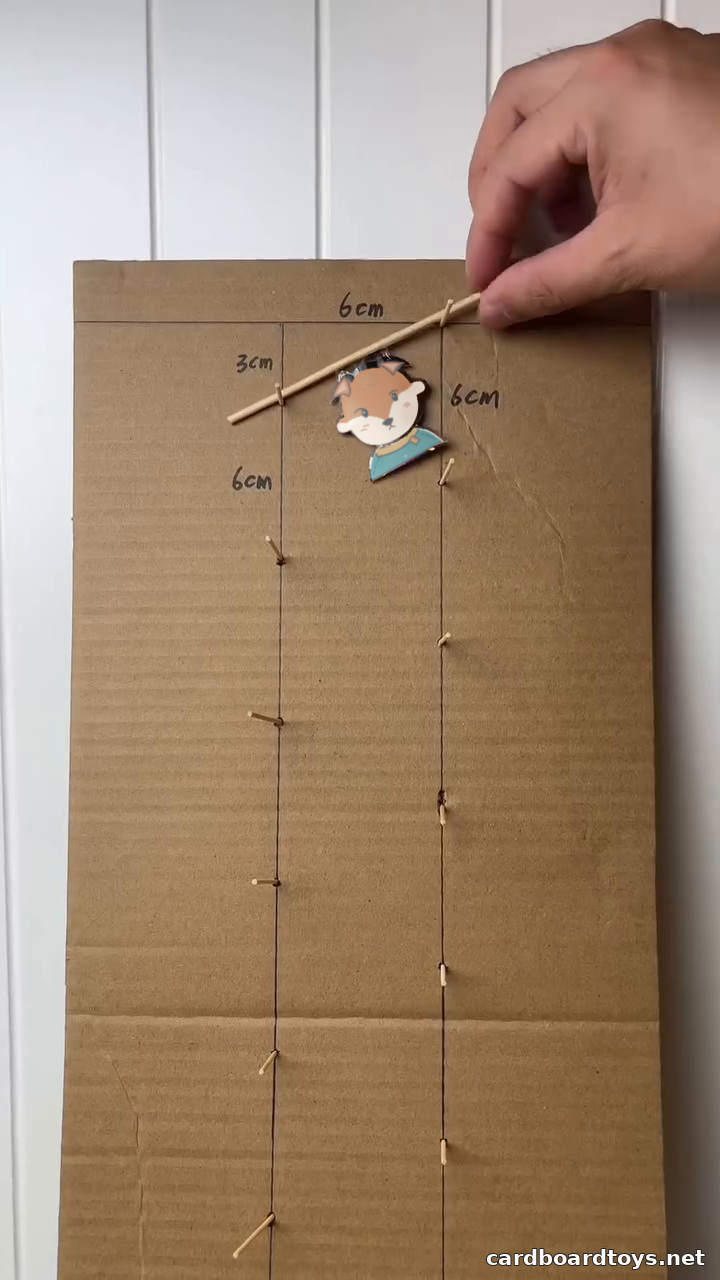
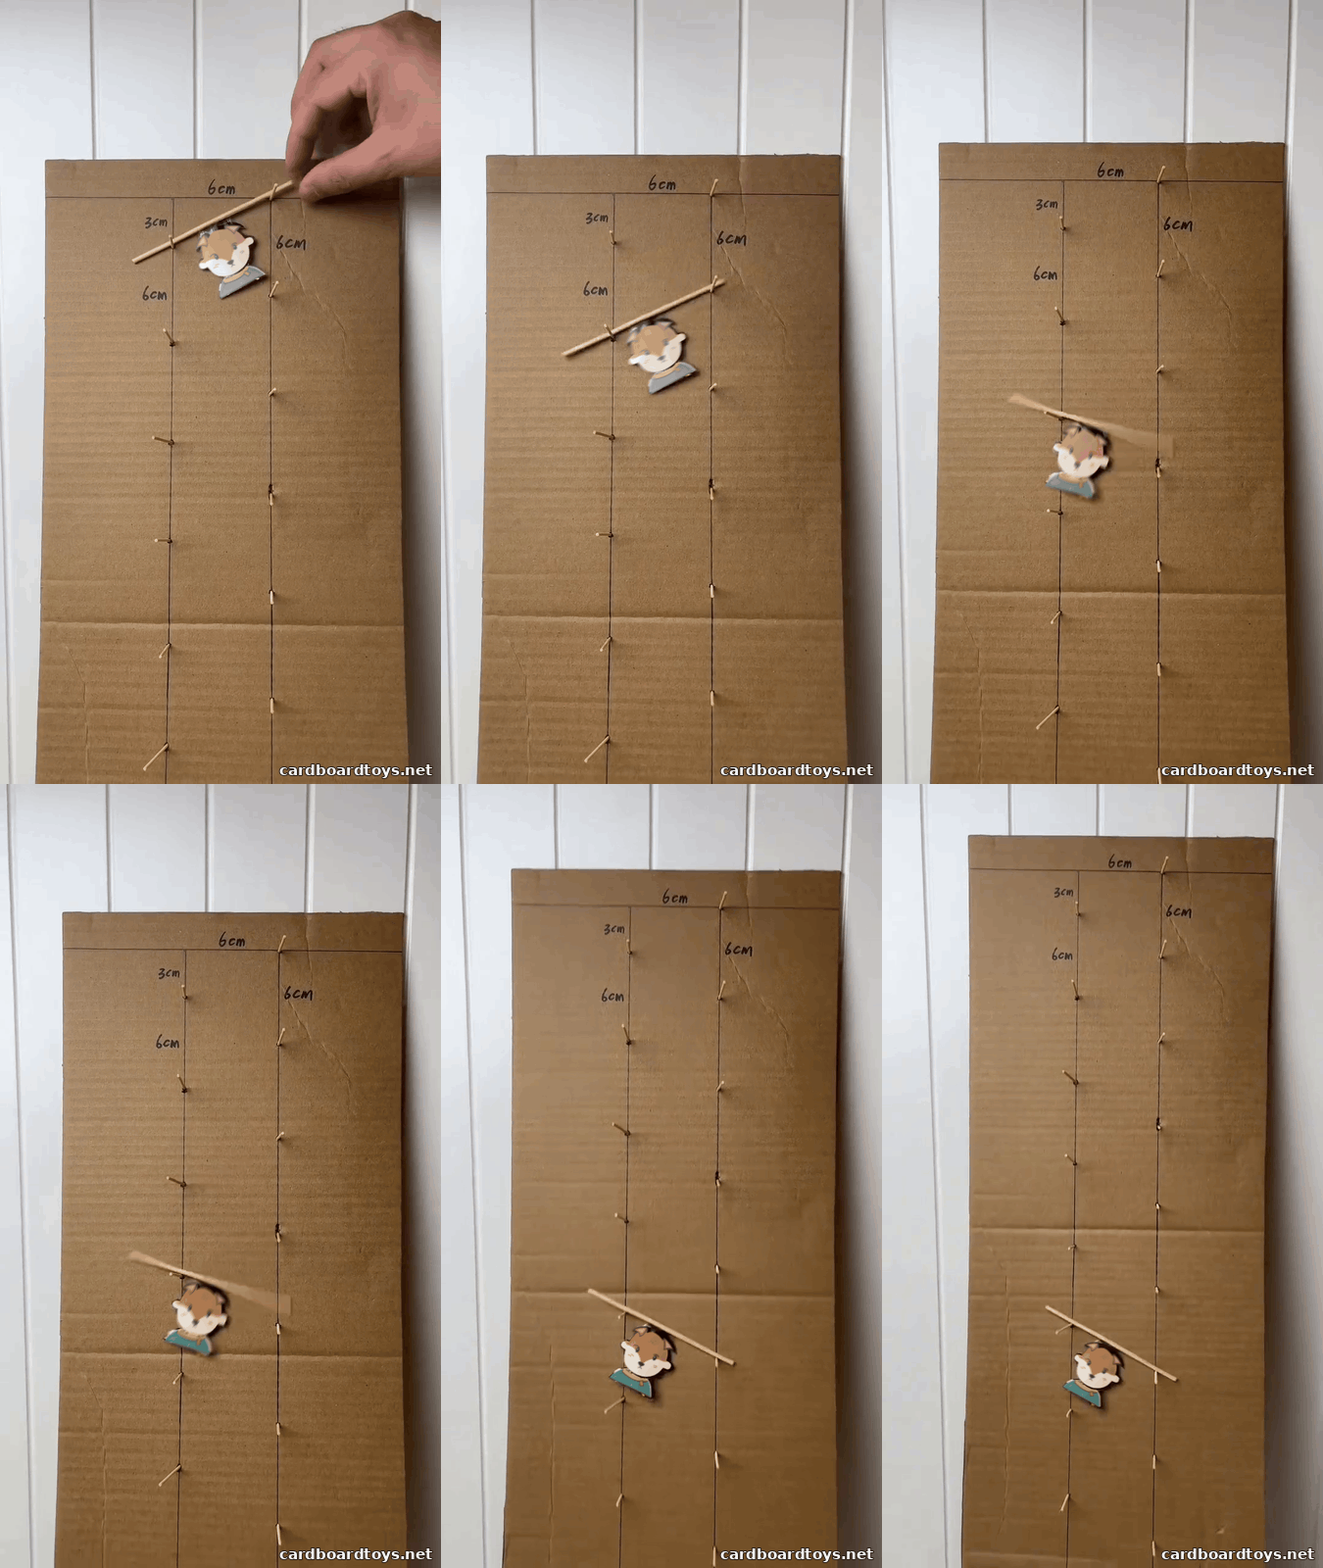
A small fox hangs from a bamboo crossbar near the top of a tall cardboard panel. Let go and one end of the crossbar catches a wooden peg. The opposite end swings down to the next peg, so the fox tips from side to side as it makes its way to the bottom. Two rows of toothpicks and a small cutout from a drink carton are all it takes to make the moving part.
Difficulty
Easy. The layout matters more than the cutting. Measure both rows from the same top line and set the wooden pegs to the same depth.
Materials
- One piece of stiff corrugated cardboard, about 28 by 9 inches (72 by 22 cm)
- One clean, dry drink carton for the fox cutout
- Twelve round wooden toothpicks
- One straight bamboo skewer
- About 12 inches (30 cm) of clear tape
Tools
- Ruler and pencil or fine marker
- Scissors for the paper carton
- Sturdy scissors or small cutters suitable for trimming thin bamboo
- Awl or pointed tool for pilot holes
- Fine sandpaper or an emery board
2026 Prices
- Reused corrugated cardboard — A$0.00
- Reused drink carton — A$0.00
- Twelve round wooden toothpicks — A$0.18
- One bamboo skewer — A$0.03
- Clear tape — A$0.02
Total A$0.23
How to Build the Toy
1. Cut the ladder board
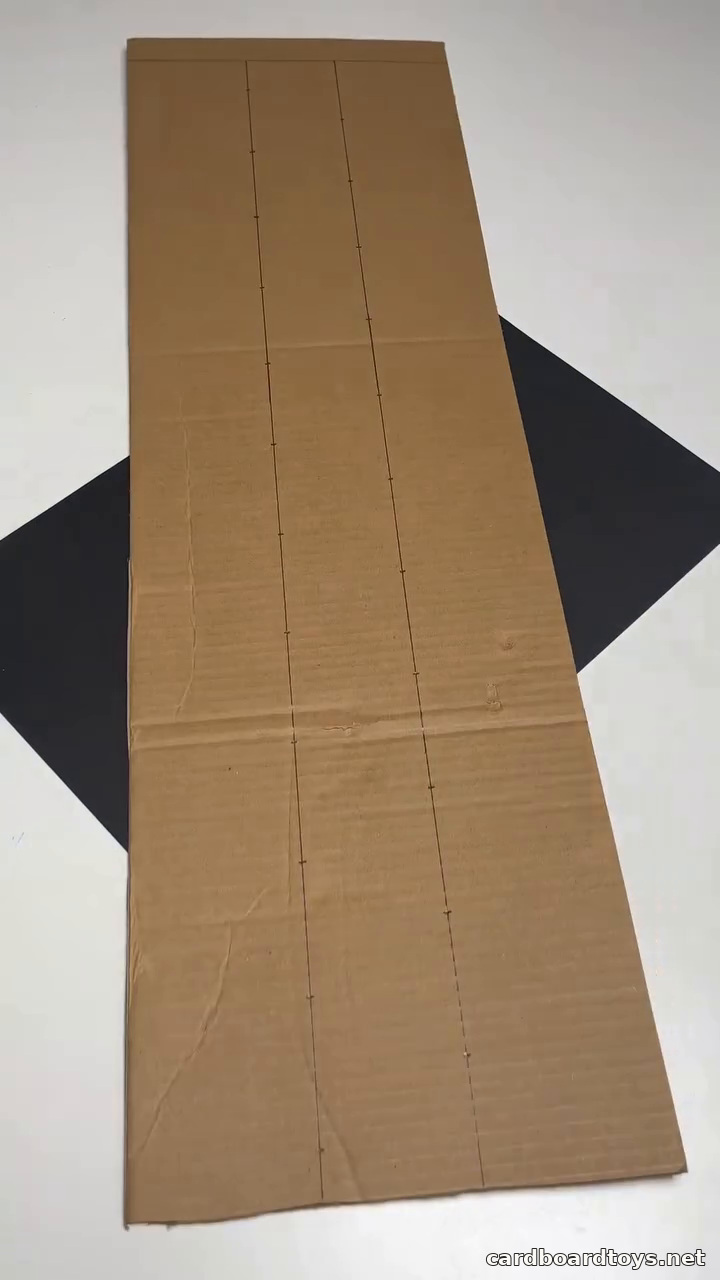
Cut a tall, narrow panel from a stiff box. Use the flattest piece available and trim the bottom edge straight so it can rest on a table. Lay the panel flat for marking.
2. Mark two staggered rows
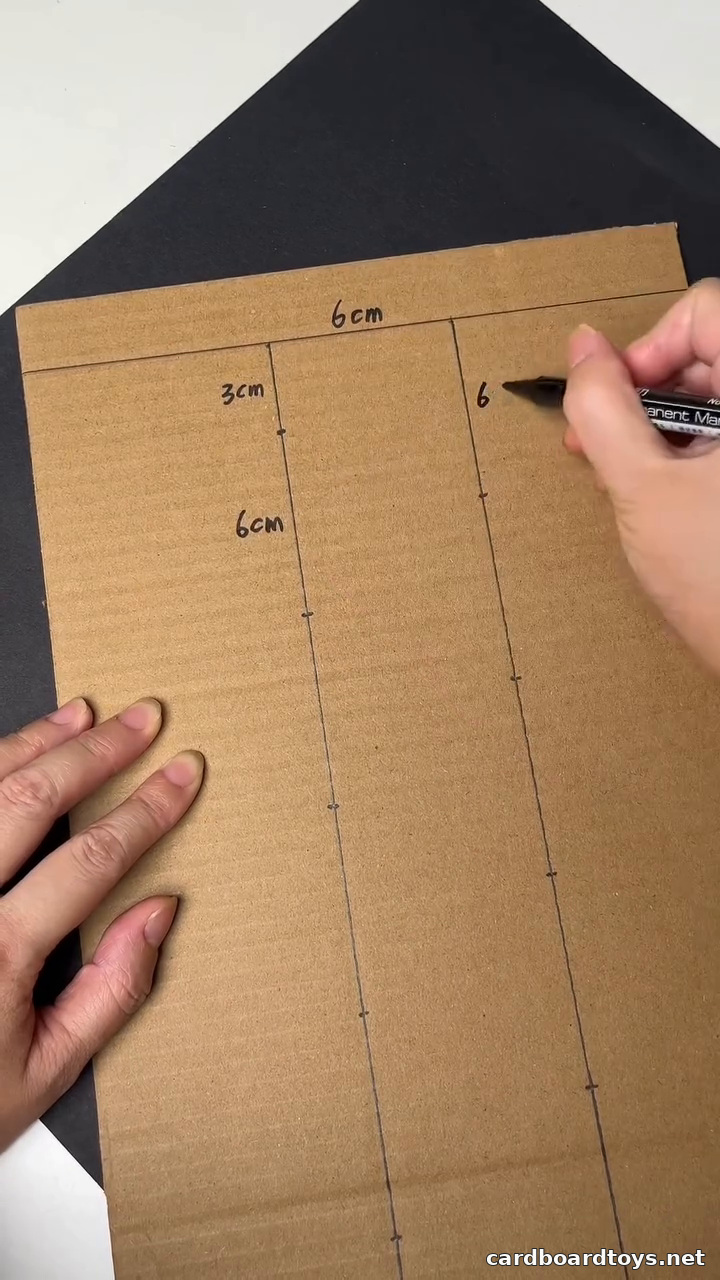
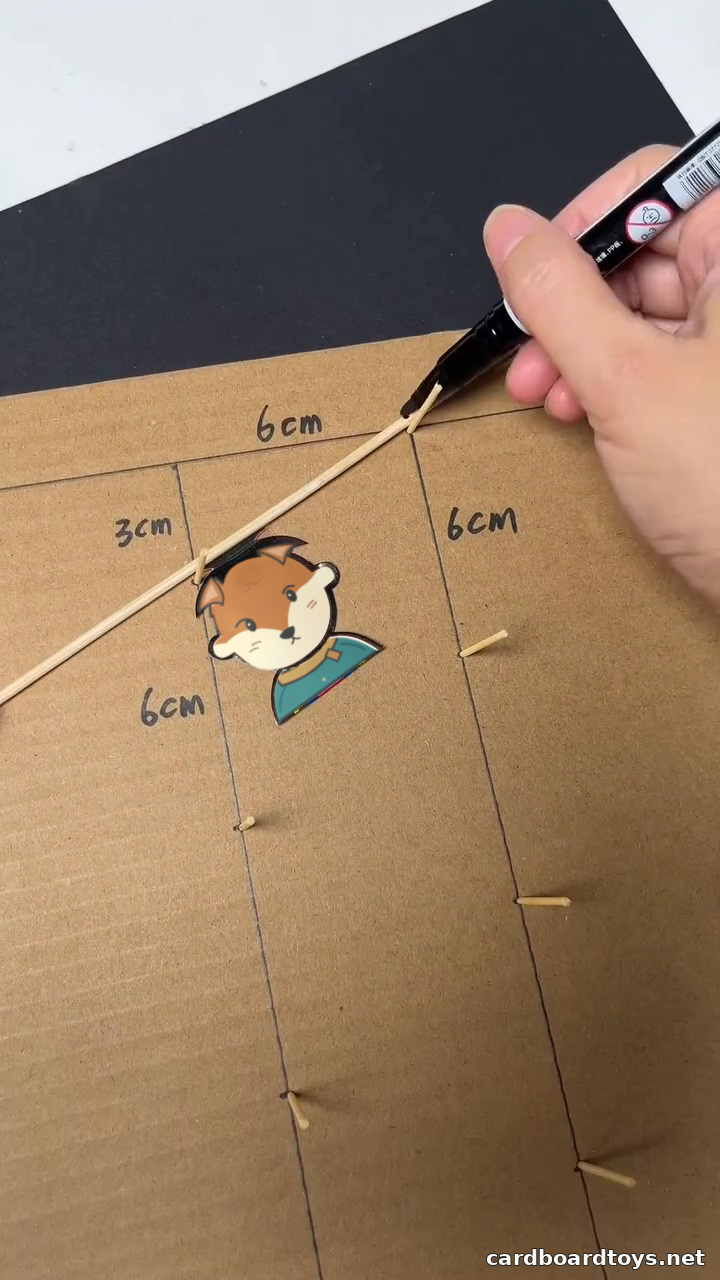
Draw a horizontal starting line about 1 inch (2.5 cm) below the top edge. Draw two vertical guide lines 6 cm apart and centered across the panel. On the right, mark a peg at the starting line and then every 6 cm below it. On the left, mark the first peg 3 cm below the starting line and the rest every 6 cm. Stop both rows about 3 cm above the bottom. The right and left pegs alternate in height.
3. Cut and seat the wooden pegs
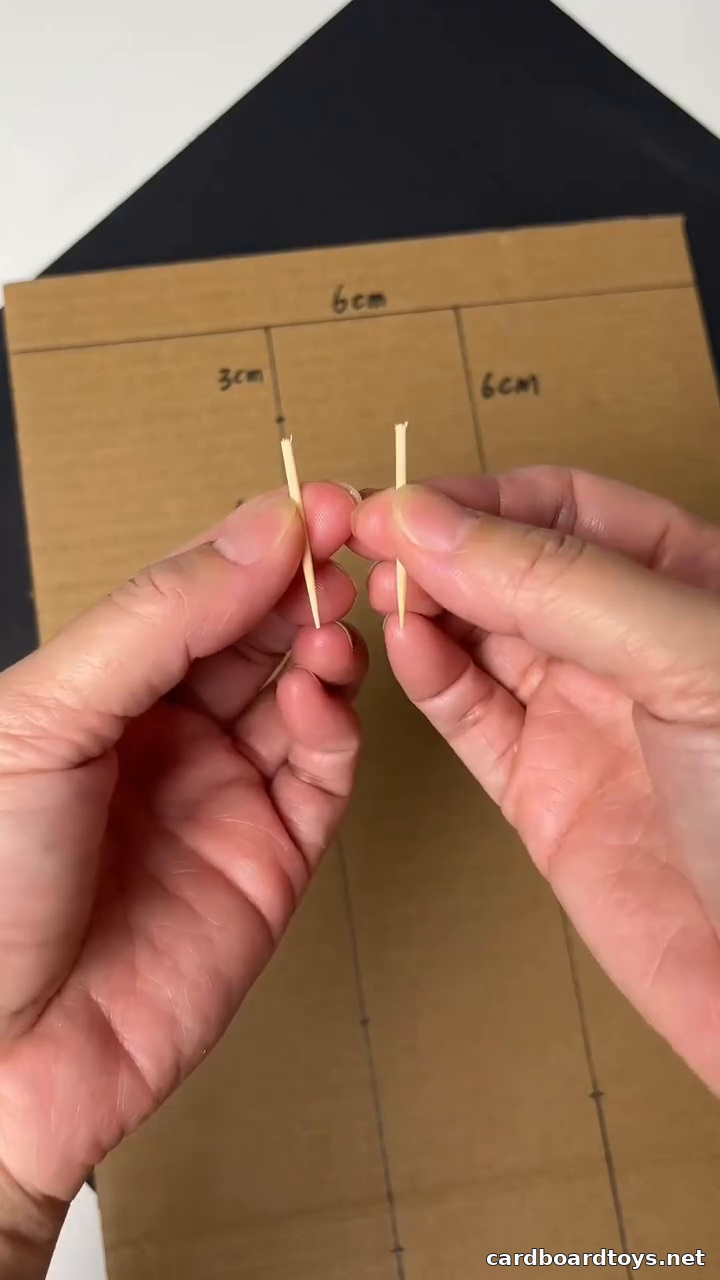
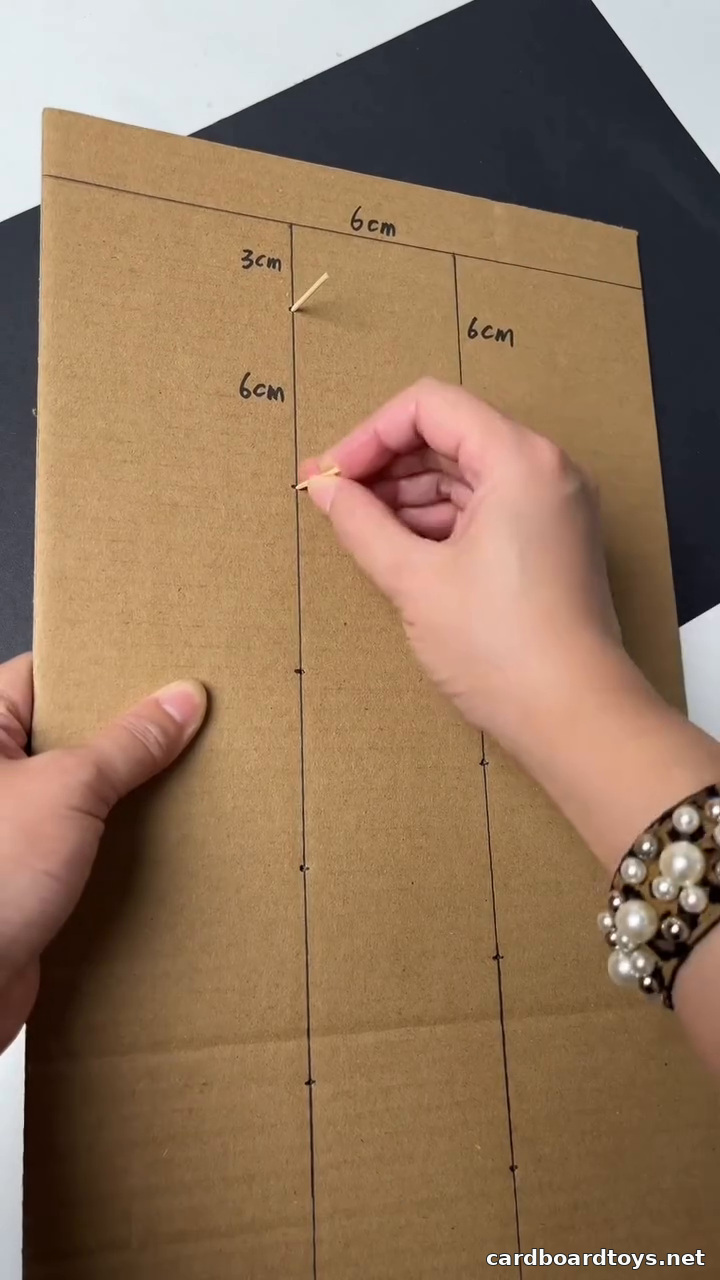
Have an adult cut the toothpicks roughly in half. Make a tiny pilot hole at each mark and press one piece in from the front. Leave about ½ inch (12 mm) projecting. Check from the side that the pegs sit firmly and extend evenly. Smooth the exposed wooden ends and make sure any pointed portions are buried before play.
4. Cut out the fox
Open and flatten a clean drink carton. Draw a compact fox with a scarf on one panel and cut around it. Keep it about 1½ inches (4 cm) wide and a little taller than it is wide. A compact cutout leaves room for the pegs on either side. Trim away any corners that catch when the figure tilts.
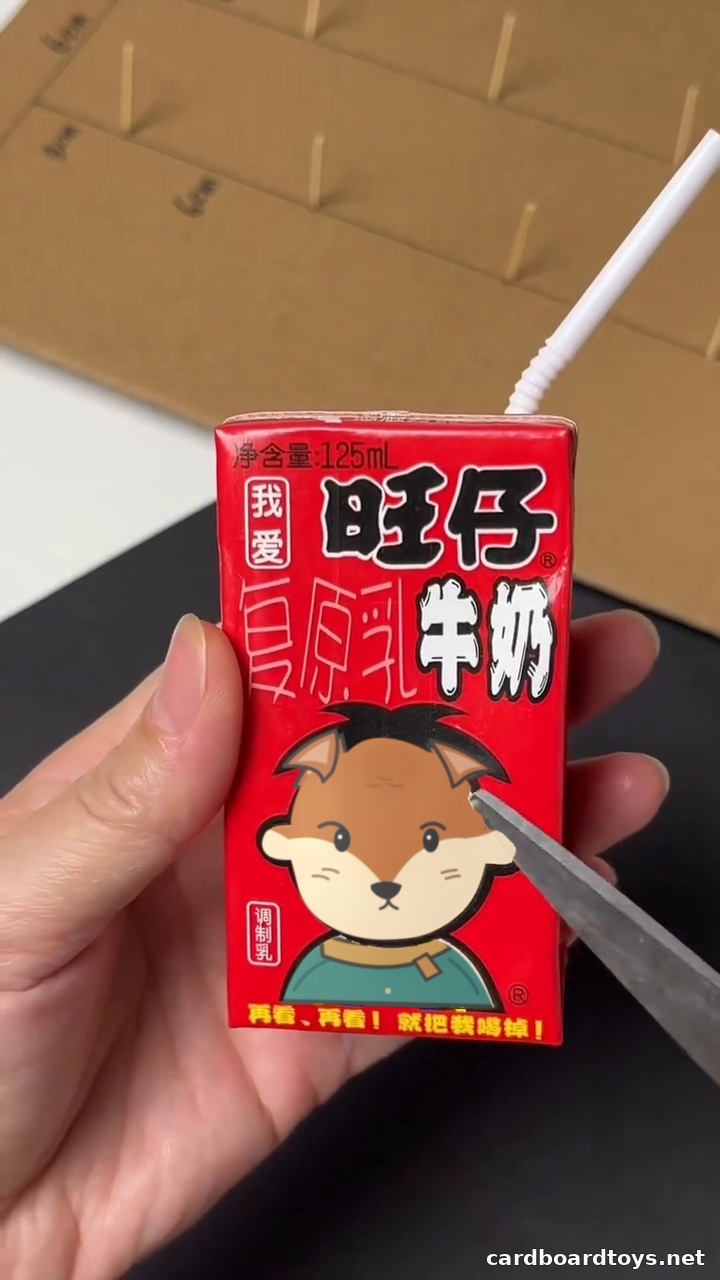
5. Attach the fox to the crossbar
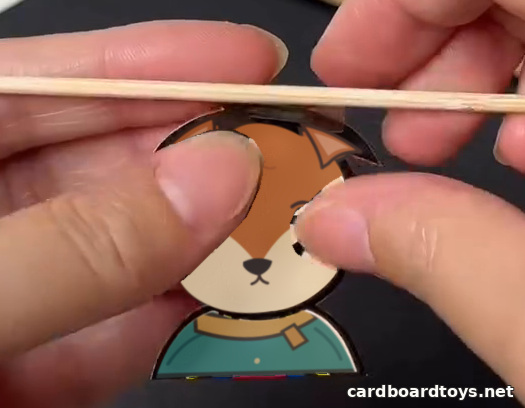
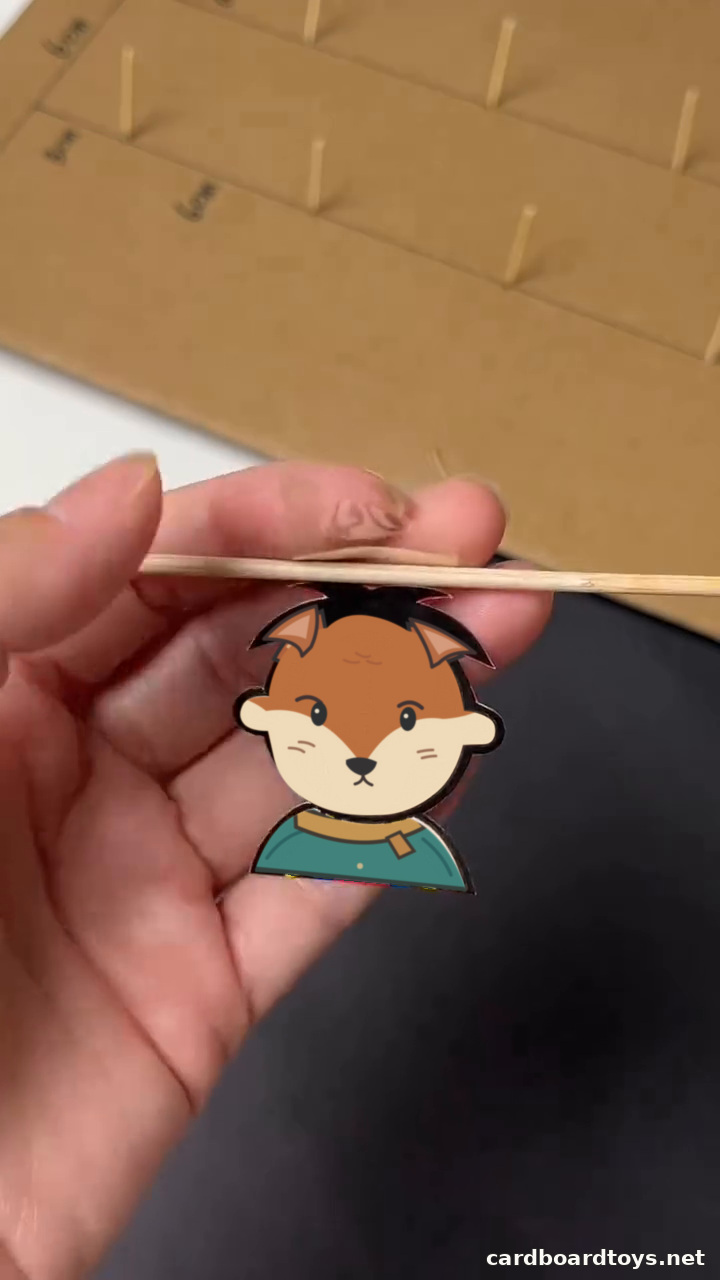
Lay the fox face down. Run the skewer across the back of its upper edge, with the center of the figure midway between the two ends of the stick. Fold a small strip of clear tape over the skewer. Press both ends of the tape flat onto the carton, one above the stick and one below. Turn the fox right side up and gently check that it moves with the skewer.
6. Size and trim the crossbar
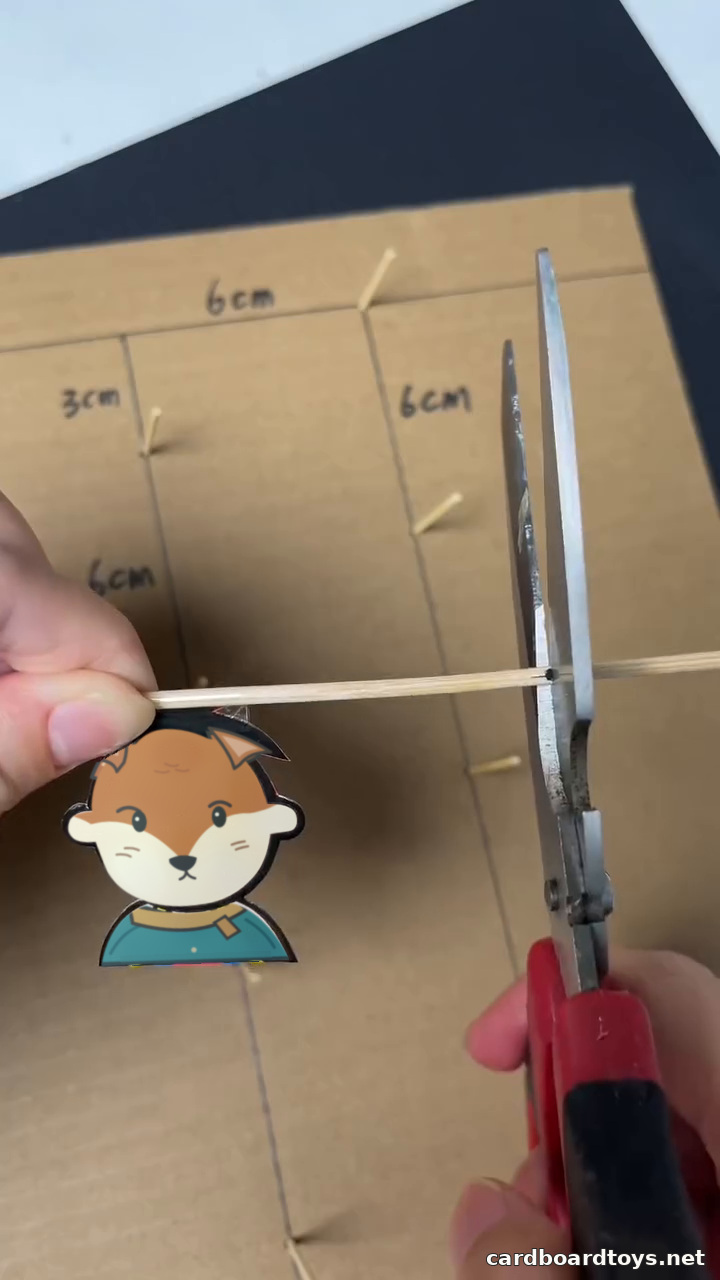
Lay the skewer across the top pair of staggered pegs. Mark both ends so they extend about 1 to 2 cm past the peg contact points. Aim for a finished stick about 4 inches (10 cm) long, with the cutout still centered. Have an adult trim off the excess with scissors or cutters suitable for thin bamboo and smooth both ends. Check again that the bar reaches both pegs when tilted.
7. Set up and release the fox
Stand the board on a firm table with the top leaning slightly back against a wall. Steady the board at its outer edge, clear of the pegs. Set the bar across the upper pegs and let go gently. One end catches on a peg while the other swings down to the opposite row. If the fox snags, check the tape, the peg depth and whether a cut edge rubs the board. Put the fox back at the top to run it again.
Watch the Fox Descend
Safety
An adult should pierce the board and cut the toothpicks and skewer. Use scissors or cutters suitable for the wood, keep fingers clear of the blades and collect the offcuts. Smooth exposed ends and make sure points are buried in the board. Check that the panel is stable and the pegs are secure before play. Keep the toy, loose pegs and offcuts away from children under three.