
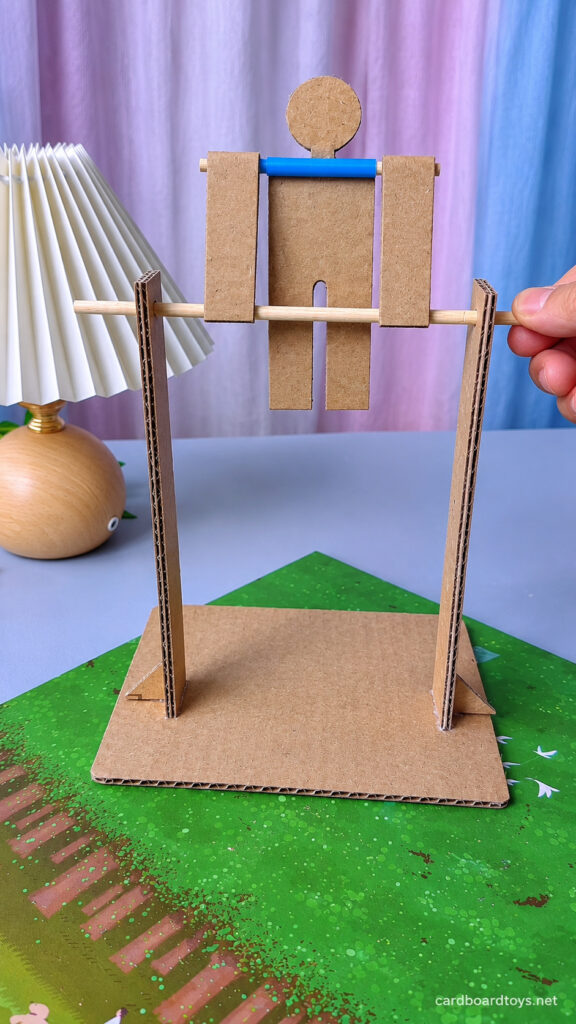
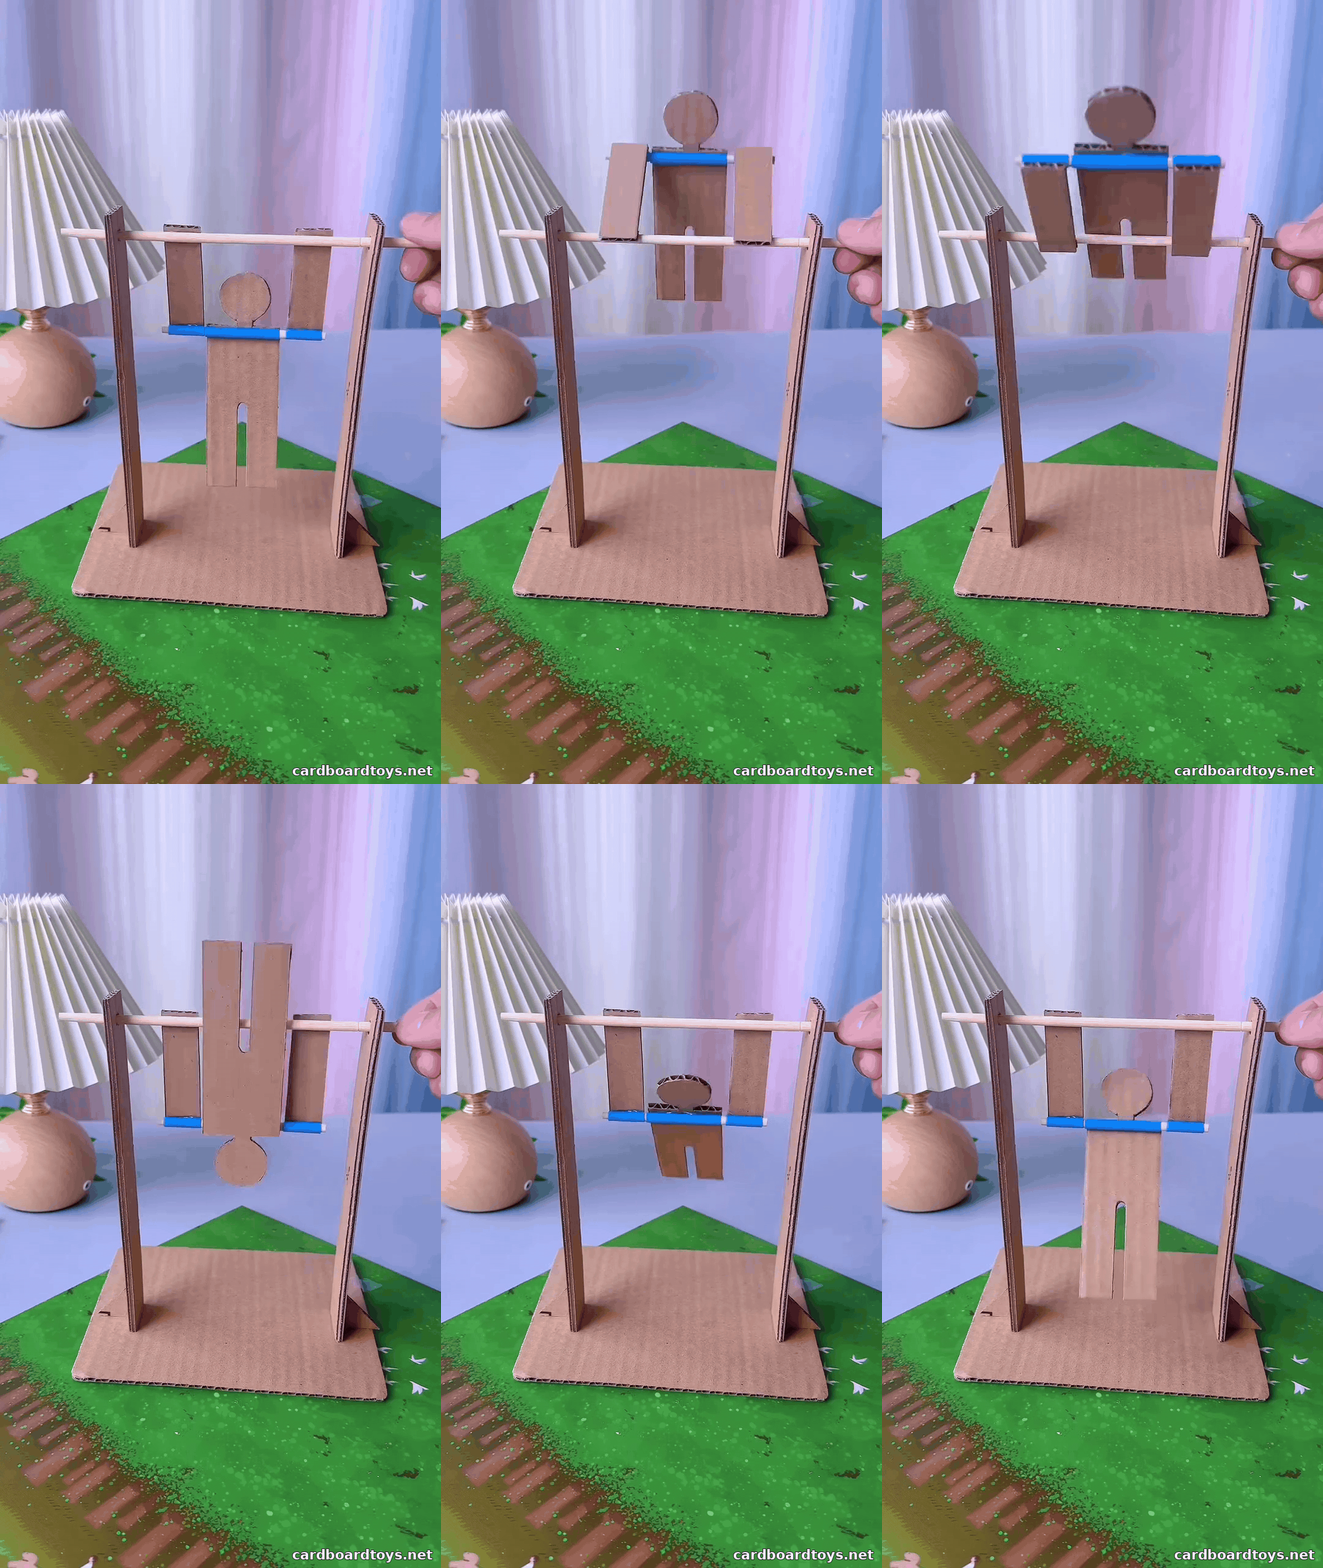
The moving shoulders make this little gymnast toy possible. Three straw sleeves sit in a straight row across the raised arms and chest, with a short wooden pin passing through them. A second, longer skewer carries both arm tips between two upright posts. Roll that upper bar and the arms travel with it, lifting the body into a flip. The torso can tip freely on its own shoulder pin, which lets it drop back into a hanging position. Narrow gaps between the straw pieces keep the joint turning, while triangular braces at the feet of the posts steady the cardboard stand.
Difficulty
Medium. The two holes in the stand need to line up, and the three straw openings must sit at the same height. Allow about 35 minutes of hands-on work, plus drying time for the glue.
Materials
- A clean corrugated cardboard box with enough flat board for a base about 16 × 14 cm, two 18 × 3 cm posts, two small triangular braces, and the three pieces of the gymnast.
- One straight paper drinking straw. Use about 8 cm in total for a 4 cm center sleeve and two 2 cm outer sleeves.
- Two slender bamboo skewers that slide easily inside the straw. Cut a 19 cm high bar and a 9 cm shoulder pin.
- About 5 mL of white PVA craft glue suitable for cardboard and wood.
Tools
- Pencil and ruler
- Scissors and a cutting mat
- Awl and a scrap of wood to support the cardboard
- Small cutters for the bamboo and fine sandpaper for the ends
2026 Prices
- Reused cardboard A$0.00
- Paper straw A$0.01
- Bamboo skewers A$0.04
- White PVA craft glue A$0.04
Total A$0.09
Assembling the Gymnast and Its Rotating Frame
1. Cut the base and match the post holes
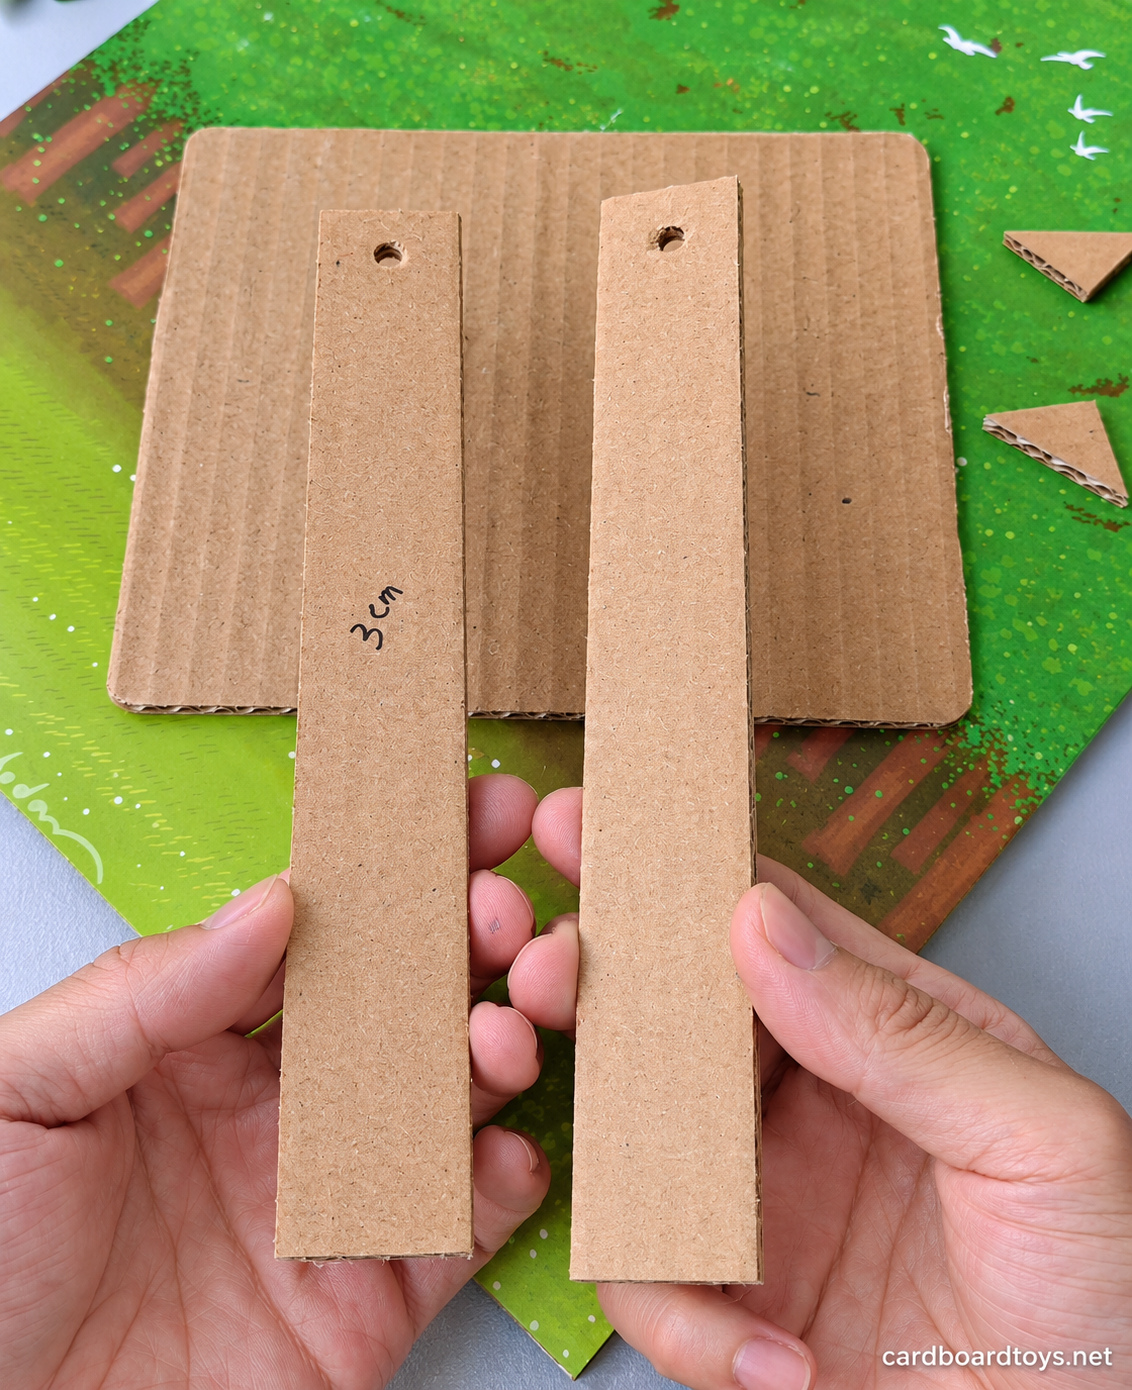
Cut a flat rectangle for the base and two strips of equal length for the posts. For the sizes listed above, run the corrugations along the length of each post. Stack the strips with their short ends flush. Mark the center of the top strip about 1 cm below the end. Rest both on scrap wood and have an adult pierce them together. Slip the long skewer through each hole. It should turn with light finger pressure and sit at the same height in both pieces.
2. Stand the posts and brace their outer faces
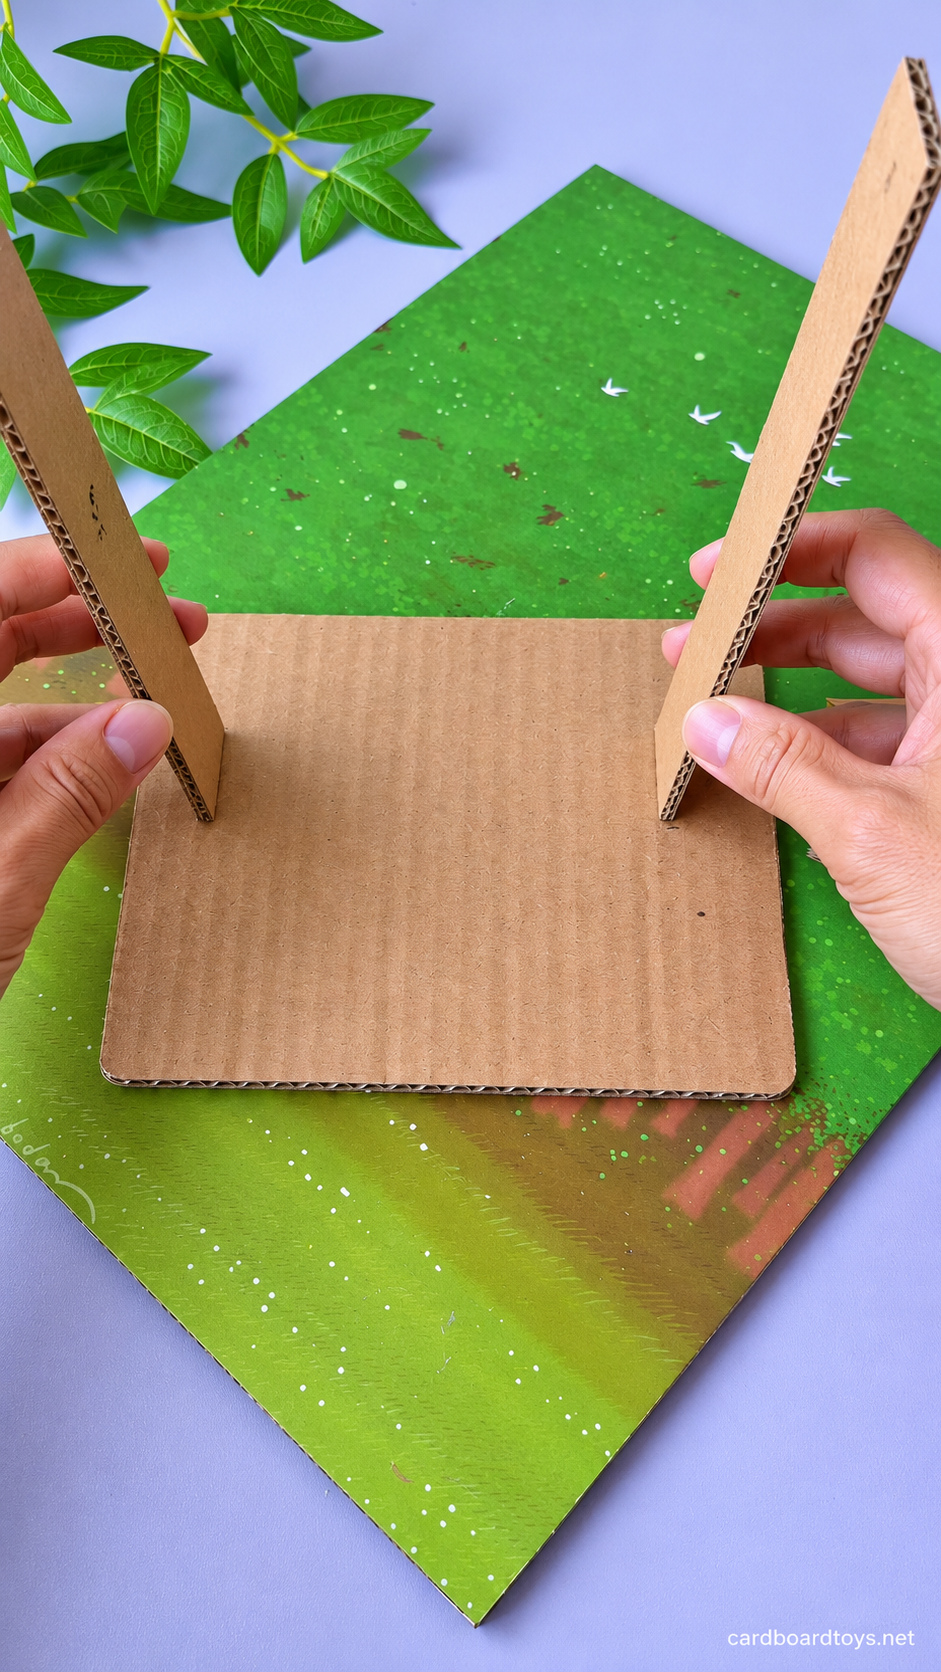
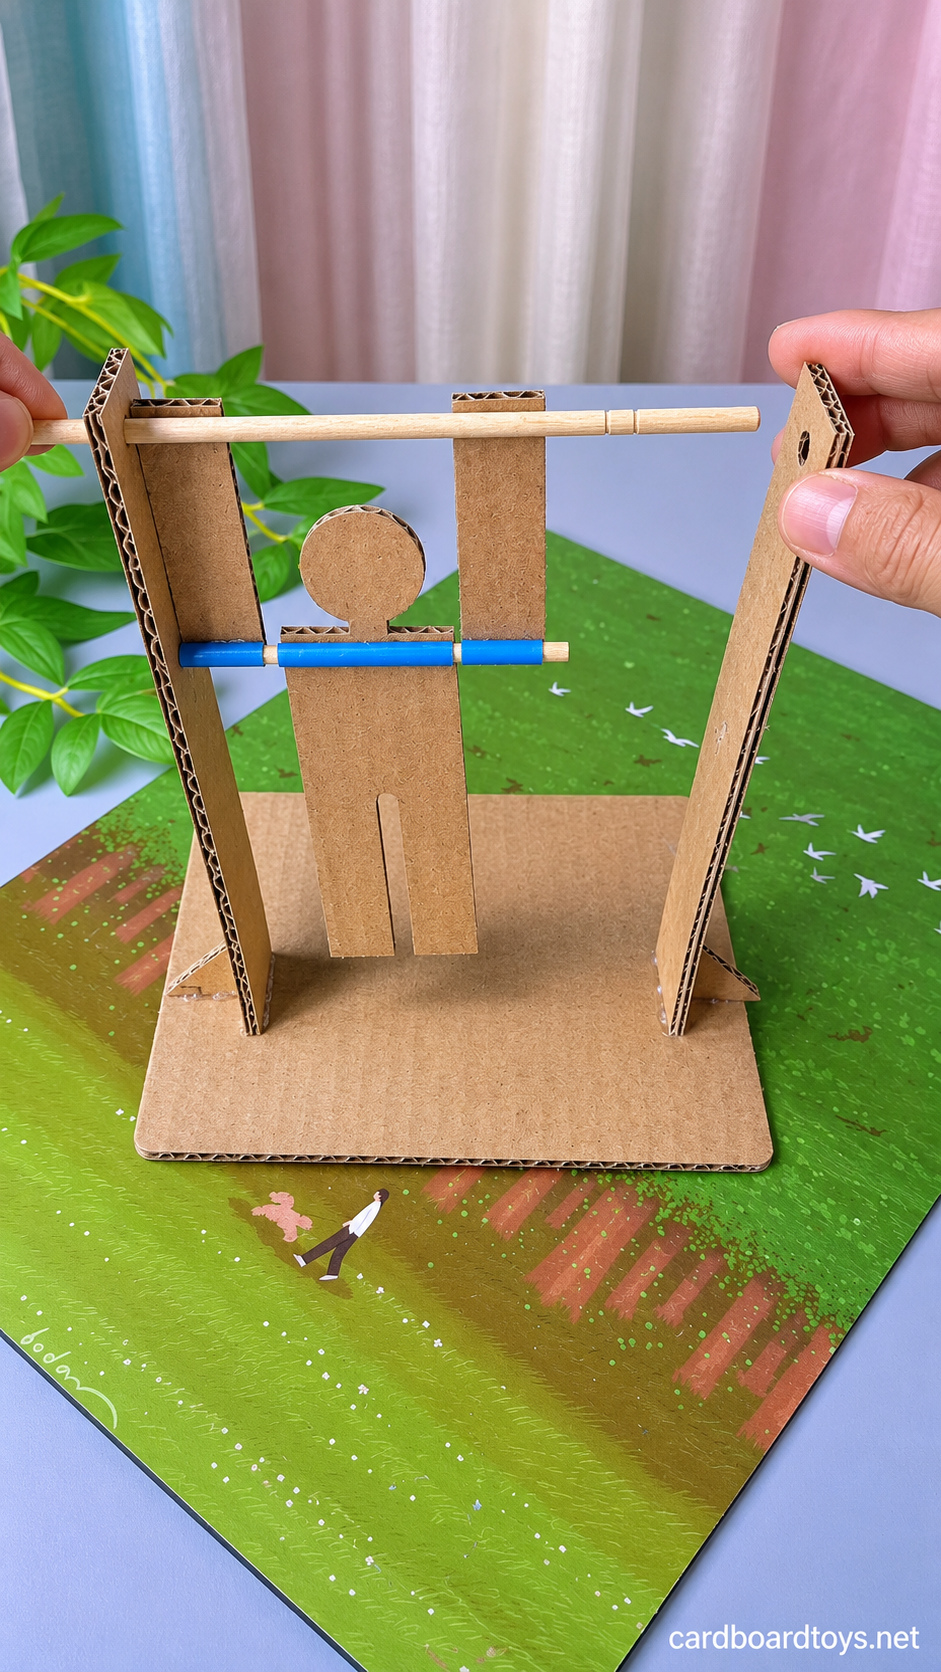
Mark two positions on the base, about 2 cm in from opposite edges and halfway from front to back. Put a little glue on the bottom edge of each post and stand them on the marks with their broad faces facing each other. Hold them square while the glue takes hold. Slide the long skewer through both holes to check the line, then withdraw it.
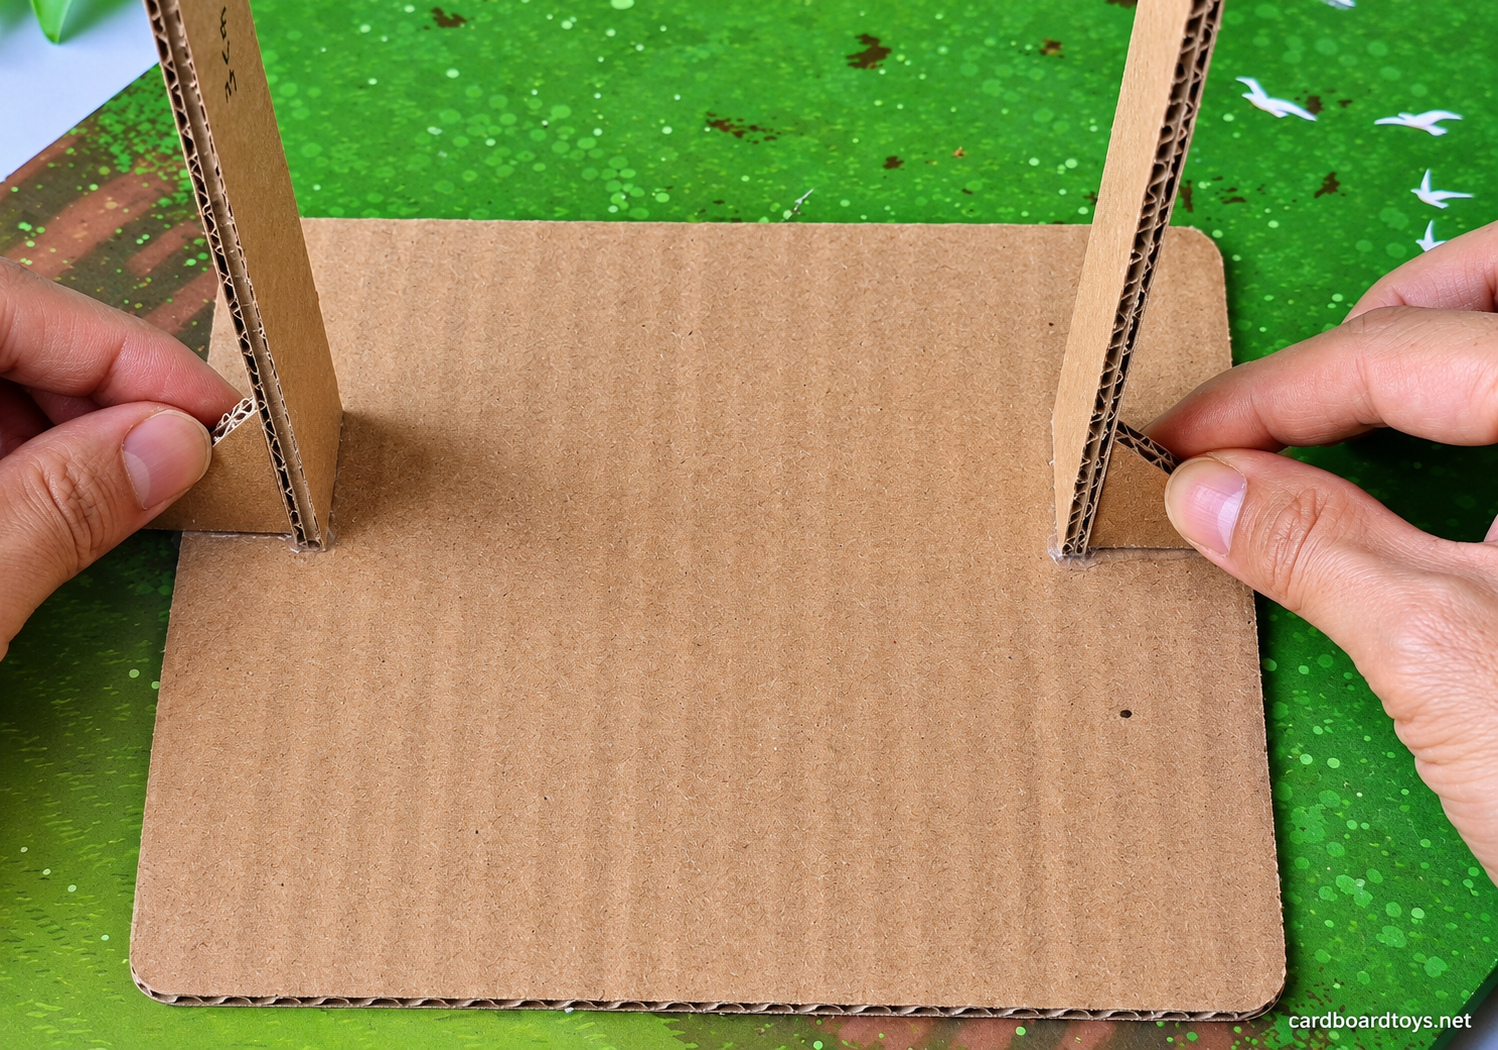
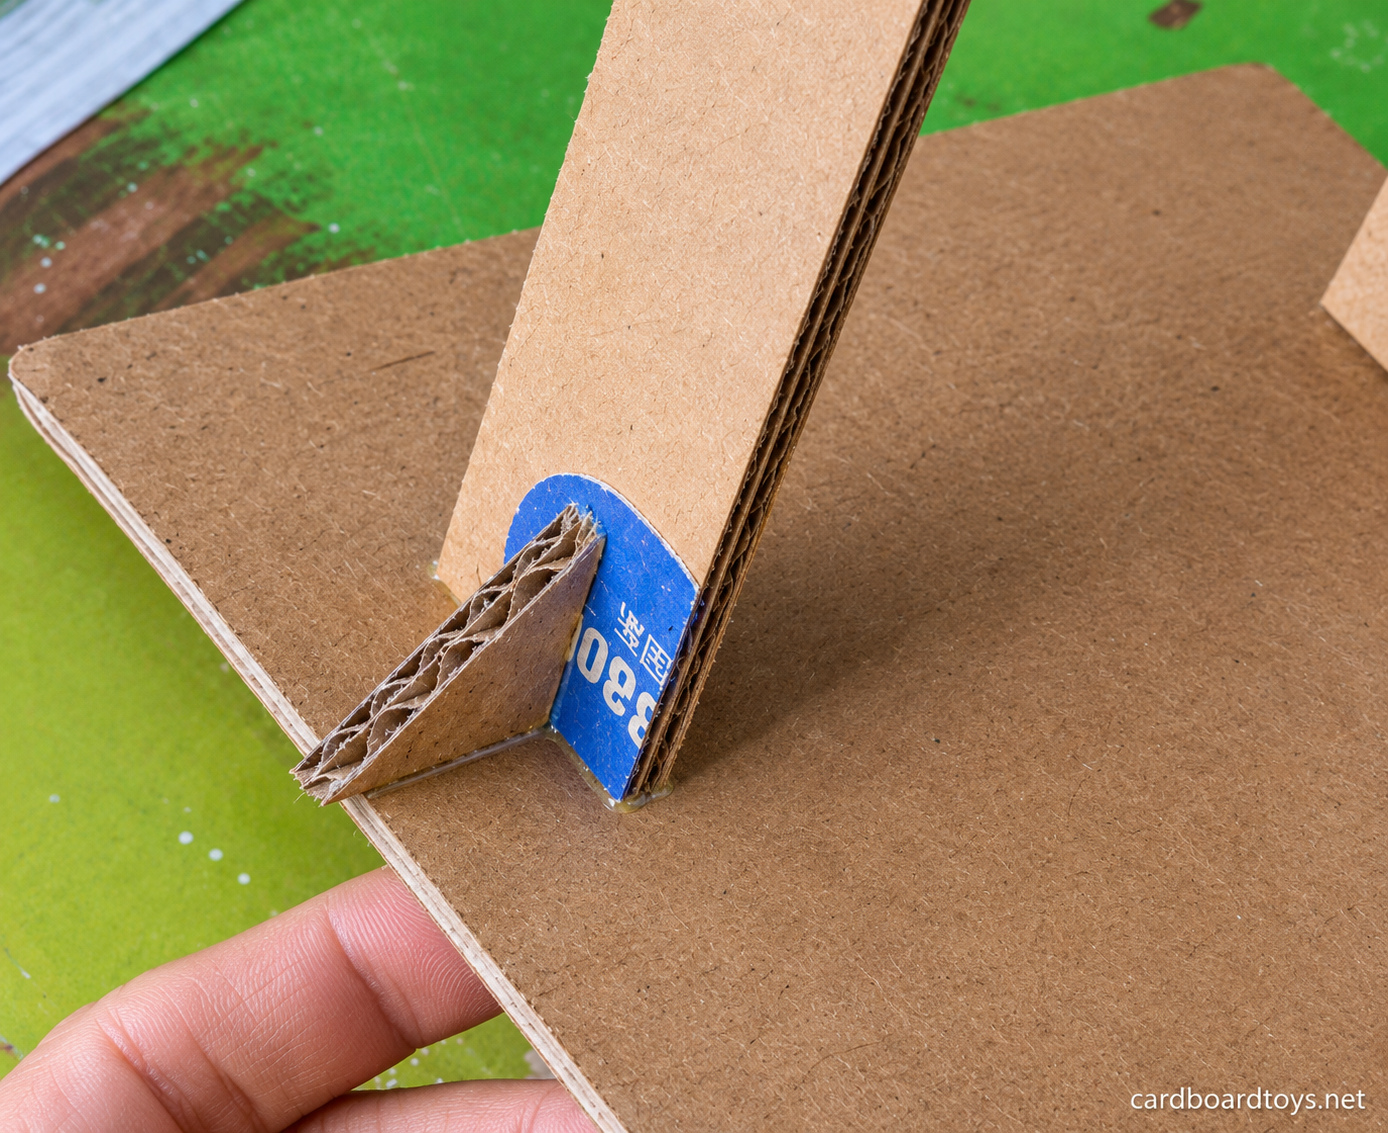
Cut two right triangles with short sides about 2 cm long. Put glue on both short edges of each triangle. Press one edge onto the base and the other against the outside of the post. Hold the joints still for the time given on the glue label and set the stand aside to dry.
3. Cut the body and two separate arms
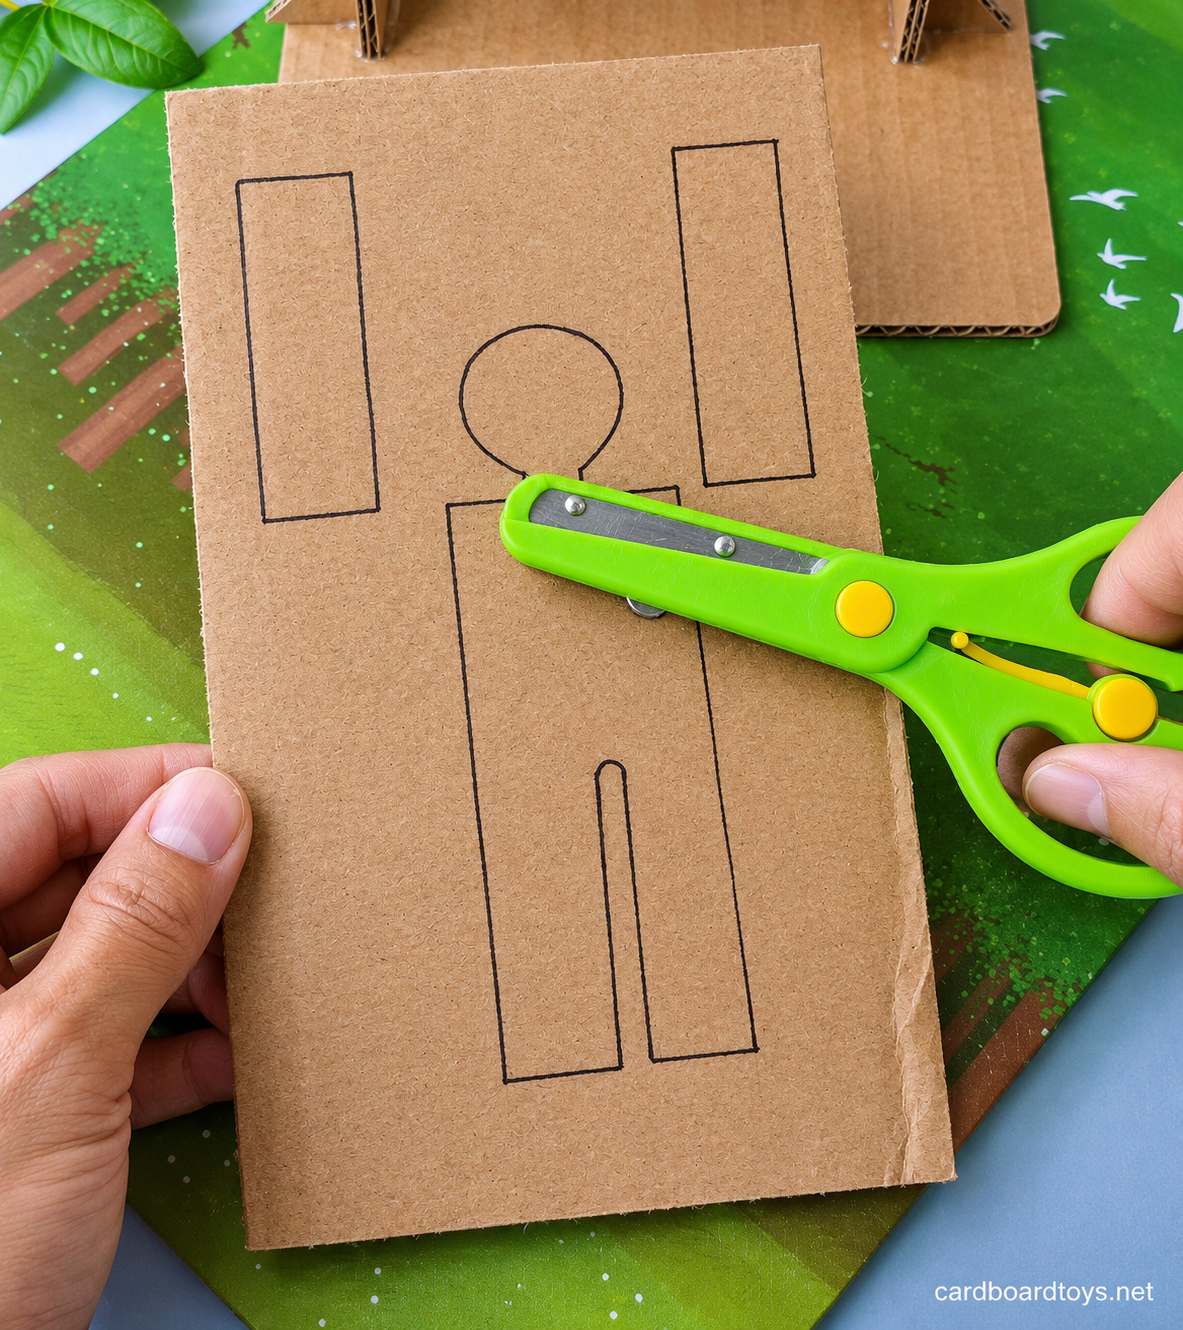
Draw a torso about 4 cm wide with a round head joined by a short neck. Allow about 8 cm from shoulder to foot. Draw a narrow slot upward from the bottom edge to divide the legs, keeping them joined at the hips. Beside the body, draw two arms about 2 cm wide and 5 to 6 cm long. Cut around the body and head as a single piece, open the slot between the legs, then cut out the arms. Lay the arms beside the head with their lower ends level with the shoulders.
4. Glue the three straw sleeves in a straight line
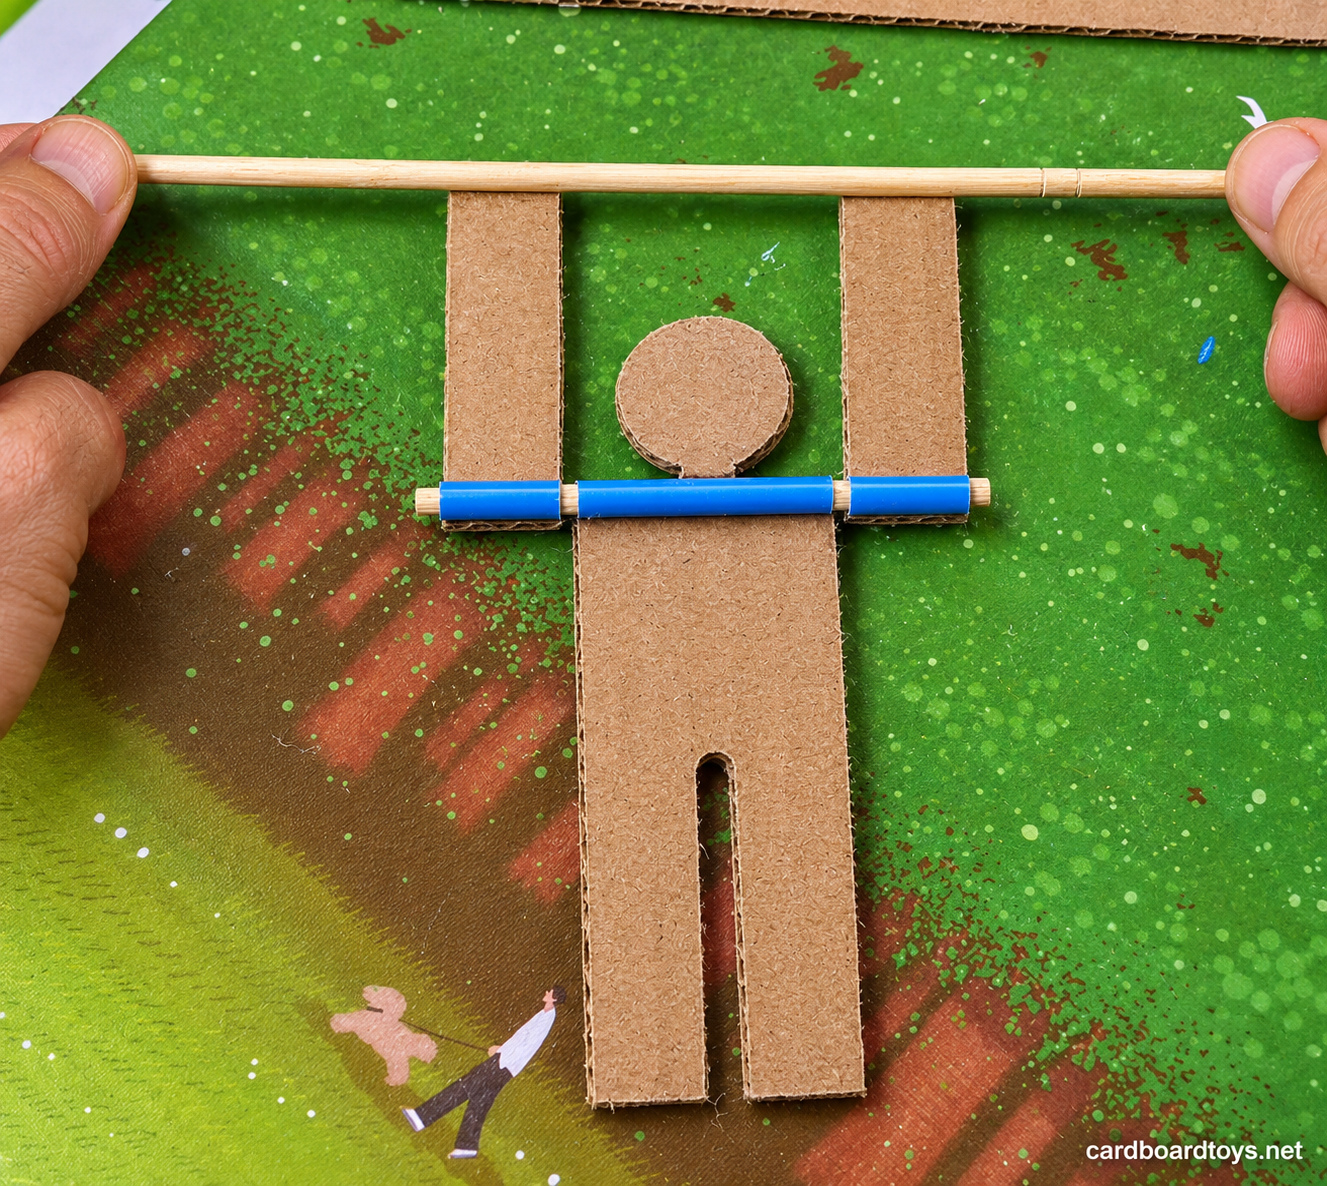
Cut the long sleeve to the width of the chest and each short sleeve to the width of an arm. Keep the straw round while cutting and check that the pin slides through each opening. Lay the long blue section across the chest just below the neck. Attach it with a thin line of glue on the cardboard.
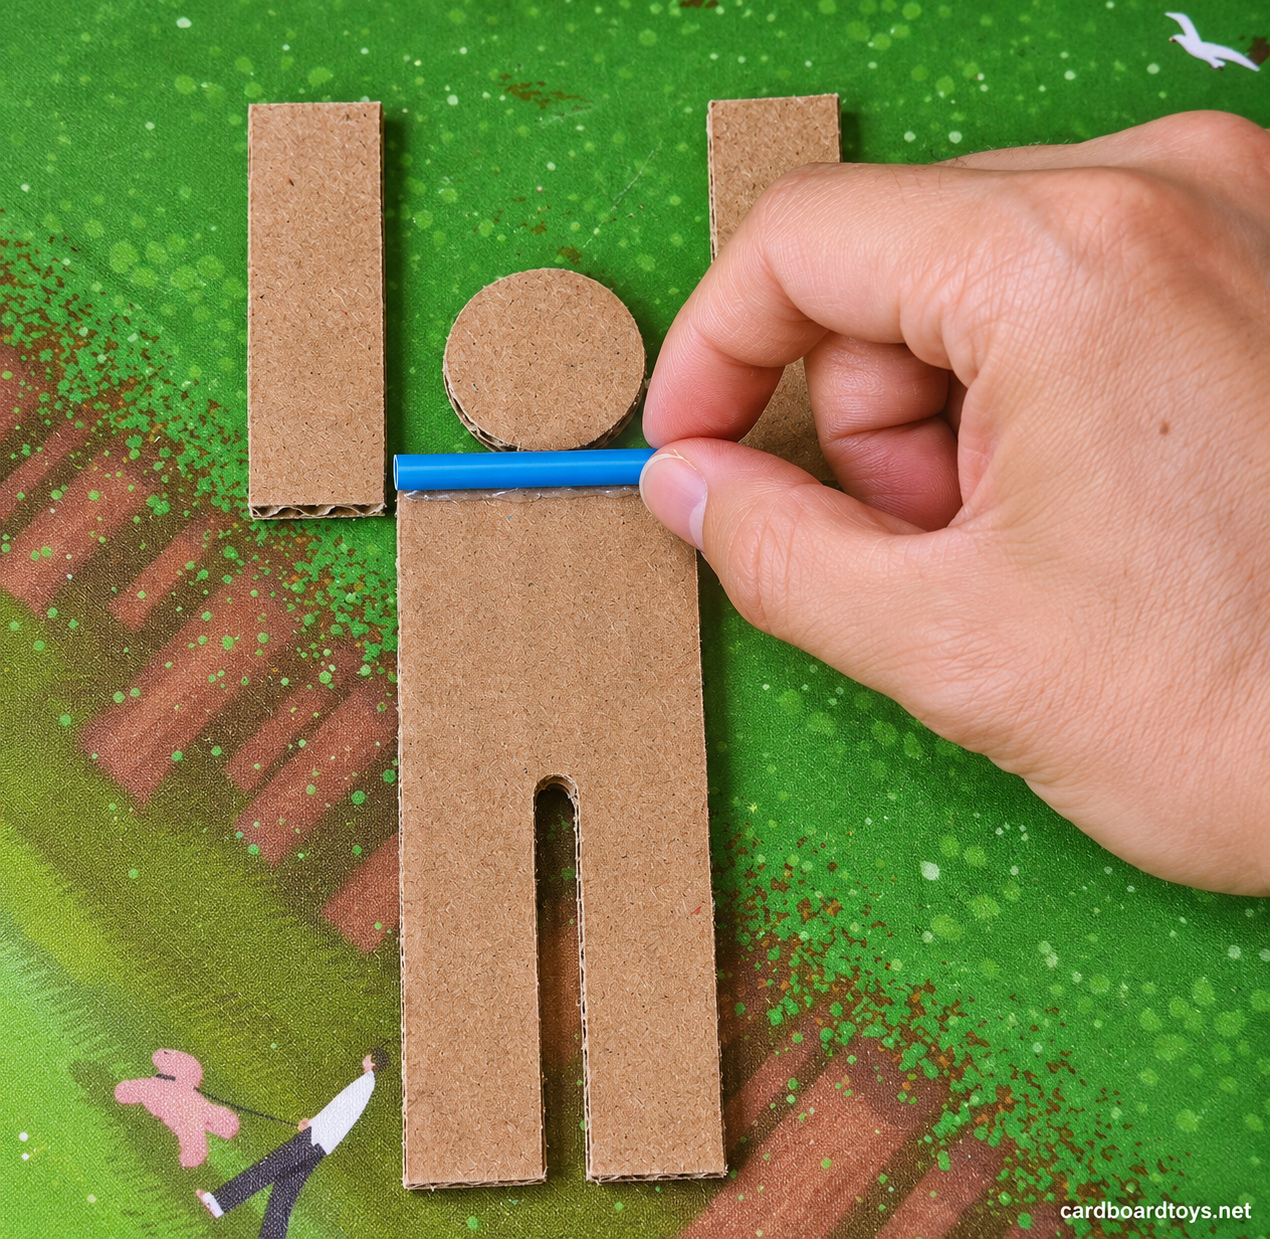
Glue one short sleeve across the lower end of each raised arm. Leave about 1 mm of space between each short sleeve and the center one. Sight through the three openings while the glue is still workable and adjust them into one straight line. Keep glue away from the openings, then let the joints dry.
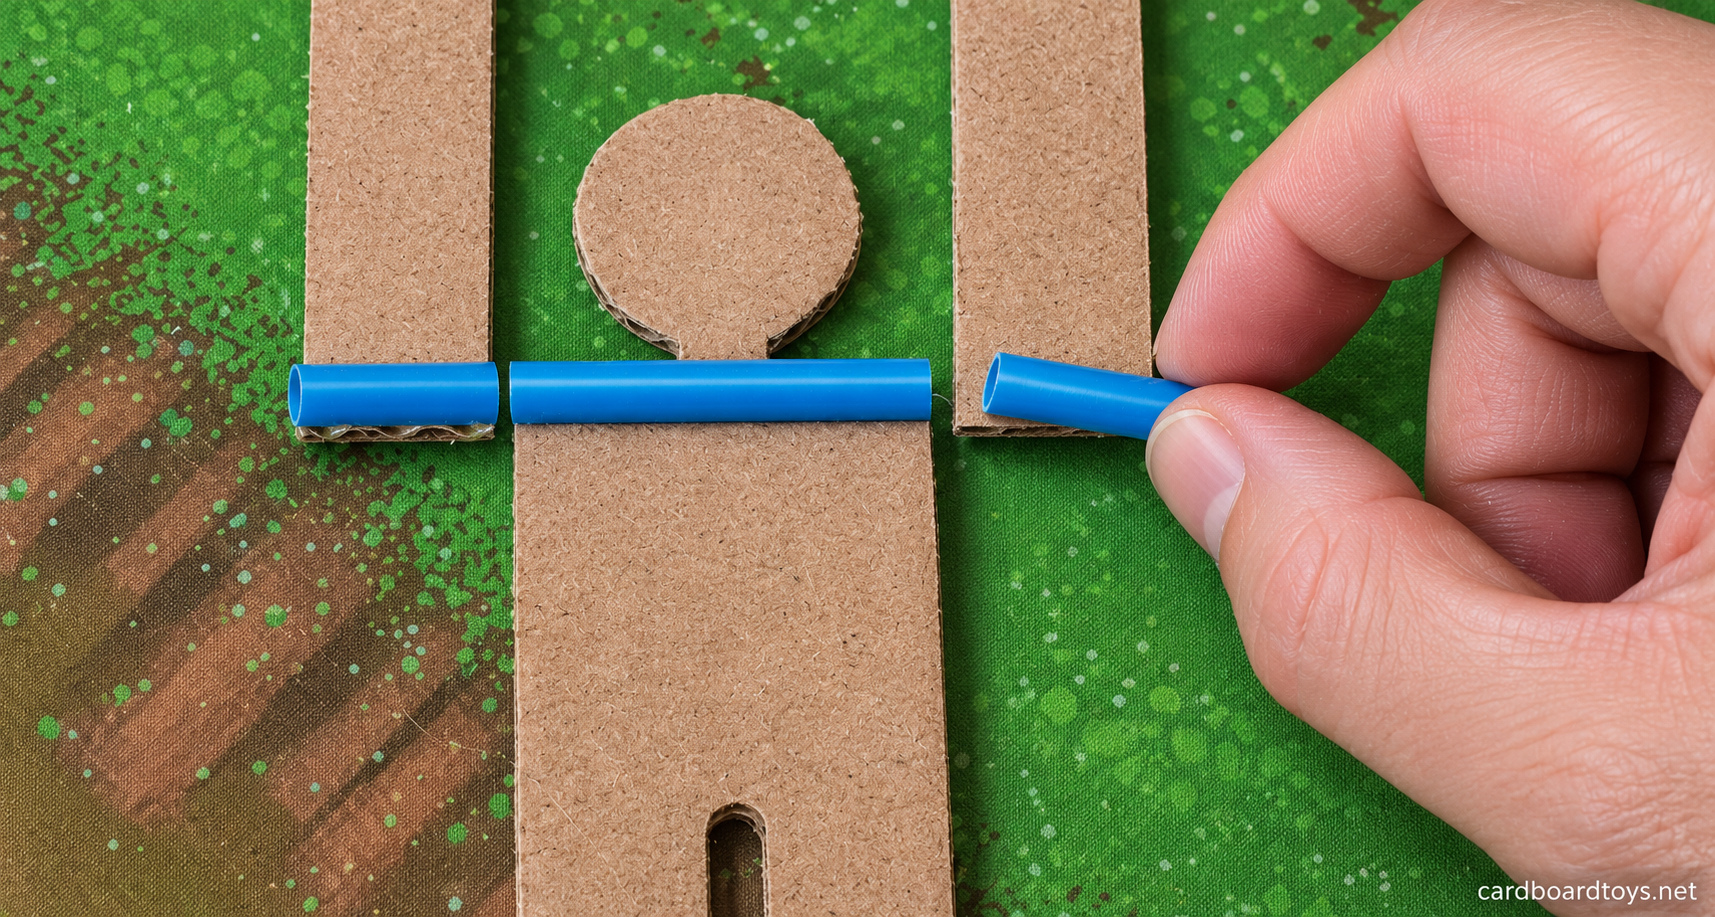
5. Thread the shoulder pin and check the swing
Have an adult trim and smooth the short pin. Feed it in from the right, through the right arm sleeve, across the chest, and out through the left arm sleeve. Center it so a few millimeters show at each end. Hold the arms and tip the feet forward. The body should swing on the pin under its own weight.
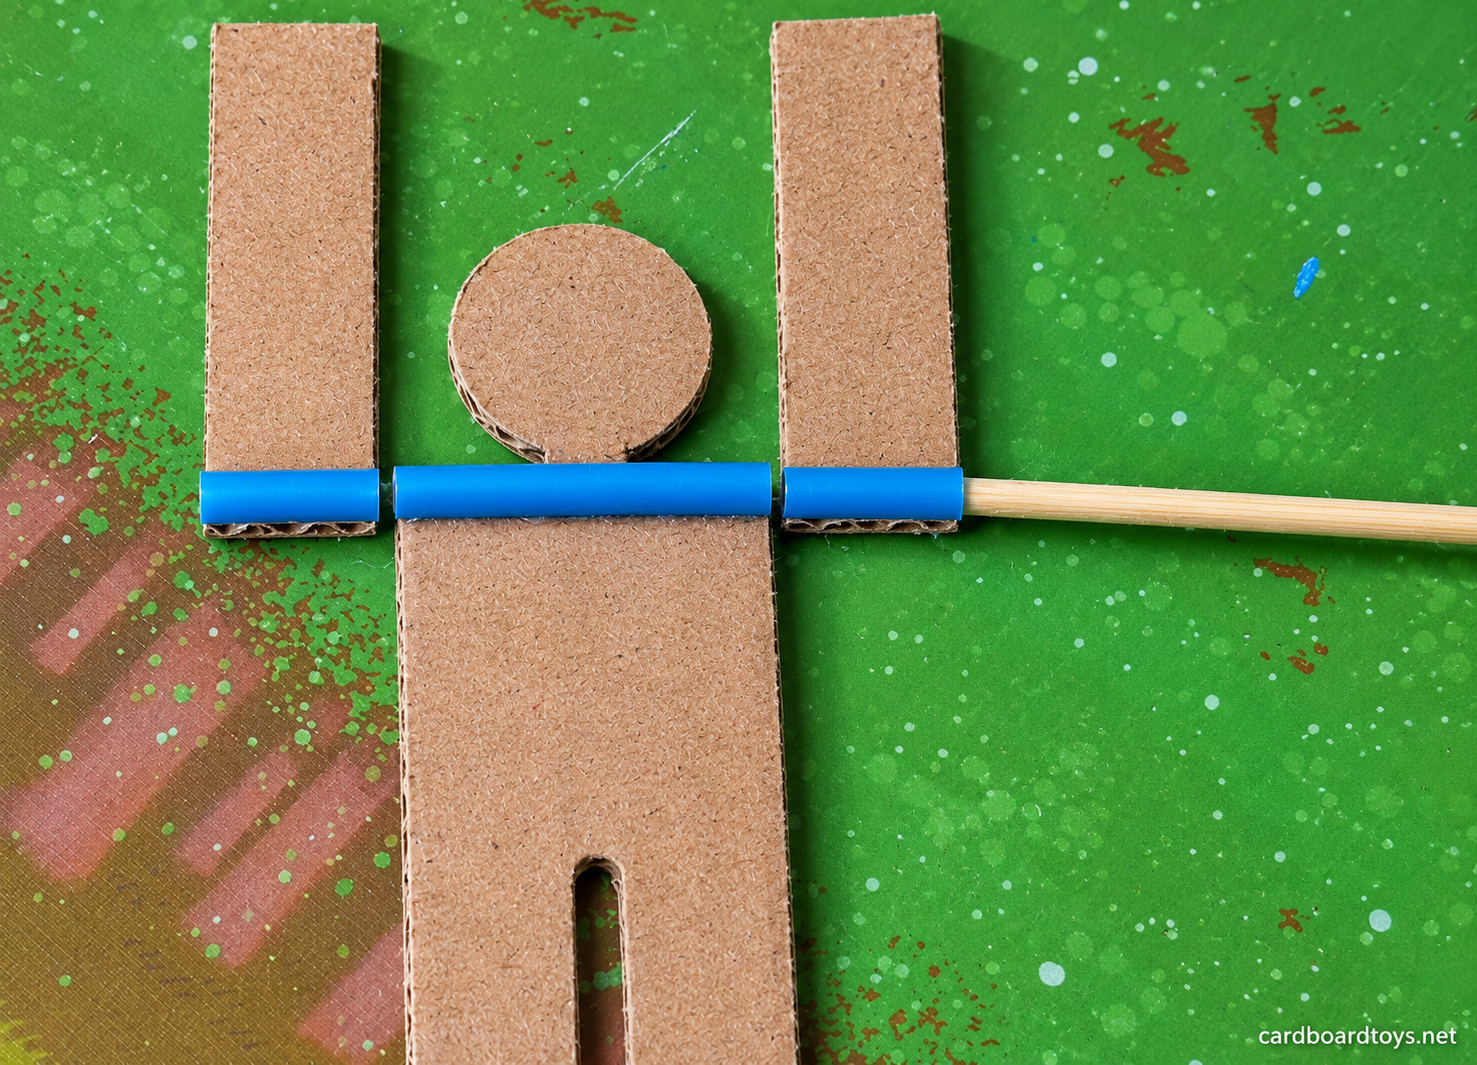
If the body sticks, look for a straw end rubbing the neighboring sleeve or a drop of glue at an opening. Once it swings freely, secure the pin with a tiny dab of glue where it emerges from one outer sleeve. Keep the two gaps and the center sleeve clear, and let the dab dry.
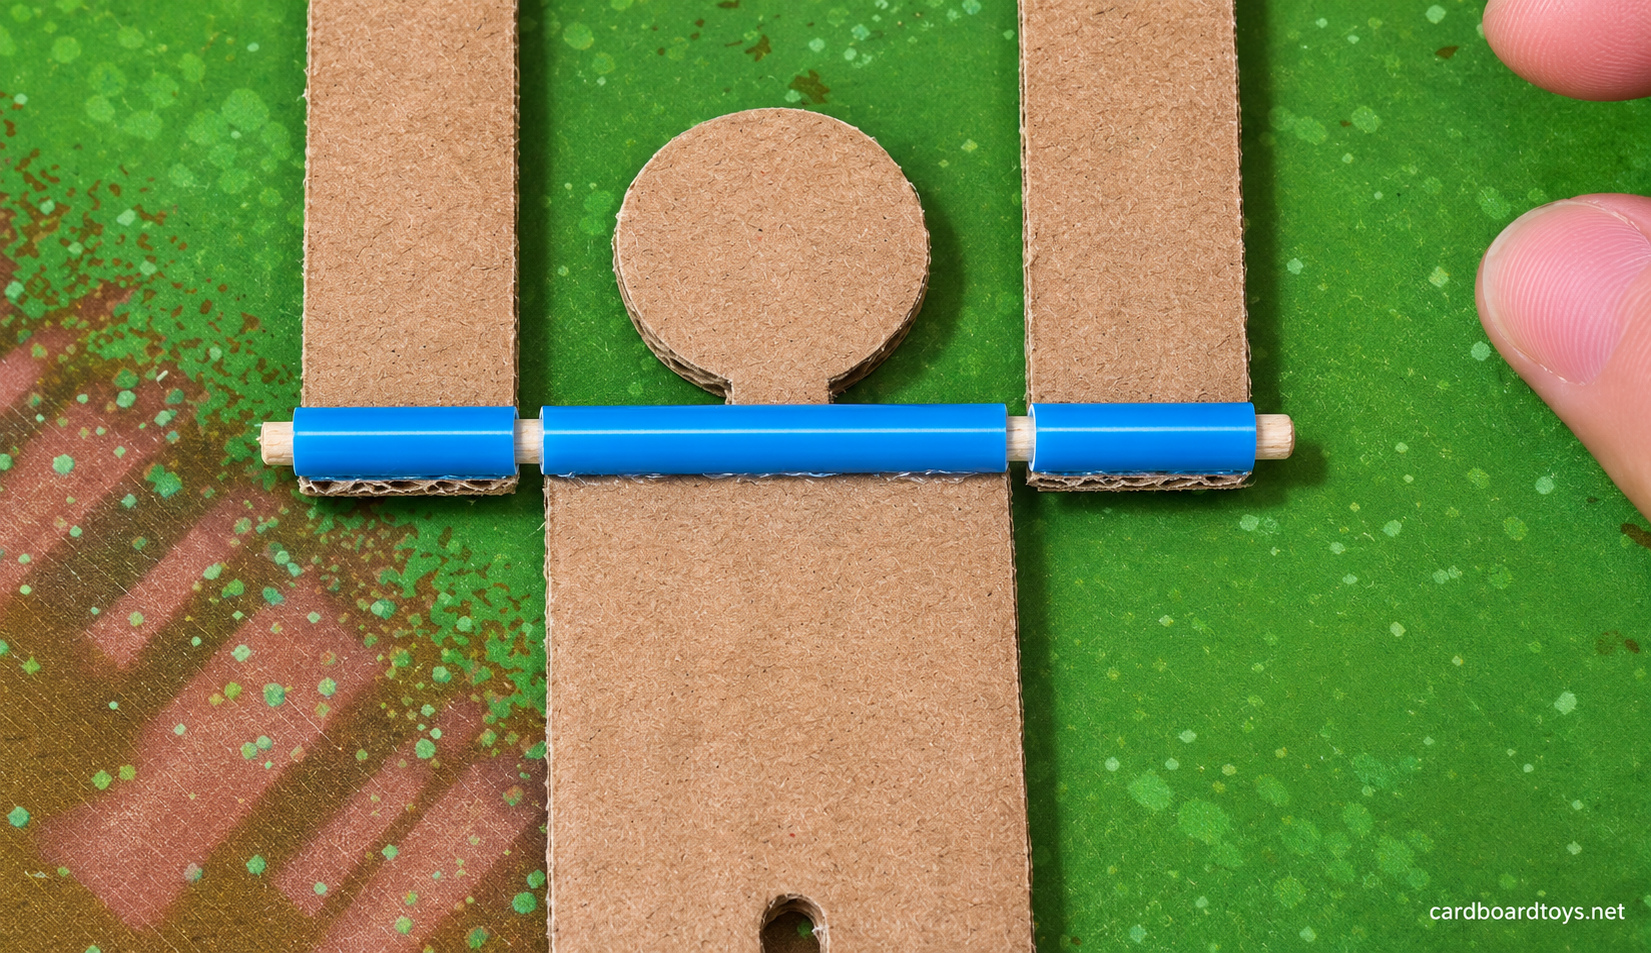
6. Fix the high bar across the arm tips
With the gymnast flat and the arms pointing upward, lay the long skewer across the faces of both free arm tips. The skewer should run parallel to the shoulder pin. Center the arms along it, mark the two contact points, and put a small bead of glue at each mark. Press the wood onto both arm tips and leave the figure flat until the joints have dried. Lift the skewer gently. Both arms should rise together while the body hangs from its own pin.
7. Fit the high bar between the posts
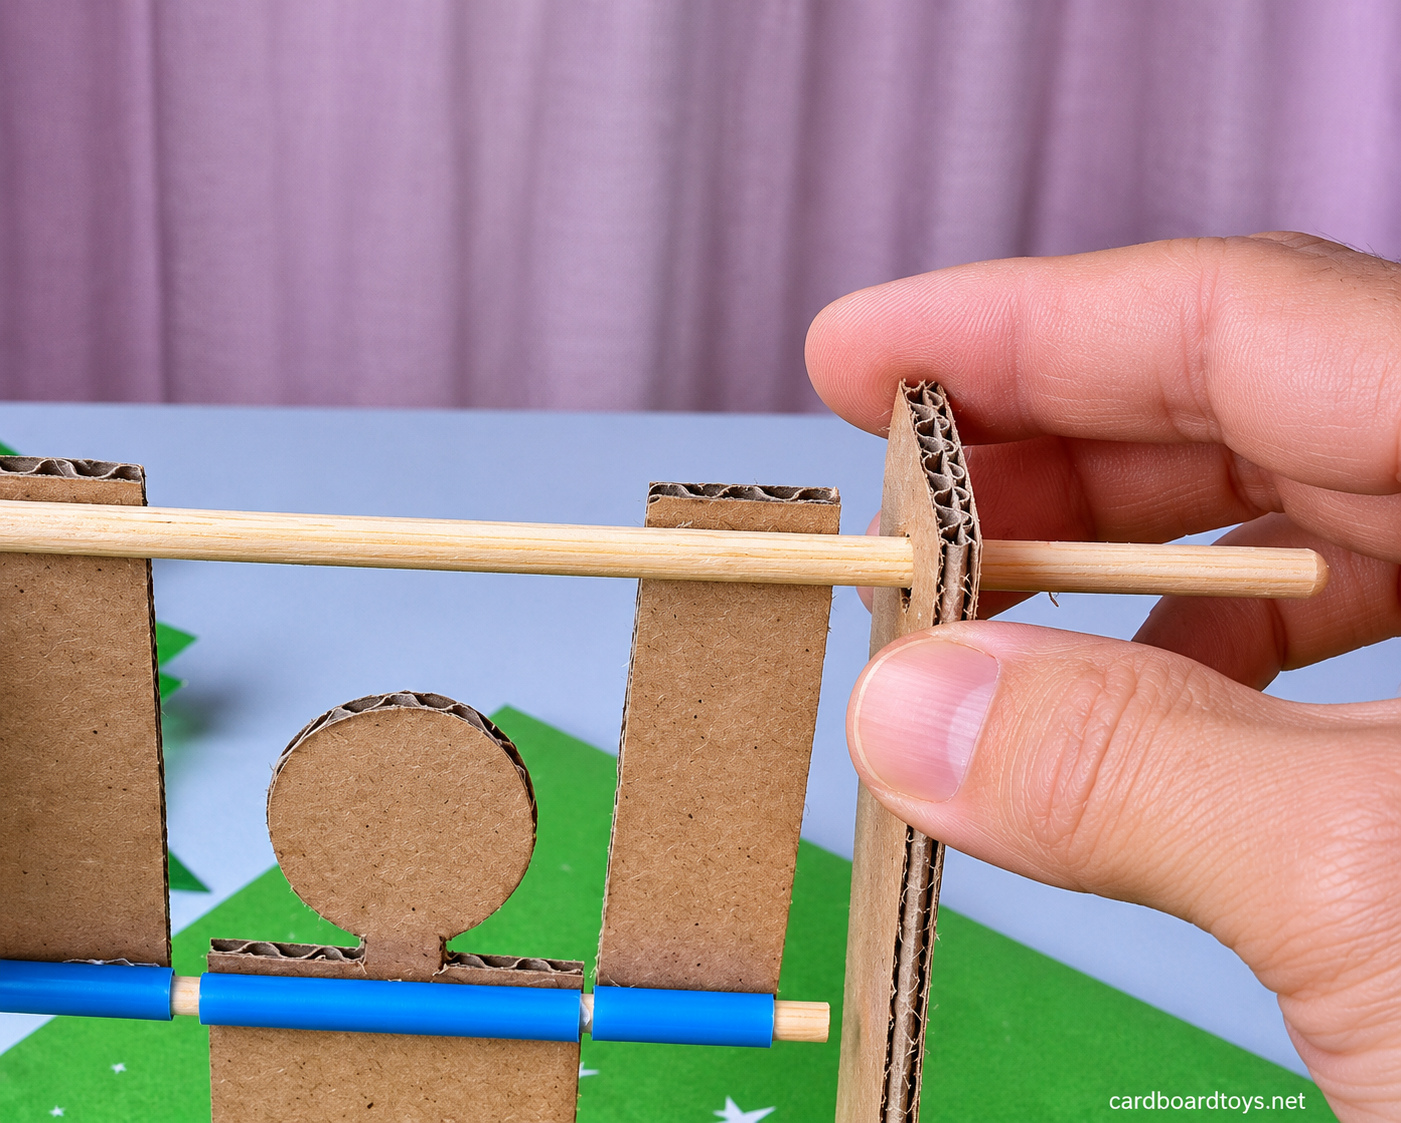
Hold the gymnast upright between the dry posts. Feed the left end of the long skewer through the left hole far enough to bring the opposite tip inside the stand. Align that tip with the right hole, then slide the skewer back through. Center the gymnast and leave enough wood outside the right post to roll between two fingers.
8. Roll the bar and test the landing
Put the stand on a level table and roll the exposed right end between thumb and finger. Start with a slow turn to check that the arms, feet, and shoulder pin clear the posts and base. A brisk, smooth roll carries the shoulders over the high bar. The body turns through its hinge and swings back to a hanging position. If an arm brushes a post, slide the skewer sideways to center the figure. If the arms rise but the body stays rigid, check the two gaps at the shoulders.
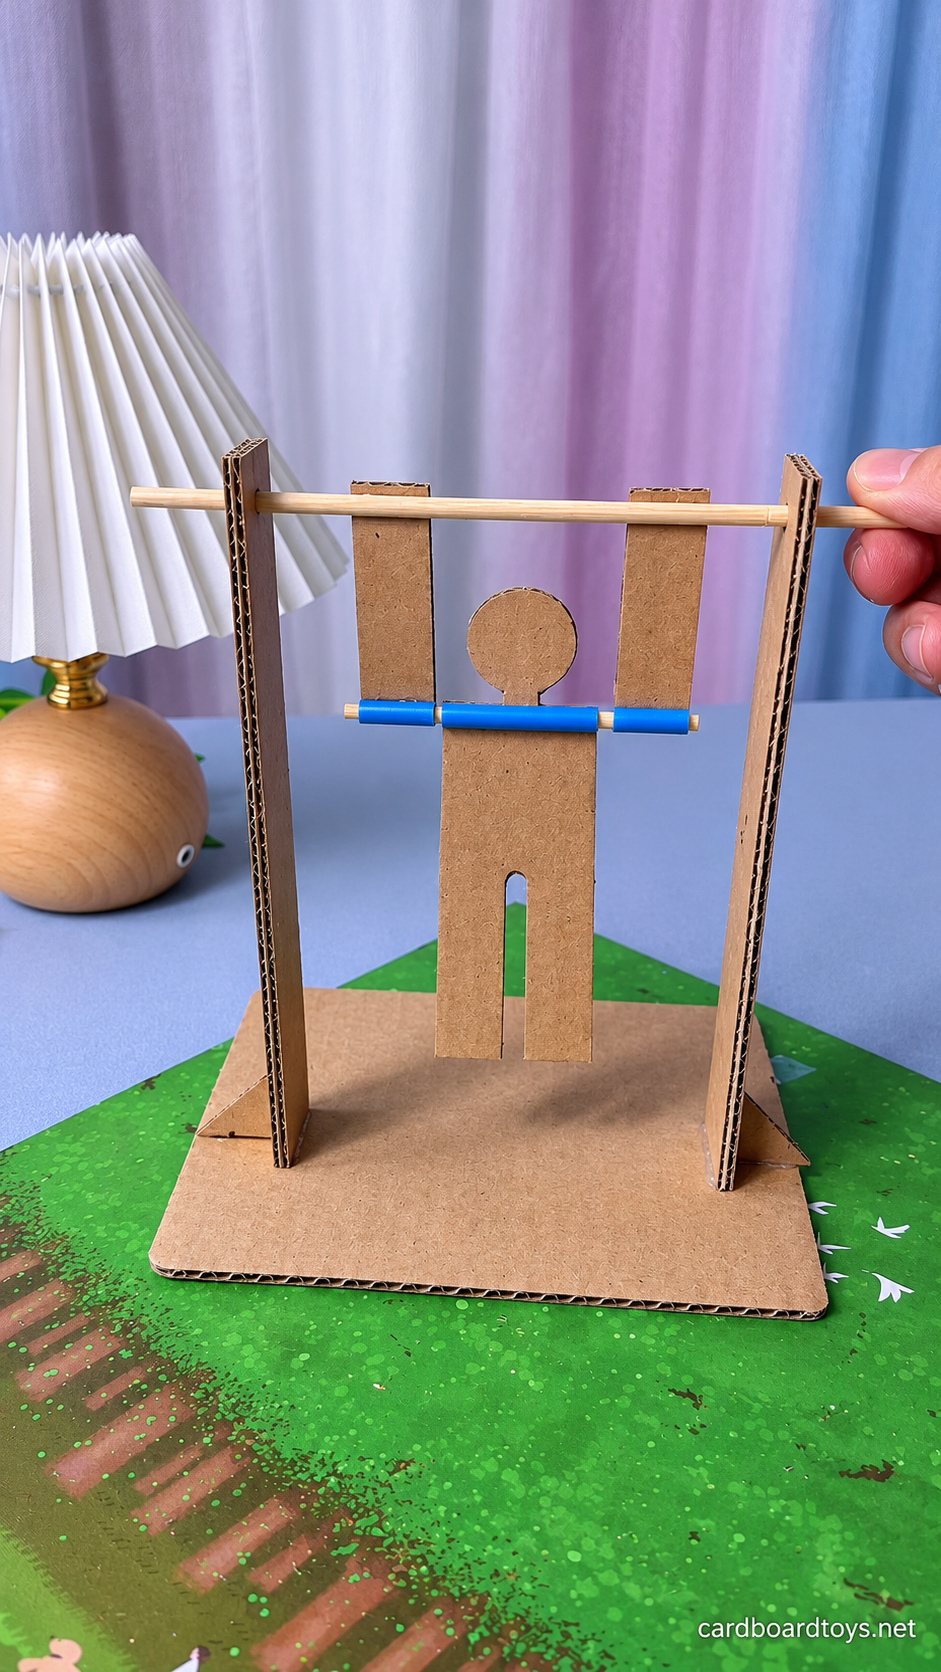
A Finger Roll Starts the Flip
Safety
An adult should pierce the post holes on a backing board, cut the skewers, and sand every exposed end smooth before assembly. Keep fingers clear of the awl and cutters. Follow the glue label for drying time and check that the two braces, arm attachments, and shoulder pin are secure before play. Keep the toy, loose pin, and small offcuts away from children under three. Supervise play and put the toy aside if a joint loosens or a skewer develops a splinter.